

Jump to Section:
Detailed Attendance Report with Hourly Totals (New)
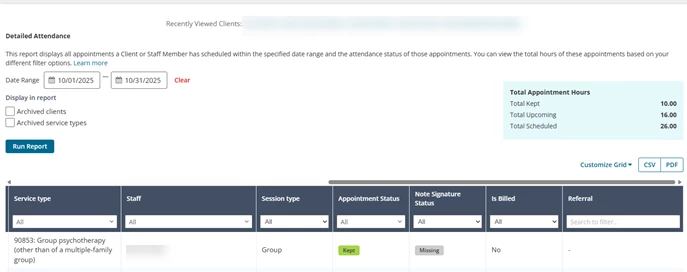
The Detailed Attendance Report has been enhanced to include more filtering options and a total hours section to give you more insight into appointments. This Report displays all Client Appointments (and their Attendance Status) a Client or Staff Member has scheduled within the specified date range. This Report can be filtered by the clicking the column headers.
This Report can help with:
- Staff who want to see how many total hours of appointments they have within a certain date range also broken up by Kept vs. Upcoming appointments to determine if they are meeting their hourly goals
- Staff who want to see detailed information about their Clients’ appointments
- Admin who want to see if Appointments have been Invoiced or Not (sort by Is Billed)
NOTE: This report includes Archived Clients and Inactive Staff if they also have appointments scheduled within the filtered results.
Set Report Parameters (New)
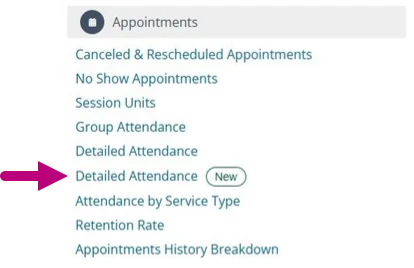
- Click Reports in the side navigation bar and click Detailed Attendance Report with the New tag under the Appointments section.
- Set Date Range filter. It will default to the current start and end date of the current month.
- Optional: Use the checkboxes to display Archived Clients and Archived Service Types.
- Click Run Report.
NOTE: Change the number of appointments shown per page (25, 50, 100, 200) by clicking the desired number of items per page at the bottom of the report.
- You can filter down results further by searching, single selecting, or multi selecting items from each column.
Read the Report (New)
- Search the Report for a specific name or word within certain columns. i.e. Client Name, Staff name, Service type, Status, etc.
- From left to right if you have all columns selected from the Customize Grid icon, you can see:
- Client name - Client the appointment was scheduled for. .
NOTE: If the client has been archived it will say (Archived) at the end of the client’s name.
- Client ID - Will show if an ID is listed.
- Primary Payer: Will show if client has active Primary Payer
- Secondary Payer: Will show if client has active Secondary Payer
- Location/Room - Where the appointment took place.
NOTE: If the location has been archived it will say (Archived) at the end of the name.
- Date/Time - When the appointment took place.
NOTE: Date/Time display in your preferred time zone.
- Duration - Duration is shown in minutes and for all appointment statuses.
NOTE: The totals from the duration column are added to the Totals table above the report based on your filtering results.
- Service Type(s) - Service type(s) associated with the appointment.
- Staff - Staff assigned to the appointment.
NOTE: If the staff has been made Inactive it will say (Inactive) after the name.
- Session Type - Session Type will be Individual or Group appointment.
- Appointment Status - Status will be; Upcoming, Kept, Canceled, No Show, Late Cancel, or Rescheduled.
NOTE: If you only want the Totals box above the report to show hours for appointments in certain statuses, make sure to only check those statuses in the column filter.
- Note Signature Status: Will show as “Signed” if attached progress note has a staff signature. Will show as “Missing” if no attached progress note or attached progress note is missing a staff signature.
- Is Billed - Status will be Billed or Not Billed to indicate whether the appointment has been Invoiced or not.
- Referral - Source for the client if they have a referral source listed under the Client Details page.
- Number of Units for the appointment.
NOTE: If there is more than one service type listed in the appointment then the Units column will show the total number of units for ALL service types in the appointment.

- Client name - Client the appointment was scheduled for. .
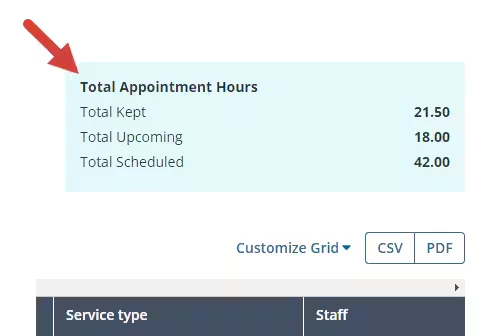
- Total Appointment Hours - Total hours for appointments that have either No Service types or Service types.
- Total Kept - Total hours of appointments that have either No Service type or Service types attached with a status of Kept.
- Total Upcoming - Total hours of appointments that have either No Service types or Service types attached with a status of Upcoming.
- Total Scheduled - Total hours of appointments that have either No Service types or Service types attached in all statuses that are part of your filtered results.
NOTE: Group appointments with multiple clients or with multiple staff will only show the total hours from the appointment once (i.e. Staff A makes a group appointment from 11:00AM to 12:00PM (1 hour) for client 1 and client 2. Therefore, that group appointment will show as 1 hour within the totals box for both multi-client and multi-staff appointments.)
Download Report (New)
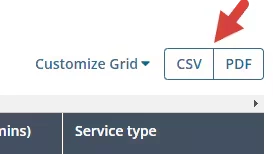
Once you have run the Report, you can download the CSV or PDF version directly to your computer based on your filtered results.
- Click the CSV or PDF button on the upper right tab.
Detailed Attendance Report (Legacy)
This Report displays all Client Appointments (and their Attendance Status) a Client or Staff Member has scheduled within the specified date range. This Report can be filtered by Location, Service Type, Duration, Attendance Status, and/or Referral Source of each Appointment.
This Report can be helpful for:
- Staff who want to see detailed information about their Clients (filter by Staff to see only their Clients).
- Admin who want to see if Appointments have been Invoiced or Not (sort by Is Billed)
NOTE: This Report includes Archived Clients and Inactive Staff if they also have appointments scheduled within the filtered results.
Set Report Parameters Filter (Legacy)
- Click Reports in the primary navigation bar and click Detailed Attendance under the Appointments section.
- Set Report Date Range if desired. It defaults to one month.
- Set additional Filters if desired: Locations, Service Types, Session Type, Attendance Status, and/or Billing Status.
- Click Run Report.
NOTE: Change the number of Clients shown per page (10, 25, 50, or 100) by clicking the desired unit at the top of the report.
Read the Report (Legacy)
All Appointments for Active and Archived Clients will display based on Report Parameters.
In this example, you can see that Joseph Graham had three Appointments in the Date Range selected.
- You can see those Appointment Locations and Times, Duration, and Service Type.
- You can see the Staff Member(s) associated with those Appointments as well as the Session Type.
- You can see Appointment Status (No Show, Cancelled, Kept, Upcoming, etc.).
- Is Billed indicates whether or not the Appointment has been Invoiced.
YES = Invoiced, NO = Not Invoiced.
Download Report (Legacy)
Once you have run the Report, you can copy or download the CSV, Excel, and PDF versions directly to your computer.
- Click the CSV and PDF button on the upper right tab.