

NOTE: Feature availability depends on your subscription plan.
Users can schedule a group Telehealth session with up to 20 participants (including the provider). Before you schedule please ensure the following:
- Your clients are already a group within the system. Each Client must be entered into the system as an individual and then formed into a Group. Your Group cannot be larger than 20 Clients for Group Telehealth sessions. Even if you edit out participants the system will not be able to schedule a Group Telehealth session for a group that has more than 20 clients. Each individual Client will be assigned a unique URL. Learn More: Create a Group
- The Appointment displays on the Calendar. Open the Appointment to see EACH Client's unique session URL
IMPORTANT: Telehealth Appointments cannot be rescheduled. They must be deleted and recreated at the new time.
Jump to Section:
Schedule Single Group Telehealth Appointment
- Click Schedule in the side navigation menu.
- Click +New Appointment. The Appointment window opens.

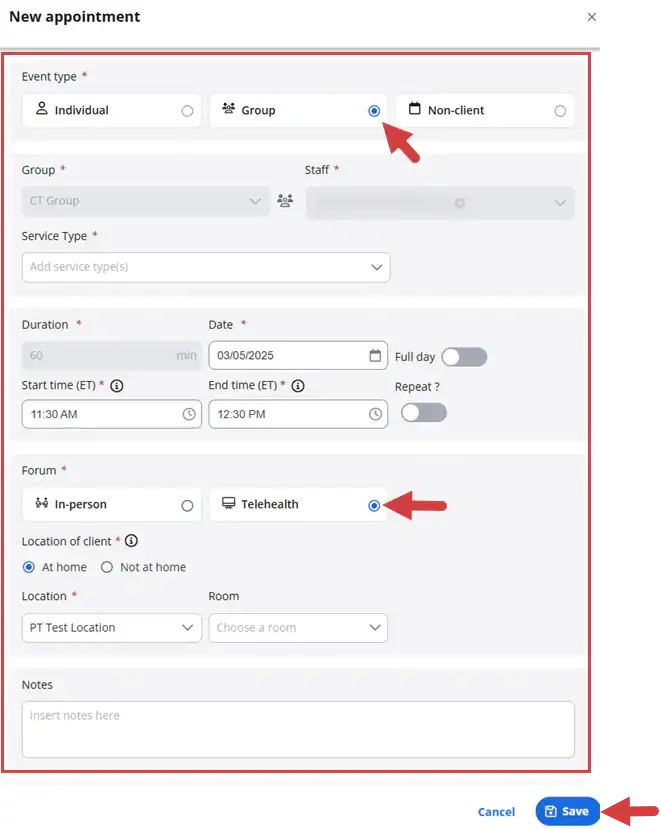
- Select Event Type - Group.
- Search for the group name. When you select the telehealth setting this field cannot be changed.
NOTE: You can add a new group directly from the new appointment window.
- Click the Group icon, enter a group name and add clients, then click Save Group.

- Click the Group icon, enter a group name and add clients, then click Save Group.
- Select a Service Type from drop down if it did not auto-populate.
- Select the Staff Member if different from yourself.
- Select Duration, Date, Start/End times & Repeat setting (if applicable). See Schedule Client Appointment and Client Appointment Variations for more information.
- Learn More: Set Up Calendar Preferences
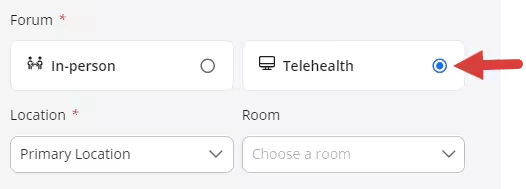
- Select Forum: Telehealth.
NOTE: The place of service will display if the setting is active in your organization’s profile. When this setting is turned on, you can select the telehealth POS code (At home or Not at home) when creating the appointment. The code will appear on progress notes and invoices. Learn More: Set the Default Place of Service
NOTE: If one or more Staff Member(s) selected are not subscribed to Telehealth, Telehealth URLs will not be generated for the appointment.
- Select Location of Client: At Home or Not at Home. The telehealth Place of Service code corresponding to the selected telehealth Location of Client(s) will be added to invoices and progress notes.
- Select Location & Room (if applicable).
- Enter Notes if needed.
- Click Save.
NOTE: Staff members have the ability to set a default time zone that is different from organization & location time zones. For the associated staff, their agenda, calendar & appointment windows will then display in the time zone set by the staff member. Appointment times will display in the location time zone on the client list and signed documentation. See Set Your General Preferences for more information.
- Your preferred time zone will display next to the start/end times when you are creating the appointment.

- Your preferred time zone and the appointment location time zone will show in your agenda.
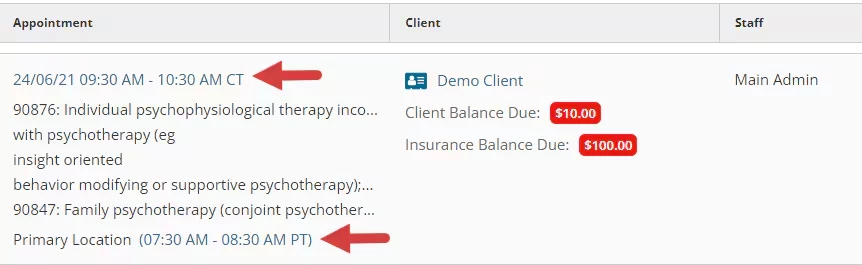
- Your preferred time zone will display next to the start/end times when you are creating the appointment.
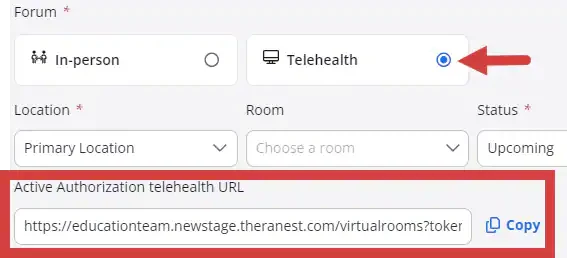
NOTE: When you click Save, the telehealth invitation link will display in the appointment window in the Telehealth URL section. You can copy & paste the URL link from here.
Schedule Group Telehealth Appointments from Clients Page
- Click Clients from the primary navigation bar.
- Click Groups.
- Find your Group and click Appointments in the Actions column.
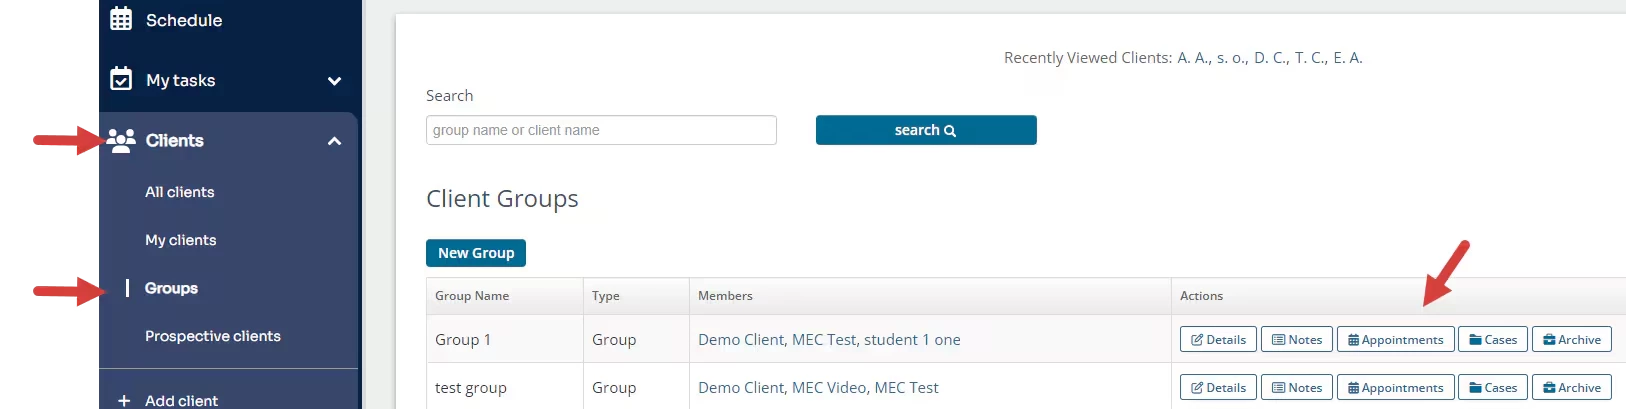
- Click New Group Appointment and follow steps listed above to enter appointment information in the new appointment pop-up window.

Recurring Group Telehealth Appointment
- Create a new appointment from the Schedule or Clients page as described above.
- Activate the Repeat setting.
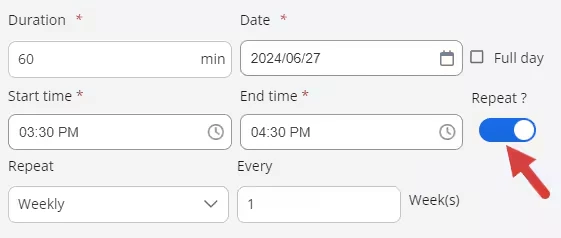
- Enter recurring schedule. See Schedule Recurring (Repeat) Appointments for more information.
- Select Forum: Telehealth.
NOTE: The place of service will display if the setting is active in your organization’s profile. When this setting is turned on, you can select the telehealth POS code (At home or Not at home) when creating the appointment. The code will appear on progress notes and invoices. Learn More: Set Default Place of Service
NOTE: If one or more Staff Member(s) selected are not subscribed to Telehealth, Telehealth URLs will not be generated for the appointment.
NOTE: When this setting is turned on, you can select the telehealth POS code (At home or Not at home) when creating the appointment. The code will appear on progress notes and invoices.
Telehealth Appointment Reminders
If Telehealth Appointments are scheduled without a Telehealth subscription, Telehealth URLs will not be generated and will not be included in email and/or text Telehealth Appointment Reminders, if enabled.
Learn More:
Related Articles Edit Recurring Appointments