PERMISSIONS REQUIRED: Any user can change Appointment Status. Clients can also change Appointment Status.
Appointment Status is a way to help categorize and keep track of Appointments. Staff Members can change the status from the Agenda, Calendar or a Client's Appointment History Report. Clients can also change the Appointment Statuses to cancelled when they respond to an Appointment text reminder or through the Client Portal. See Organization Cancellation Policies - Overview for more information.
NOTE: Progress Notes & Upcoming Appointment Status - Progress notes linked to appointments with an Upcoming status cannot be signed, submitted or approved. See Create a Progress Note for more information. Also, you cannot make changes to an Appointment (i.e. update a Service Type) after you have created and linked an Invoice. In order to make changes, you will need to delete the linked Invoice. Then after you have made your changes to the Appointment, you will need to recreate the Invoice with the corrected/updated Appointment information and reapply any Payments.
You can see when the Appointment Status was changed and by who in the Activity Log Report.
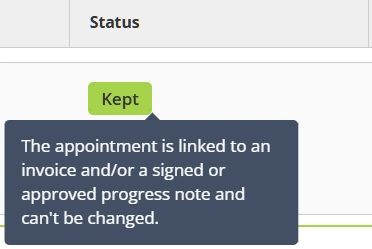
If the Edit Status option is greyed out, you should see some info when you hover over it describing why that status cannot be changed, such as having a signed progress note, etc.
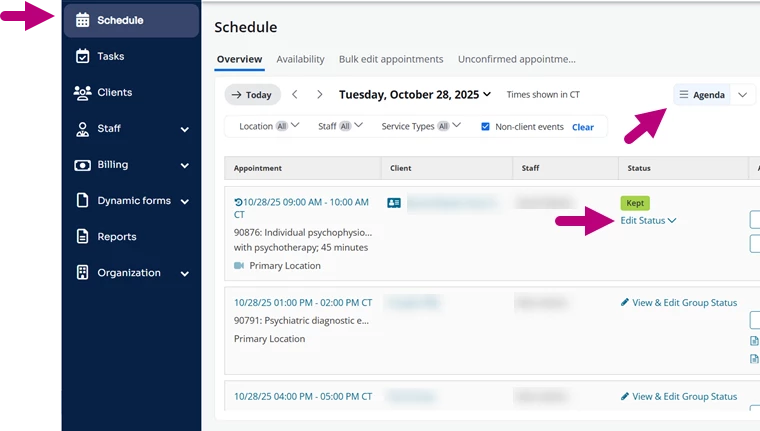
Click the Edit Status drop down for the appointment to select a new status and open the Edit Appointment window.
You can select Upcoming, Kept, Canceled, No Show, Late Cancel & Rescheduled.
Confirm the status. You have the ability to change the status if needed.
You have the option toadd a fee. Click waive fee to exclude fee.
Select who initiated the status change: Provider or Client.
Optional: Select a Reason and add a Comment.
Click Save.
Group Appointment
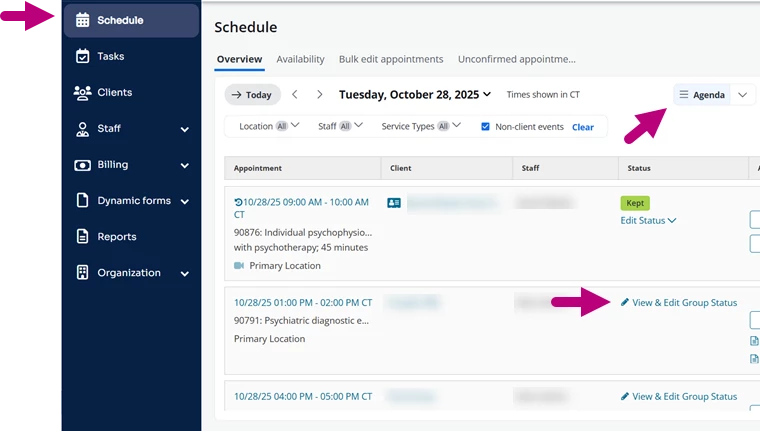
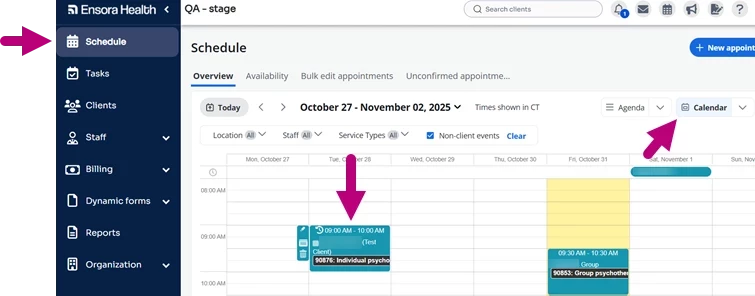
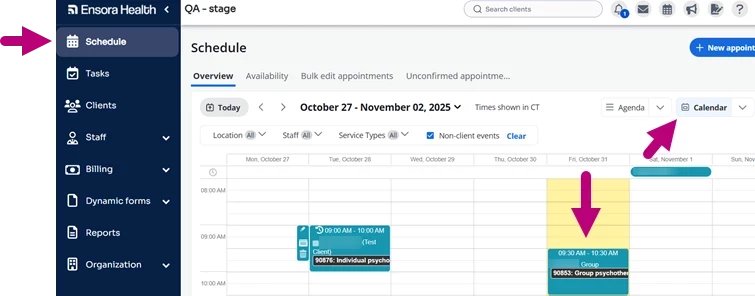
Click Schedule in the side navigation.
Select Agenda.
Click View & Edit Group Status for the group appointment.
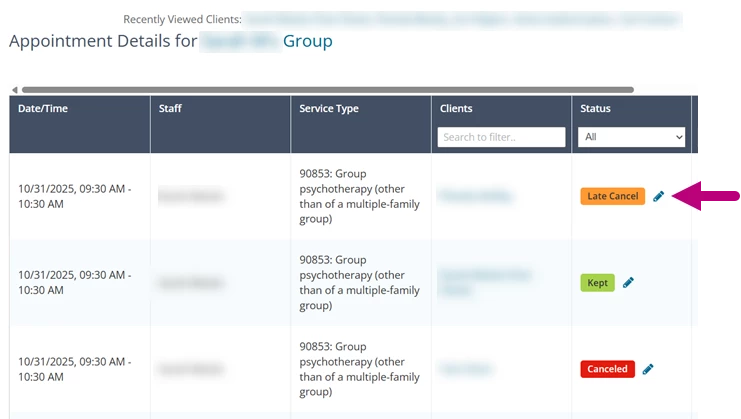
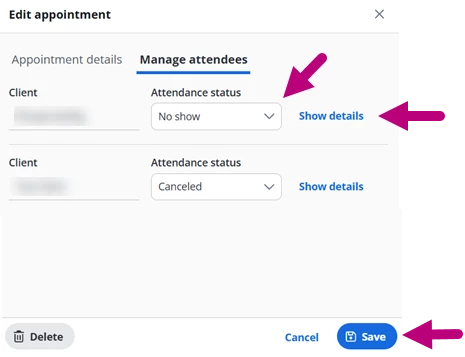
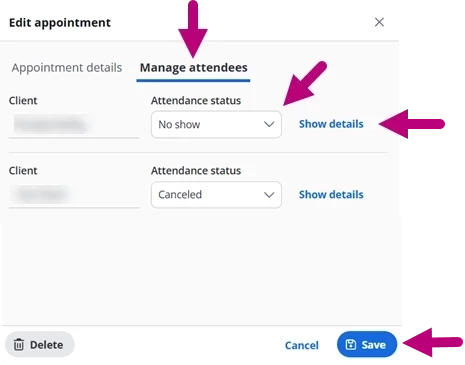
Click the Pencil icon in the status column to select a new status and open the Manage Attendees tab on the Edit Appointment window.
You can select Upcoming, Kept, Canceled, No Show, & Late Cancel.
NOTE: The Manage Attendees tab will not display when editing a recurring series for a group appointment.
Confirm the Attendance Status, or click the dropdown to select a different status.
Click Show Details to add or waive a fee for the client, indicate who initiated the status change (Provide or Client), select a reason for the change or add a comment.
NOTE: You can also click the Appointment Details tab to view and edit additional appointment details.
Change Appointment Status from the Calendar
Individual Appointment
Click Schedule in the side navigation.
Select Calendar.
Double click the Appointment on the Calendar to open the Edit Appointment window.
NOTE: Clicking directly on the client name will open the client details page.
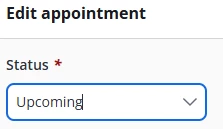
Click the Status dropdown and select new status.
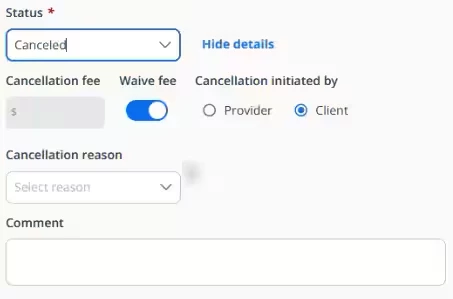
You have the option toadd a fee. Click waive fee to exclude fee.
Select who initiated the status change: Provider or Client.
Optional: Select a Cancellation Reason and add a Comment.
Click Save.
Group Appointment
Click Schedule in the side navigation.
Select Calendar.
Double click the Appointment on the Calendar to open the Edit Appointment window.
NOTE: Clicking directly on the group name will open the Appointment Details page. From here, you can click the Pencil icon in the status column to open the Edit Appointment window.
Click the Manage Attendees tab.
NOTE: The Manage Attendees tab will not display when editing a recurring series for a group appointment.
Confirm the Attendance Status, or click the dropdown to select a different status.
Click Show Details to add or waive a fee for the client, indicate who initiated the status change (Provide or Client), select a reason for the change or add a comment.
Change Appointment Status from the Client's Profile (Appointment History)
Individual Appointment
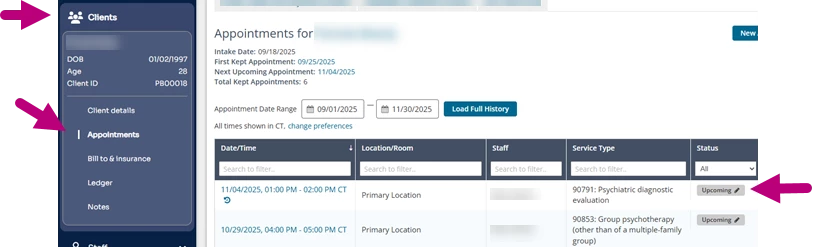
Click Client in the side navigation.
Open a Client Profile.
Click Appointments.
Click the Edit Status dropdown for the appointment to select a new status and open the Edit Appointment window.
Confirm the status. You have the ability to change the status if needed.
You have the option toadd a fee. Click waive fee to exclude fee.
Select who initiated the status change: Provider or Client.
Optional: Select a Cancellation Reason and add a Comment.
Click Save.
Group Appointment
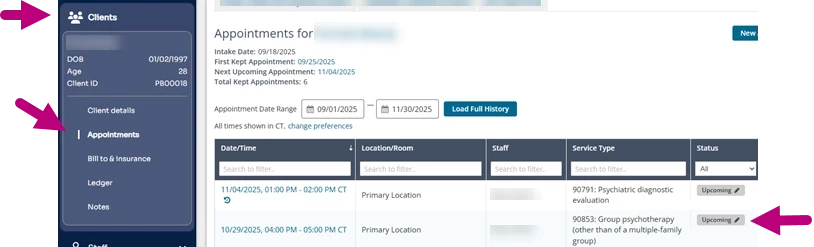
Click Client in the side navigation.
Open a Client Profile.
Click Appointments.
Click the Edit Status dropdown for the appointment to select a new status and open the Manage Attendees tab on the Edit Appointment window.
NOTE: The Manage Attendees tab will not display when editing a recurring series for a group appointment.
Confirm the Attendance Status, or click the dropdown to select a different status.
Click Show Details to add or waive a fee for the client, indicate who initiated the status change (Provide or Client), select a reason for the change or add a comment.
NOTE: You can also click the Appointment Details tab to view and edit additional appointment details.