

REQUIRED PERMISSIONS: You must have Billing Permissions with the ability to "Submit Claims to Clearinghouse" enabled.
After a claim is accepted by the payer you will receive an ERA with payment for that claim. If your Organization uses claims with Ensora Clearinghouse, you can enable a setting to have ERAs processed automatically.
NOTE: You will not typically receive the ERA Payment the same day the claim is accepted. It often takes time for the ERA Payment to process after the claim is accepted. If you are a non-partnered clearinghouse user, the client will be matched based on the CLP01 value. If the match is not made to the CLP01 value, the match is made to the client's first name/last name.
Jump to Section:
Enable Automated ERA Processing
- Click Claims Service under Organization.
- Click the Automation Settings tab.

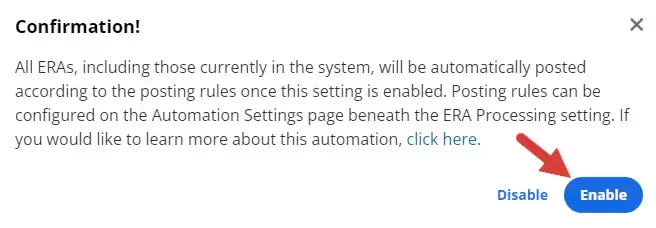
- Click the toggle to Enable Automated ERA Processing. A confirmation window opens.

- Click Enable in the confirmation window. The toggle moves to the right and turns blue.
- The Posting rules window opens where you can configure conditions to exclude claims from automatic processing.
NOTE: The following ERA Posting Rules will be populated by default after enabling ERA Processing Automation:
- For All Insurers, CO-45, post as Write off
- For All Insurers, CO-253, post as Write off
- For All Insurers, PR-1, post as Patient Responsibility
- For All Insurers, PR-2, post as Patient Responsibility
- For All Insurers, PR-3, post as Patient Responsibility
Process Payments One by One
- Click Actions for every Payment and select one of the following:
- Process Payment - This means you're taking the Insurance Payment and applying it to that Invoice/Claim on the Ledger. When you choose this option the payment will automatically be applied to the Invoice/Claim. The ERA will then move to the Paid/Processed tab on the claims screen.
- Mark as Process - No Payments are being applied to the Invoice but that payment line moves to the Paid/Processed tab. If you accidentally marked a Payment as processed without applying, see below.
Manually Adjust an ERA
NOTE: This feature is only available for organizations who are using claims with Ensora Clearinghouse.
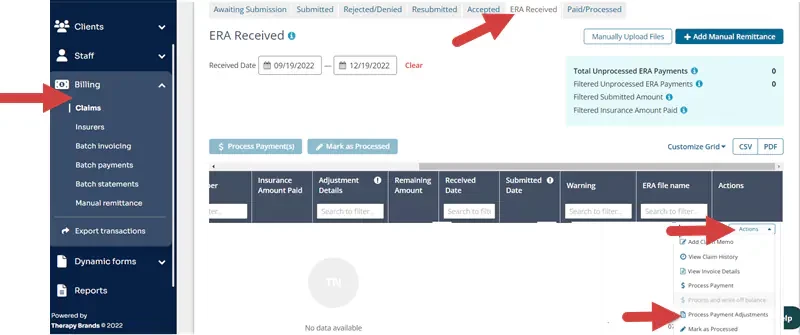
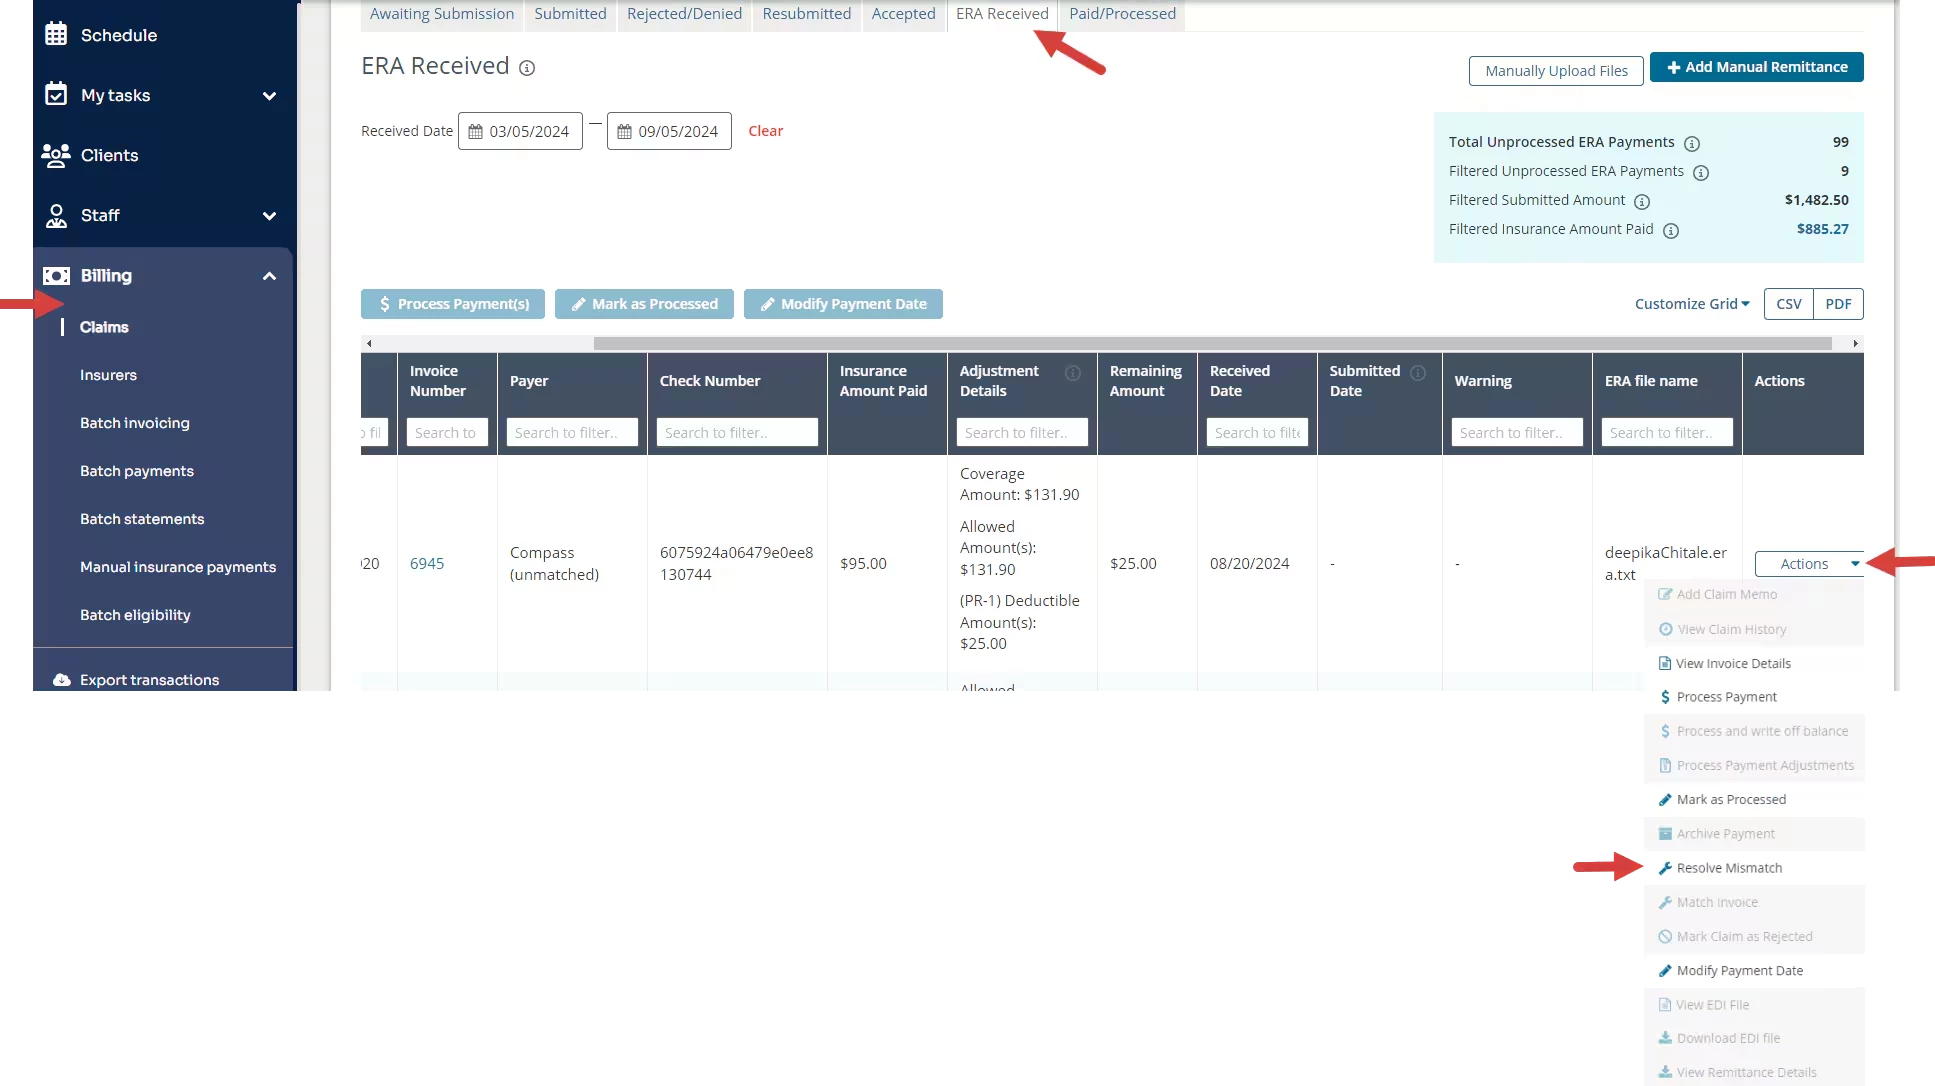
- Click Billing, Claims.
- Select ERA Received tab.
- Click Actions for the appropriate ERA you want to adjust.
- Click Process Payment Adjustments to match the action in the application.
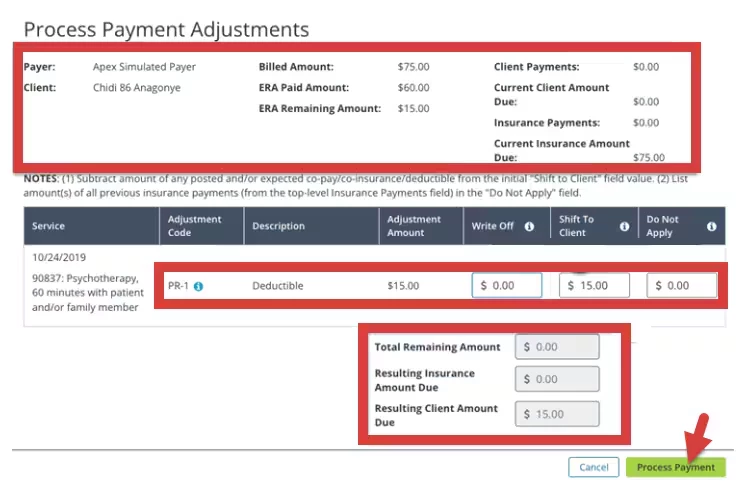
- Claim Details display at the top.
- Adjustment Codes display.
- To add a Write Off - Enter the Write-Off amount in the field.
- To Shift Balance to Client - Enter the Balance amount in the field.
- To leave an Insurance Balance Due - Enter the amount in Do Not Apply field.
- After you have made the adjustment, the Remaining Amount, the Resulting Insurance Balance, and the Resulting Client Balance will be reflected below.
Click Process Payment button to complete the adjustment.
Match Invoice to ERA
If an ERA has been matched to a client but not an invoice, you can resolve the mismatch by linking the appropriate invoice.
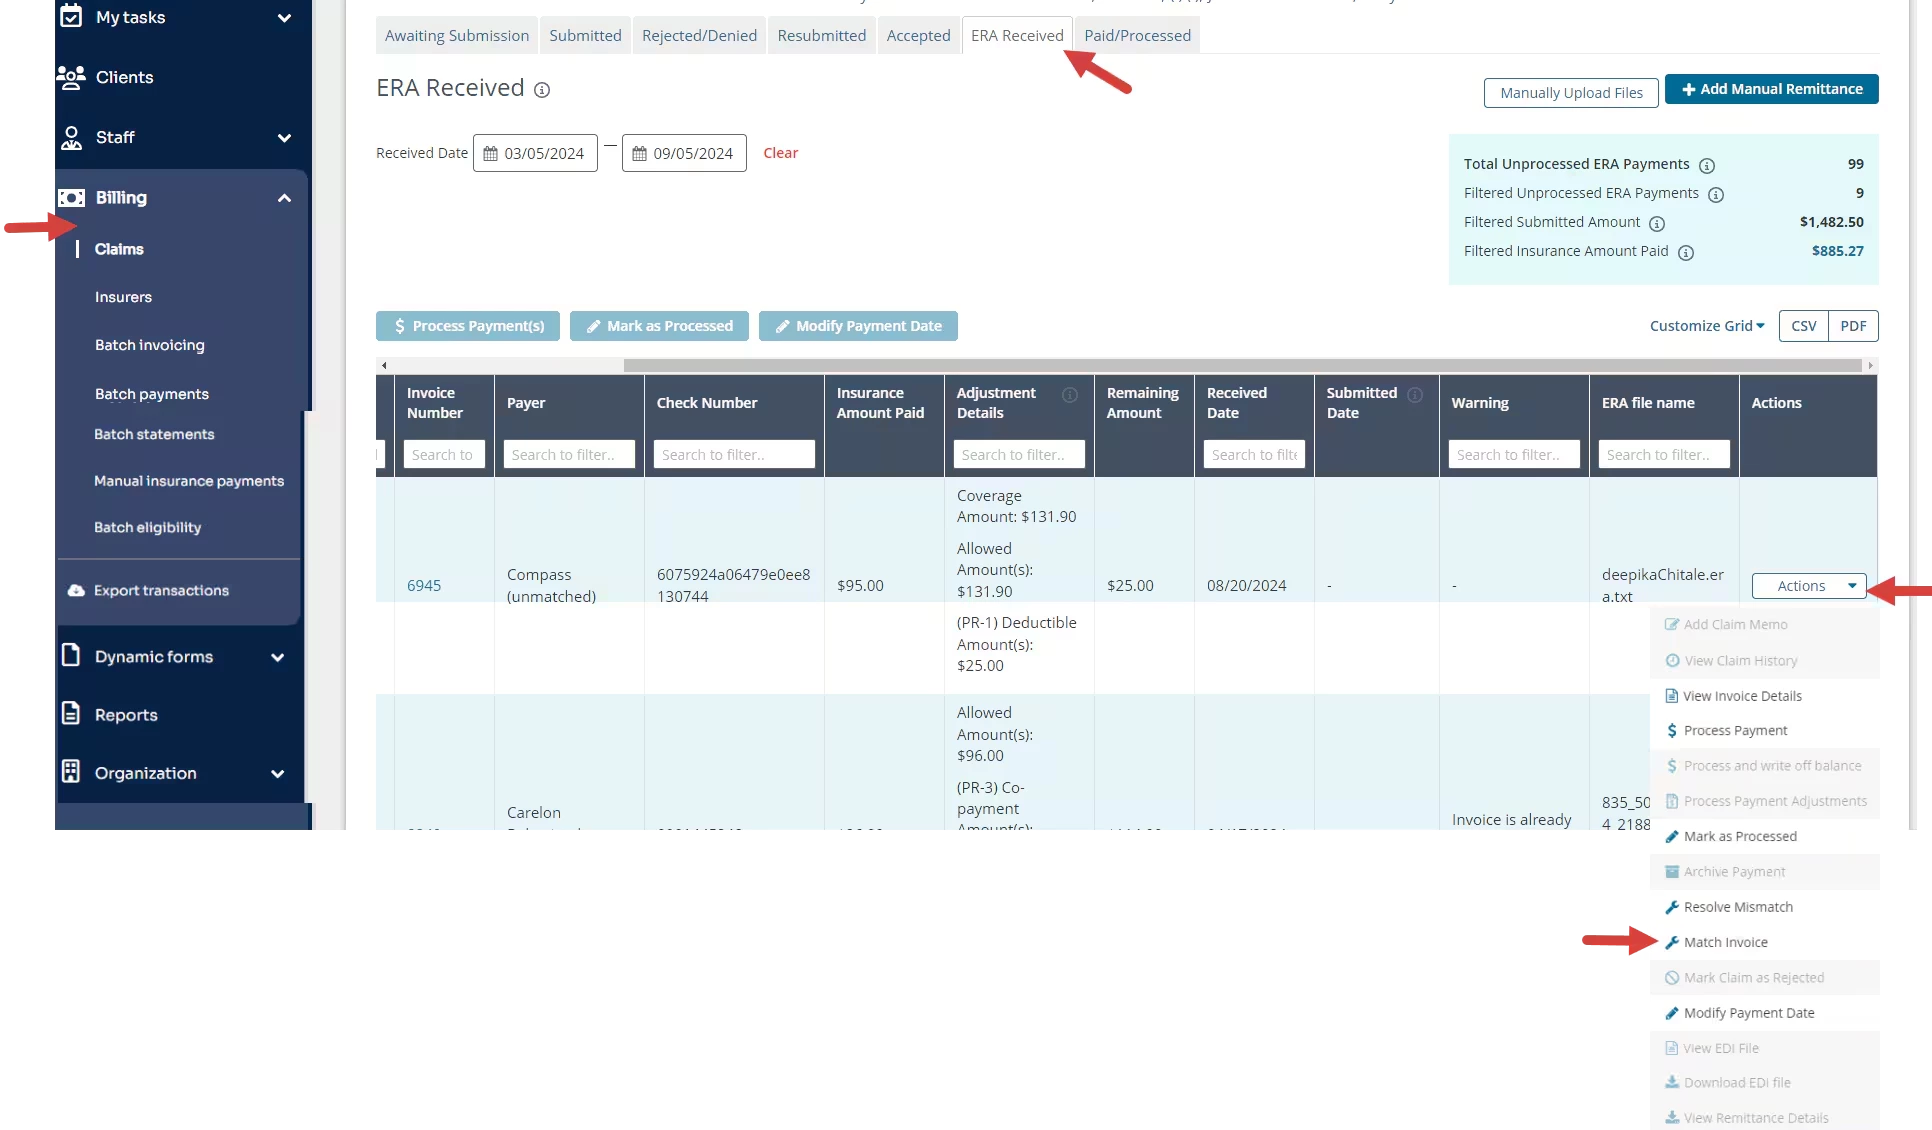
- Click Billing, Claims.
- Select ERA Received tab.
- Click Actions menu for the invoice.
- Select Match Invoice on the drop-down menu.
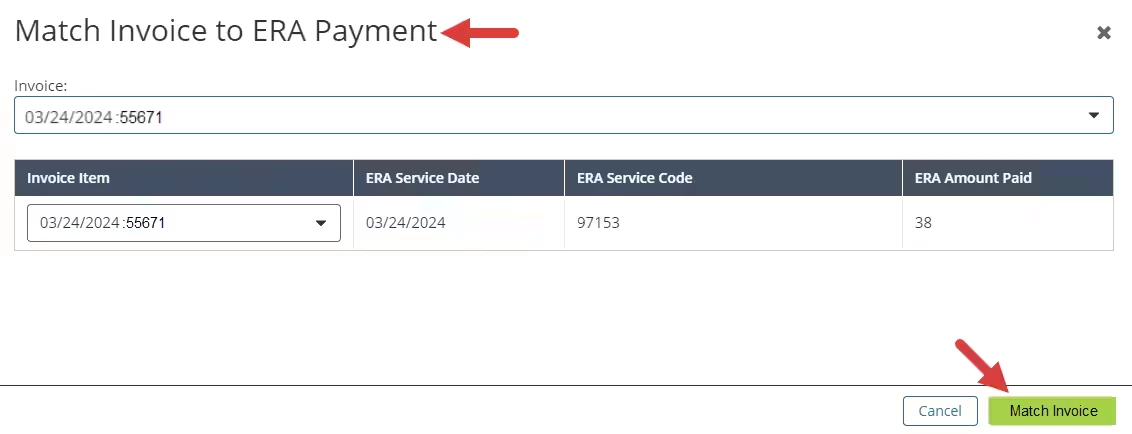
- The Match Invoice to ERA Payment pop-up window opens. Select the desired invoice.
- Click the Match Invoice button.
Resolve a Mismatch
When you receive an ERA that does not match back up with the original claim you submitted, you will need to manually resolve the mismatch before you Process Payments.
- Click Billing, Claims.
- Select ERA Received tab.
- Click Actions menu for the invoice.
- Select Resolve Mismatch.
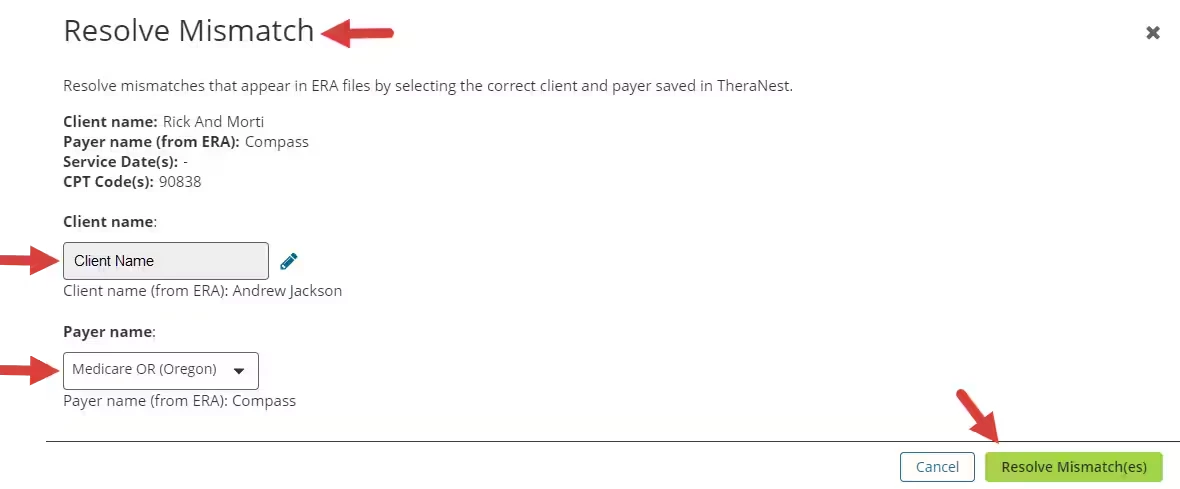
- The Resolve Mismatch pop-up window opens. Select the Client.
- Select the Payer.
- Click the Resolve Mismatch button.
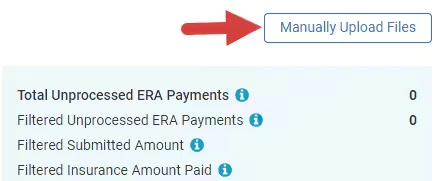
Manually Upload ERA Files
Troubleshooting
If you accidentally marked a payment as processed without applying, you can reverse the movement.
- Go to the Paid/Processed tab.
- Click Actions next to the Payment.
- Select Mark As Not Processed. The Payment will go back to the ERA Received tab for you to apply.