

PERMISSIONS REQUIRED: Billing
Batch invoicing allows you to find all unbilled Appointments in a desired date range and create Invoices for them all at once. You can create Invoices per Client or Staff, or for ALL Clients and Staff.
Jump to Section:
Create Batch Invoices
- Click Billing tab in primary navigation bar.
- Click Batch Invoicing in side navigation. Create New Invoices tab opens.
- You can filter by Client, Client Pays by (Insurance or Self), Staff, Service Type, Place of Service, Primary Insurance and Note Signature Status.
NOTE: If you want ALL unbilled Invoices, leave filters empty.
- Set appropriate Date Range.
- Click Search button.
- View total count of items selected, total dollar amount selected, and the total dollar amount including selected and unselected items.

- Select Hide No Shows, Reschedule & Cancellations box if desired to filter. Clients with unbilled Appointments display.
- Click each Client's name to show Invoice Details. You can make any changes there.
- (Optional) You can add a Batch Invoice item or add invoice information and Apply to all Invoices.
- Select or deselect Clients you wish to create Invoices for.
- Click the green Create Selected Invoices button.

- Click Yes I'm sure to confirm you want to create Invoices.
Group All Appointments into Single Claim
NOTE: Follow these steps to Group all appointments into single claim in bulk before creating batch invoices. This feature is only available for those that use our partnered clearinghouse.
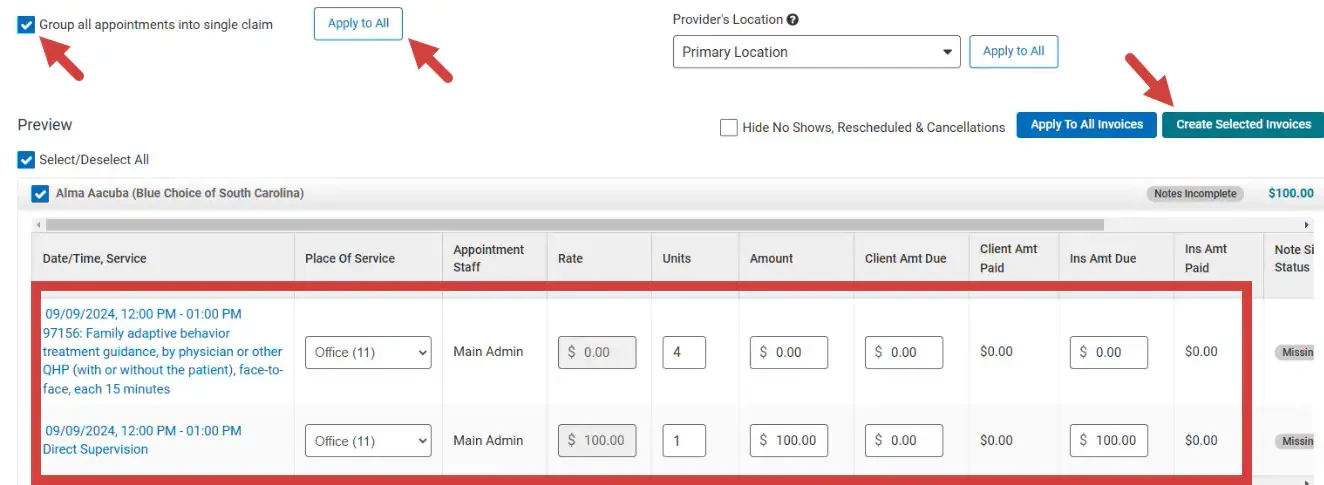
- Click Apply to all Invoices.

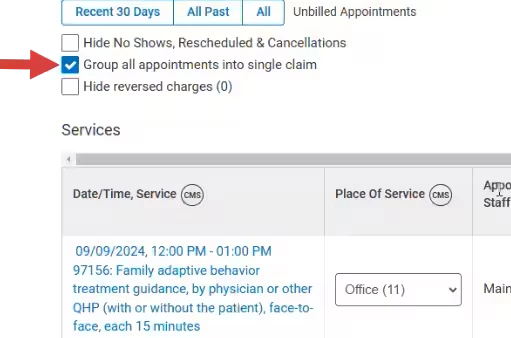
- Click Group all appointments into single claim.
- Filter invoices.
- Click Apply to All.
- Click Create selected invoices.
- Select the invoice on the Process Existing Invoices page.
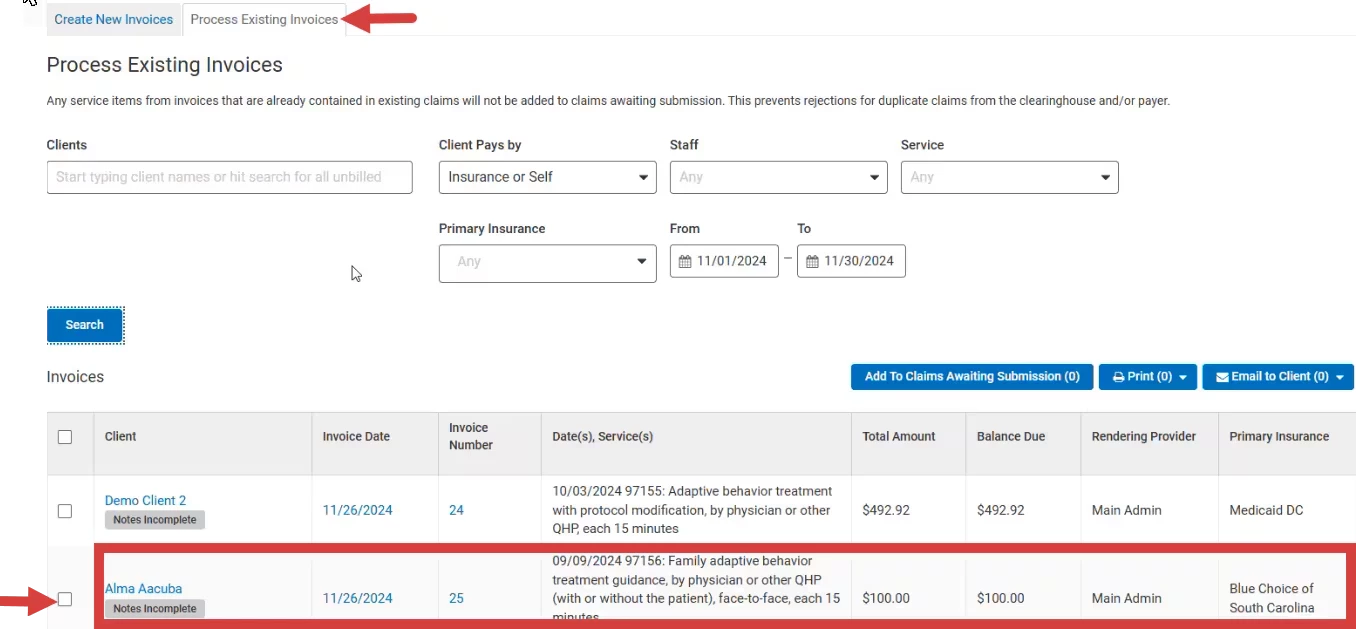
- The Group all appointments into single claim checkbox will be selected by default.
Print or Email Invoices
- Click Billing tab in primary navigation bar.
- Click Batch Invoicing in side navigation.
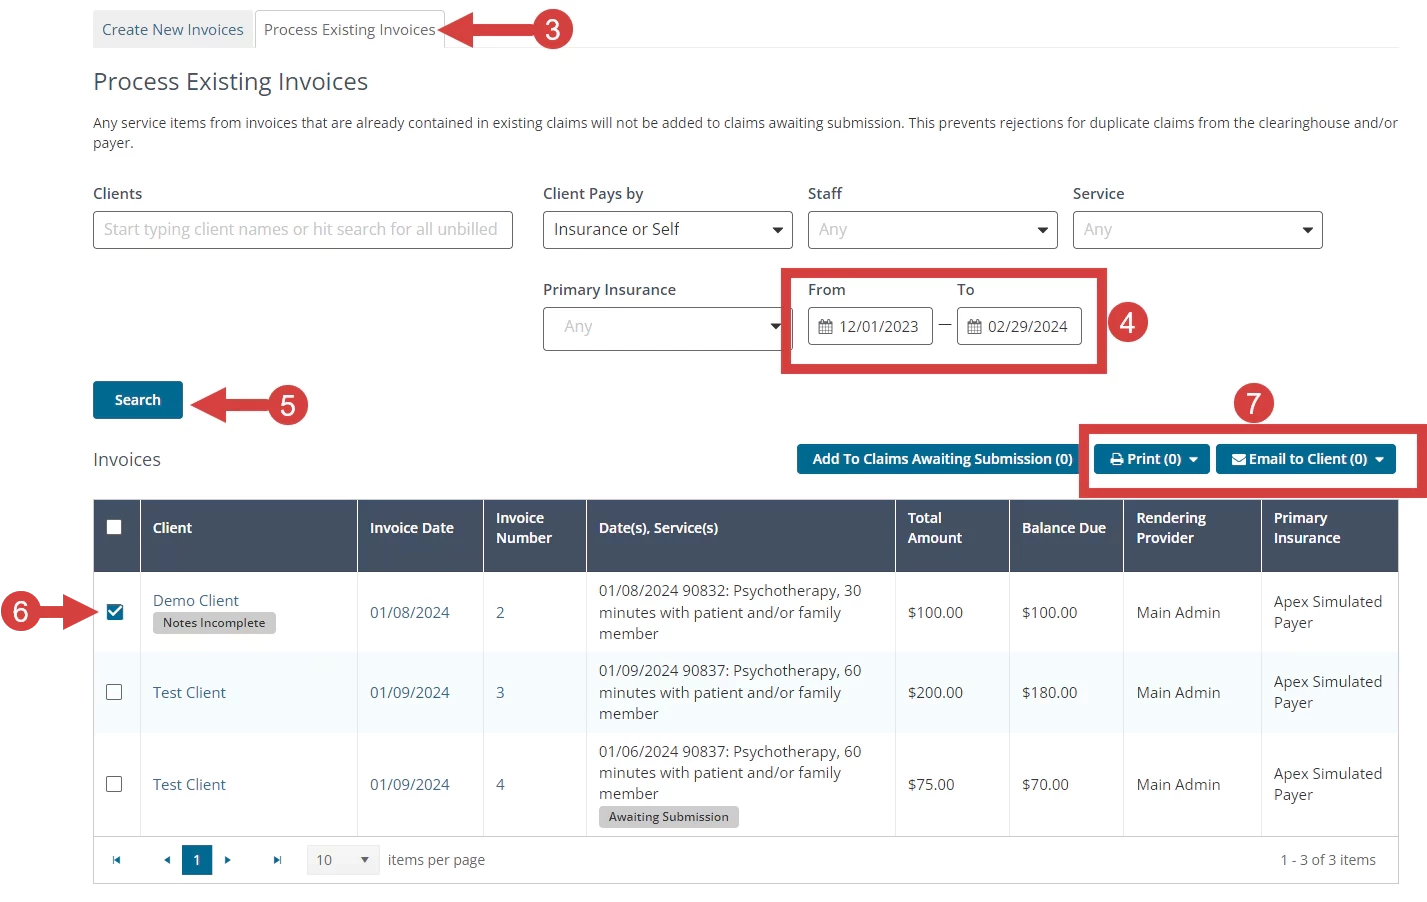
- Click Process Existing Invoices tab.
- Set appropriate Date Range.
NOTE: Date Range here is the date the Invoice was created.
- Click Search button.
- Select or deselect Clients you wish to print or email Invoices for.
- Click Print or Email to Client and select Invoice or Superbill.
NOTE: If you are connected to a Clearinghouse, you can add Claims to Awaiting Submission by clicking Add to Claims Awaiting Submission button.
Related Article:
- Add Multiple Invoices to Claims Awaiting Submission: Batch Invoicing: Submit to Clearinghouse