

This article will discuss how to assign users access to various parts of eCR based on their role.
NOTE: When applying access level permissions, you are applying those permissions only to the selected Access Level. You must apply permissions to every Access Level you have created.
Be sure to click Save after you have applied any changes. The boxes will remain filled if you change tabs prior to saving but to ensure you do not lose any changes you have made to the permissions allowed for that Access Level, it's a good idea to save your work regularly.
Access Levels can be found one of two ways:
- From the Administration drop-down menu, go to Access Levels.
- From the desktop menu, if set up in My Preferences, go to Administration > Access Levels. See Set Up My Preferences for more information.
Jump to Section:
Access Level Permission
- Go to Administration > Access Levels.
- Select the existing access level or create a new access level.
- Select the 2nd User Access tab.
- Check the box for Access Level Manager.
- Click Save and repeat for each access level that will be given permission for the Access Level Manager.
Create a New Access Level
- Go to Administration > Access Levels.
- Select New to create a new Access Level.
- In the Access Level field, enter the name of the new Access Level.
- Select the tabs and desired options to define the access rights to provide to the new Access Level you are creating.
- For details on each tab, continue reading.
- For details on each tab, continue reading.
- Click Save.
Edit an Existing Access Level
- Go to Administration 🡪 Access Levels.
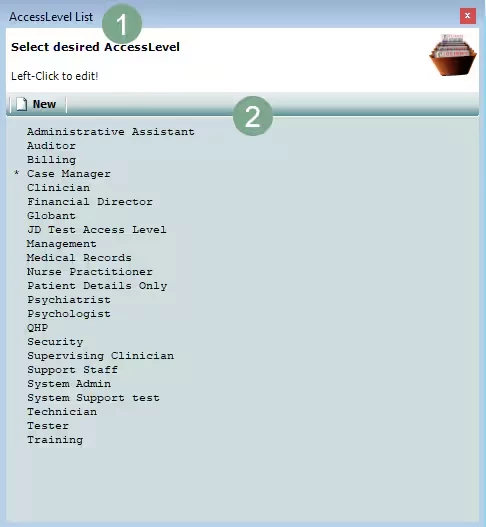
- Left-click on the existing access level from the list to open.
- Uncheck previously selected options and/or check additional boxes to remove/allow additional access rights for this access level.
- Click Save.
1st User Access Tab
- Check the box for System Admin to give System Admin access to this access level in addition to their designated access level.
Check the box for Inactive to inactivate this access level. - Check the box for Select All to apply all permissions to the specific role.
- Check the box for Un-Select All remove all permissions to the specific role.
- Day to Day (Section 1)
- Check the box for Alerts to give access to the Alert Manager screen for personal alerts and instant messages.
- Check the box for Patient Registration to give access to search or add a patient on the Patient Registration screen.
- Check the box for Patient Search to give access to the Patient Search screen.
- Check the box for Billing Progress Notes to give access to the My Billing screen to pull claims generated from completed Progress Notes.
- Check the box for Process PN to give access to process Progress Notes in My Billing in order to process claims.
- Check the box for Show all PN to display all Progress Notes in My Billing. If left unchecked, only the user’s Progress Notes will display.
- Check the box for Remove Notes to give access to remove notes in My Billing. If left unchecked, the user will not be able to remove Progress Notes from the chart.
- Check the box for My Daysheet to give access to My Daysheet, displaying all notes from patients’ charts over a specified date range.
- Check the box for View All Notes to display all Progress Notes within the My Daysheet screen, If left unchecked, only the user’s notes will display.
- Check the box for My Clients to give access to My Client List.
- Check the box for My Groups to give access to My Groups to add patients, schedule appointments and enter notes for groups.
- My Groups must be checked in order for View All Groups to be active. Check the box to give access to view all groups within My Groups.
- My Groups and View All Groups must be checked in order for Access Group Notes to be active. Check the box to give access to update all groups. If left unchecked, the user can update only their groups.
- My Groups must be checked in order for View All Groups to be active. Check the box to give access to view all groups within My Groups.
- Check the box for DCF EVNT, for Florida-based clients, to give access to the DCF EVNT functionality in eCR.
- Check the box for DCF Serv to Visit for Florida-based clients, to give access to make corrections to service visits for the DCF SERV file.
- Check the box for Charges to give access to the Charge Entry screen to look up claim information and manually bill for claims that aren’t generated from a progress note.
- Attachments refers to attachments on a claim.
- Check the box for Add to give access to add an attachment.
- Check the box for Delete to give access to remove an attachment.
- Attachments refers to attachments on a claim.
- Visual Bed Board enables visual access to provide bed management. As such, Bed Management setup is done via Setup 🡪 Admin Bed Management and used to create a bed structure, defining Facilities, Buildings, Floors, Units, Rooms, and Beds.
- Check the box for View to give access to view Visual Bed Board.
- Check the box for Edit to give access to edit data in Visual Bed Board.
- Check the box for Bed Management Wait List to give access to the Wait List in Bed Management.
- Check the box for Submission Center, for OMH clients, to give access to the PCS Submission screen to process a PCS file (PCS file goes into Web Portal).
- Check the box for PAS Submission, for OASAS clients, to give access to the PAS Submission screen to process a PAS file (PAS file goes into the Web Portal).
- PCS Submission is legacy, replaced by the Submission Center. Do not use.
- Check the box for DCF Submission, for Florida-based clients, to give access to the DCF Submission screen to process a DCF file.
- Check the box for BHCD Submission for Behavioral Health Chemical Dependency Submission.
- Check the box for Visit Type to BHCD Attendance Code to give access to add/edit Visit Type to BHCD Attendance Mapping in Setup drop-down.
- Check the box for Nursing Shift Notes to give access to the Nursing shift report for nurses to use for notes from their shift that are not patient/chart specific.
- Check the box for Referral to give access to the Referral Pre-Intake Module.
- Check the box for Wait List to give access to the Wait List to manage wait-listed patients.
- Day to Day (Section 2)
- Check the box for Families to give access to Families module to create a family name and link multiple patients.
- Check the box for Attendance Billing Census to give view or edit access to the Attendance Billing Census screen which allows a user to mark the status of a patient and create charges based on status.
- Check the box for PROS Check In/Out to give access to the check in/out screen to log times of the patient's appointment for PROS billing.
- Check the box for Modify Check In/Out to give access to update check in and out times in Check In/Out.
- Check the box for Fill Medication Orders to give access to filling medication orders.
- Check the box for Med Dispense Supervisor to give access to edit the amount of medication being provided or alter from the patient’s schedule.
- Check the box for Bulk Medication Dispensing to give access to dispensing bulk medication in eCR.
- Check the box for Medication Pre-Pour Dispensing to give access to the Medication Pre-Pour Dispensing module.
- Check the box for Patient Reminders to give access to Patient Reminders MU screen to log and track reminders for preventative care and follow-up to patients.
- Check the box for CCDA to give access to queue up and send MU CCDA.
- Check the box for Clinical Decision Support to give access to MU Clinical Decision Support Module to set parameters for patients who, when standards are met, a pop-up will display to prompt an action.
- Check the box for Secure Mail to give access to send secure mail through eCR.
- Check the box for ePrescribe Notifications to give access to the ePrescribing Notifications screen.
- Check the box for Lab Orders to give access to the Lab Orders screen.
- Check the box for Lab Orders Bulk to give access to the Lab Orders Bulk screen.
- Check the box for Lab Results Entry to give access to Lab Result Entry.
- Check the box for Image Results to give access to Image Results.
- Check the box for Educational Resources to give access to the Patient Education button on Patient Chart, displaying patient-specific educational resources.
- Check the box for Clinical Quality Measures to give access to MU Clinical Quality Measures.
- Check the box for Clinical Quality Measures II to give access to MU II Clinical Quality Measures.
- Check the box for Automate Measure Calculations to give access to MU automated measures calculations.
- Check the box for Automated Measure Calculations II to give access to MU II automated measures calculations.
- Check the box for Automated Measure Calculations III to give access to MU III automated measures calculations.
- Check the box for Radiology Orders to give access to the radiology orders screen.
- Day to Day (Section 3)
- Check the box for Referent/Self-Referral which is Part of Phone Pre-Intake module, to give access to specific forms filled out along with pre-intake.
- Check the box for Accounting of Disclosures to give access to Accounting of Disclosures module, accessed through the patient's chart or Day to Day.
- Check the box for Allow Remove to give access to remove account of disclosure.
- Check the box for Clinical Info Reconciliation to give access to Clinical Information Reconciliation (part of MU).
- Check the box for Communication Log to give access to the communication log module.
- Check the box for Modify/Lock to give access to modify or lock the communication log.
- Check the box for CCBHC Measures to give access to CCBHC Measures under Day-to-Day.
- Check the box for Front Desk to give access to the Front Desk Module under Day-to-Day.
- Check the box for Subscriber/RP to give access to add/edit subscribers/responsible parties.
- Check the box for Call Center Intake to give access to the Call Center Pre-Intake Module.
- Check the box for Compliance Center to give access to the Compliance Center. Functionality allows user to view the Due Treatment Plans by the user and for patients the user has access to.
- Check the box for Phone Pre-Intake to give access to the phone pre-intake module, which allows the user to log information on a patient without registering patient.
- Check the box for Allow to Mark Inactive on Phone Pre-Intake to give access to select Inactive under the Demographic tab for Phone Pre-Intake under any pre-intake method.
- Check the box for Supervision Notes to give access to the Supervision Note under Day-To-Day and allows the user to create and view their own notes.
- Check the box for View All Supervision Notes to give access to view all notes and edit any incomplete supervision notes whether you created them or not.
- Check the box for Appointment Reminder Inbound Report to give access to the Inbound folder within the Phone Call Reminder module.
- Check the box for Treatment Wizard to give access to the Treatment Wizard module.
- Screening Results
- Check the box for Void Screenings to give access to void methadone screenings within a patient's chart.
- Check the box for View Future Screenings to give access to view future scheduled screenings within a patient's chart.
- Screening Schedules
- Check the box for Stop Schedules to give access to end scheduled screenings within a patient's chart.
2nd User Access Tab
- Administration
- Check the box for Access Level Manager to give access to the Access Level list to update access roles.
- Check the box for Credential Manager to give access to Credentials screen to manage credentials and specify signature type per credential.
- Check the box for Organization Chart to give access to set up the hierarchy of the organization. This directly relates to “Route To” signatures on forms.
- Check the box for Users to give access to manage information on existing users in eCR and add new users.
- Check the box for Alert Manager to give access to Alert Manager, giving the capability to set up automatic alerts.
- Check the box for Form Manager to give access to modify or create a chart with forms from the form library and assign to a program, and to add and modify consent and releases and custom forms.
- Check the box for Group Manager to give access to Group Manager to manage existing groups and add new groups, as well as managing and adding new patients and users to Groups.
- Check the box for Location to give access to facilities to set up a location where service is rendered.
- Check the box for Patient Chart Manager to give access to the Patient Chart Manager to purge patient charts or copy patient forms from one chart to another.
- Check the box for Other Organizations to give access to the Other Organizations tab to manage or add organizations that client is associated with.
- Check the box for Pharmacy Manager to give access to the Pharmacy Manager to add pharmacies used by patients.
- Check the box for Programs List/Add to give access to the Program screen to manage and add programs in company.
- Check the box for Max Beds to give access to enter information in Max # of bed license and Max # occupancy fields within the program screen.
- Check the box for Diagnosis to give access to manage/add diagnoses.
- Check the box for Insurance to give access to manage/add insurances.
- Check the box for Client Service Sheets to give access to manage client service sheets.
- Check the box for Procedures to give access to manage/add procedures.
- Check the box for Emergency Access to give access to the Emergency Access screen for a user to declare a state of emergency and choose users to have System Admin access in the event of an emergency.
- Check the box for ICD 10 to give access to manage/add ICD 10 codes.
- Check the box for Meaningful Use Portal to give access to the Meaningful Use Portal.
- Check the box for Medication Dispensing Admin Screen to give access to the Medication Administration Screen.
- Check the box for Payer Groups to give access to manage/add payer groups, located in the insurance screen.
- Check the box for Pump Calibration to give access to Methadone Pump Calibration.
- Check the box for FormLabTM to give access to the FormLabTM
- Check the box forFormLabTM Publish to give access to publish forms in the FormLabTM
- Check the box for Reset Docking Flag to give access to reset docking flag.
- Check the box for Allow Appending of Text and Progress Notes so that, once a note is signed and locked, the user can right-click on a text box to make a change. The note will not show the change but will indicate a change was made and allow the user to see it.
- Check the box for Allow Editing of NA on Supervisor Sigs will allow the user to remove the supervisor signature requirement by being able to check the NA box next to the supervisor signature.
- Check the box for Clear User Locks to give access to the Clear User Locks window to clear any user locked in a session.
- Setup
- Check the box for Defaults to give access to edit the Clinic Defaults screen.
- Check the box for Options to give access to edit the Clinic Options screen.
- Check the box for Lookup Manager to give access to edit Look Up Manager.
NOTE: Look Up Manager is used to populate choices listed in the drop-downs throughout the system.
- Check the box for Spell Check Dictionary to give access to spell check dictionary to add words considered correct for spell check.
- Check the box for Visit Types to give access to manage and add Visit Types.
NOTE: Visit Types are available to use when scheduling appointments and associating Progress Notes.
- Check the box for Admin Visual Bed Board to give access to Admin Bed Management screen to set up building(s), floor(s), unit(s), room(s), and bed(s) for inpatient bed tracking.
- Check the box for Attendance Billing Setup to give access to manage attendance billing for inpatient programs.
- Check the box for Case Mgmt Team Setup to give access to the Case Mgmt Team Setup to manage and add users to a case management team.
- Check the box for Case Reporting Trigger Codes to give access to Case Reporting Trigger Codes (part of MU 3).
- Check the box for Phone Call Reminder Setup to give access to the Phone Call Reminder setup for interface set up to export a third-party call reminder service (automated dialer interface West).
- Check the box for Lab Order Test Setup ti give access to setup Test for Lab Orders.
- Check the box for Pill Bottles to give access to setting up Pill Bottle Inventory for Methadone.
- Check the box for Methadone Dosage Setup to give access to setting up dosage amounts for patients using the Methadone Module.
- Check the box for UDF Setup to give access to set up User Defined Field questions to gather more information in Patient Details > UDF tab.
- Check the box for Activity Items to give access to Activity Items (part of MU).
- Check the box for Medication Categories to give access to setting up Medication Categories.
- Check the box for Zip To Zone Setup to give access to Zip to Zone to users in the User Screen.
- Check the box for Service Threshold Setup to give access to setup Service Thresholds for a patient.
- Check the box for Dispensing Window Setup to give access to the Dispensing Window Setup under Setup.
- Check the box for Medication Billing Profiles to give access to the Medication Billing Profiles window.
- Check the box for Methadone Label Template to give access to the Methodone Label Template.
- Full Access
- Check the box for Profile Phase Admin to give access to define profile phase settings.
- Check the box for NewCrop Registration to give access to a user to register for eprescribing with NewCrop.
- Scheduling
- Check the box for Schedule to give access to the scheduler screen.
- Check the box for Allow Check In to give access to check in appointments on the scheduler so that an alert is sent to the patient's primary staff.
- Check the box for Allow UnCheck In to give access to un-check in appointments on the scheduler.
- Check the box for Do not Schedule Override to give access to Schedule Override when right-clicking on the Schedule.
- Check the box for Calendar to give access to manage/add information to the company, resource, and custom calendar.
- Check the box for Setup to give access to manage/add custom resources, custom subjects, availability types, appointment status colors, and user preferences.
- Billing
- Check the box for Insurance Billing to give access to the Insurance Billing screen to submit claims to payers electronically.
- Check the box for Void Bill Date to give access to void a bill date within Charge Entry.
- Check the box for Patient Statements to give access to print patient statements under the Billing header.
- Check the box for Attach Authorizations to give access to attach an authorization to a claim.
- Check the box for Batch Visit to give access to create a batch of visits to submit to a payer.
- Check the box for Billing/Program Defaults to give access to manage Billing/Program defaults in the Setup menu.
- Check the box for Delay Reason Code to give access to the Daily Reason Code screen (was Over 90 Days Indicator).
- Check the box for COPS/CSP Rates to give access to the COPS/CSP Rates screen to manage bill rates.
- Check the box for 277 Reader to give access to the 277 reader to pull in a 277 and read in this view.
- Check the box for Response Reader to give access to the Response reader screen.
- Check the box for Procedures Sliding Scale Fees to give access to manage a procedure’s sliding scale fees.
- Check the box for Eligibility to enable functionality to validate patient eligibility.
- Check the box for Eligibility Insurance Entry to give access to Eligibility Insurance Entry.
- Check the box for Claim Management to give access to the Claim Management Screen.
- Check the box for Medication Mapping to give access to medication mapping.
- Check the box for Snomed Mapping to give access to snomed mapping.
- Reporting
- Check the box for Ad-Hoc to give access to update the Ad-Hoc Reports.
- Check the box for Reporting to give access to eCR reporting.
- Check the box for Power BI File Retriever to retrieve eCR data from the database for analytical purposes related to Power BI.
- Check the box for Advanced Reporting Search to give access to Advanced Reporting Search under Reporting.
- User Access
- Check the box for Crisis to give access to add users on a patient’s chart for crisis situations.
- Check the box for View Users on Chart to give access to view all users on a chart.
- Import/Export
- Check the box for HL7 Logs to give access to the HL7 logs screen for inbound and outbound HL7 transactions including errors.
- Check the box for Lab Results Manager to give access to the Lab Results Manager. The Lab Results Manager allows a user to match results to patients that are not connected automatically.
3rd User Access Tab
- Patient Details
- Check the box for Patient Details to give access to Patient Details.
- Check the box for Patient Save to give access to save in the Patient Details screen.
- Check the box for Patient Add Photo to give access to add a photo of the patient in the patient’s chart.
- Name/Address
- Check the box for Edit to give access to edit the name and address of a patient.
- For each of the following tabs, check the box for View and/or Edit to give access to view or edit the tab in Patient Details.
- Additional Demographic Info
- Payor/ SS Fee
- Authorizations Tab
- Service Thresholds
- Contacts Tab
- Diagnosis Tab
- Pharmacy Tab
- Allergies Tab
- Medications Tab
- Lab Results Tab
- SS Fee/Copay Tab
- ePrescribing
- Connect EHR
- HIE
- Check the box for Patient Details to give access to Patient Details.
- Patient Chart Detail
- Check the box for Print Patient Chart to display the print button on patient chart, allowing the user to print forms in chart.
- Check the box for Scan to Chart to display the scan button on patient chart, allowing the user to scan forms directly into achart.
- Check the box for Attach to Chart to display the attach button, allowing the user to attach documents to the chart.
- Check the box for Delete Attachment to give access to delete an attachment from a patient’s chart.
- Check the box for Archive Patient to give access to the archive button in patient’s chart.
- Check the box for Lock Chart to allow the user to lock a patient’s chart so that other users will not be able to edit patient’s chart.
- Check the box for Edit locked MRN to allow the user to edit a patient’s Medical Record Number.
- Check the box for Add Users to Chart and any below to give access to do the following:
- Manage/add a Primary Therapist.
- Change Program for a patient.
- Transition Program, transition a patient from one program to another.
- Edit Transitions, edit the details of a transition.
- Check the box for Void to give access to void a patient’s chart.
- Check the box for Enable Forward/Backward buttons to give access to move patients through their status.
- Check the box for Enable Down button to give access to the down button within the patient chart.
- The down button allows for a patient to be un-admitted, before a patient is admitted to a program.
- Check the box for Allow Change Chart Number to give access to change a patient's chart number.
- Check the box forTreatment Plan Management to give access to manage treatment plan due dates and functionality at the chart level.
- Check the box for Medication Hold to give access to the medication hold button on the Fill Methadone Orders screen and on the patient chart.
- Check the box for Medication Hold Removal to give access to remove a Medication Hold placed on a patient from the Medication Hold screen.
- Check the box for Medication Check-In to give access to Medication Patient Check In under Day-to-Day.
- Check the box for Set Providers by Date to give access to set providers by date on a patient’s chart details.
- Patient
- Check the box for Delete Patient Notes Created by Inactive Users to allow a user to delete patient notes for patients created by now inactive users.
- Check the box for Allow to see SSN to give access to see a patient’s Social Security Number.
- Patient Chart Manager
- Check the box for Purge Charts to allow a user to purge a patient’s chart.
- Check the box for Purge Subscribers to allow a user to purge rendering providers from created charges.
- Check the box for Purge Patients to allow a user to purge a patient from created charges.
- Check the box for Copy Forms to allow a user to copy forms from a patient’s chart to another of their charts.
- Check the box for Copy Locked Forms with Headers to allow a user to copy locked forms with headers from a patient’s chart over to another of the patient's charts.
- Check the box for Move Patient Charts to allow a user to move a patient's chart from one program to another.
- File Transfer Portal
- Check the box for any of the following to give access to the folder in File Transfer Portal under Day-to-Day.
- Billing Folder
- Reporting Folder
- PAS Submission Folder
- PHI Folder
- Check the box for any of the following to give access to the folder in File Transfer Portal under Day-to-Day.
- Blocked User
- Posting
- Check the box for Ledger to give access to the Patient Ledger showing all transactions for a patient.
- Check the box for Allow Adjustments to give access to right-click on an item within the ledger and add an adjustment.
- Check the box for Auto-Posting to give access to auto-post remittances.
- Check the box for Payments to give access to the Payments screen to apply payments.
- See Posting Payments: Payments History Tab and Posting Payments: Writeoffs History Tab for more information.
- Check the box for Patient Receipts to give access to Print Patient Receipts.
- Check the box for Ledger to give access to the Patient Ledger showing all transactions for a patient.
- Libraries
- Check the box for Progress Note Library to give access to the Progress Note Library to manage/add the Progress Note template available to this user to choose from when writing Progress Notes.
- Check the box for Common Progress Note Library to give access to manage/add Progress Note templates available to all users when writing Progress Notes.
- Check the box for Goal/Objective Library to give access to manage/add goals in the Goal/Objective Library available to this user when choosing goals/objectives in Progress Notes.
- Check the box for Common Goal/Objective Library to give access to update goals/objective templates available to all users.
- Check the box for Progress Note Library to give access to the Progress Note Library to manage/add the Progress Note template available to this user to choose from when writing Progress Notes.
- Forms
- Check the box for Allow Unsigning to allow a user to unsign signed forms.
- Check the box for Edit Form Help Notes to allow a user to edit help notes that are available while completing forms.
- Check the box for Employee Assistance Program to give access to the these settings.
- For each of the following tabs, check the box for View and/or Edit to give access to view or edit the tab in Employee Assistance Program.
- Company
- Communication
- Profile
- Services
- Contract
- Detailed Contract
- For each of the following tabs, check the box for View and/or Edit to give access to view or edit the tab in Employee Assistance Program.
Chart Status Tab
- Check the box for Set Explicit Chart Status Permissions for this Access Level to have to the remaining options appear.
- When explicit permissions are set, a user with this access level is only allowed to perform the chart status transitions that are checked in the diagram below.
- In the Program drop-down menu, select All Programs or a specific program where the user with this access level can perform chart status transitions.
- Check the boxes for the Chart Status Transitions the user can perform.
- Click Save.
NOTE: If you are specifying transitions for multiple, specific programs, you have to click save before you move to the next program otherwise your specifications will be lost.
In the example below, this user would only be able to transition a patient from Admitted to Discharged and Discharged to Admitted in all programs.
Form Tab
- Check the box for Select All to grant complete access to all forms in the form library to this role.
- Check the box for Un-Select All to remove access to all forms in the form library from this role.
- In the Form Permissions section, you can apply any of the below specific access to specific forms in the form library to this role.
- View
- Add/Edit
- Void
IMPORTANT: When choosing specific forms, make sure all forms listed in the chart(s) are select as desired, to ensure the user will have any access to all the forms in the chart(s).
Initial Preferences Tab
- Check the box for any of the following to display on My Client List:
- Show All Referrals
- Show Only My Clients
- Show Details On Scheduled Today
- Additional details of scheduled appointment, such as Appointment Type & Status.
- Under Order By, select the radio button to choose the default sort order for the My Client List.
- Program
- Client
- Scheduled Today
- Clinician
- Unit
- Location
- Under On Login, select the options to determine how eCR loads upon login.
- Start eCR Full Screen
- Show My Client List
- Show Alerts
- Expand Main Menu Items
- Day-to-Day
- Reports
- Administration
- Help
- Current User
- Hide Main Menu Items
- Day-To-Day
- Reports
- Administration
- Under Alert Manager, select the options for when an email will be sent to the user when the specific alert is created.
- Send me emails for Form and Date alerts
- Send me email for Route To alerts
- Send me emails for Auth alerts
- Org Chart
- Check the box for Show Access Level to show a users' access level on the organizational chart.
- Client Charts
- Check the box for Display Expanded Chart to display all filled out forms on the left of the chart instead of collapsing older versions.
- Check the box for Display User Initials on Version Nodes to display the initials of the user who completed that version of the form on the chart.
- Check the box for Display User Name on Version Nodes to display the entire name of the user who completed that version of the form on the chart.
- Check the box for Message when Saving Forms on Print/Preview, so that once the form is saved, it will open and allow you to edit its content. Then when finished, will allow you to select the Preview button and see how the form will look or you can print a sample using the Print button.
- Check the box for Auto Save on Tab Change so that any information entered or selected within a form will be saved when the user goes from tab to tab.
- Patient Form List
- Check the box for Show Versions to display all completed versions of a form.
- Check the box for Show Forms, Hide Versions to display completed forms and hide versions of the forms.
- Check the box for Show Sections, Hide Forms to show sections of the chart and hide the completed forms.
- Customize Dashboard Menu
- Check the box for Restore Clinical Defaults to restore all Clinical Defaults to previous settings.
- Check the box for Restore Billing Defaults to restore all Billing Defaults to previous settings.
- Under My Menu, you'll see your customized dashboard menu. You can drag the items from the Available Menu Items column to the My Menu column to customize your dashboard menu.