

PERMISSIONS REQUIRED: You must have Administration Permissions or higher or Can use bulk edit appointments permission enabled to use this feature. You must have Can delete client appointments permission checked as well to bulk delete appointments.
You can edit appointments that are still in an Upcoming status in bulk. You can change the locations of appointments, update them to a Canceled Status or Delete them in Bulk. If an Invoice or a Signed Progress Note is already attached to an appointment, then you will not be able to select it for bulk edits. If you have “Alert me when someone else changes a calendar event” and/or “Email me when someone else changes my schedule” enabled under your preferences, you will also get the appropriate alerts/emails if these changes take place from the Bulk Edit Appointments page. Activity logs will also be created for actions taken on this page.
NOTE: If you have appointments that are part of a recurring series these will be indicated by a clock symbol . You will only be making changes to the individual occurrences that you select within the bulk edit page even if they are part of a series. If you want to make changes to the entire series, click on the link for one of these appointments, then click on Edit Series. Appointments that are part of a recurring series are not available to bulk edit past 60 days in the future.
Jump to Section:
Bulk Edit Appointment Location
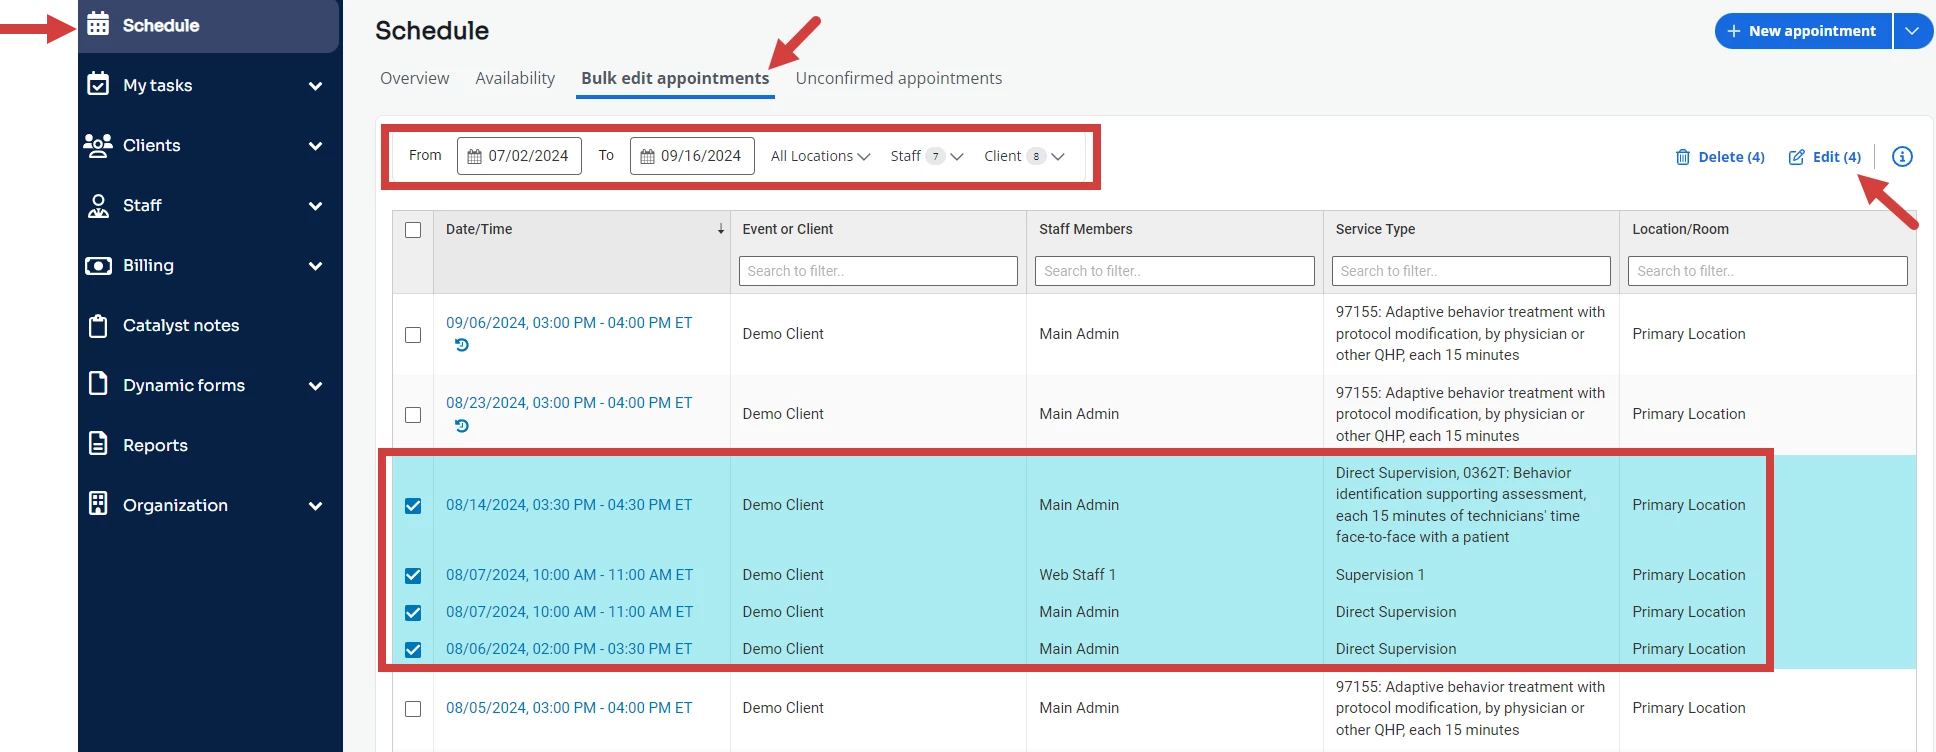
- Click Schedule in the navigation bar.
- Click Bulk Edit Appointments.
- Select the Date Range and the original Location and Room (if applicable) for appointments that you want to change.
- You can also filter by Staff and Client.
- Your filtered results will show in the grid. Select the appointments you want to edit for the Location.
NOTE: You can only bulk edit the locations for the selected appointments if all selected appointments have the same location.
- Click Edit.
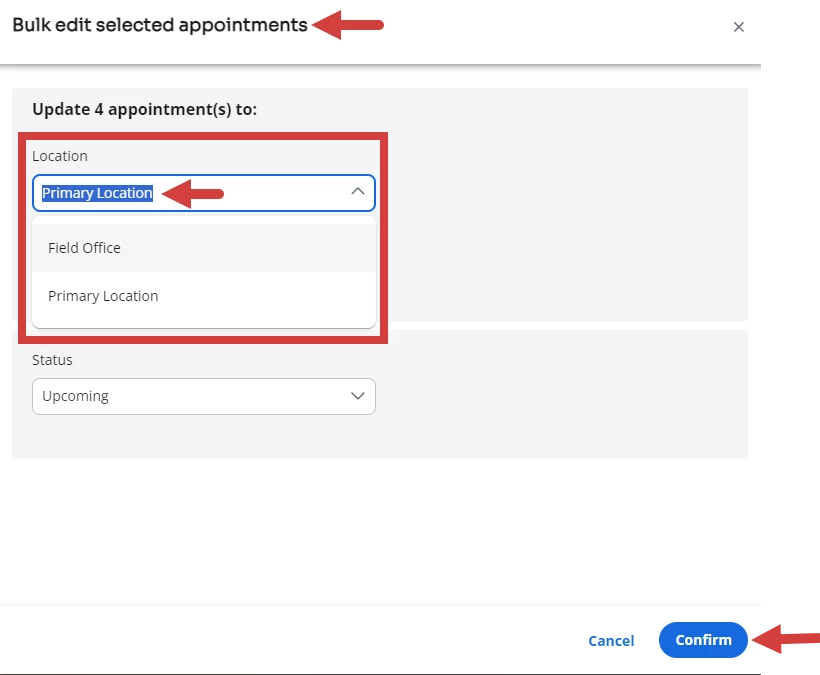
- The original location/room of the appointments will display. Select the new location to apply to the appointments. Also select the room for the new location if applicable.
- Click Confirm.
- A message displays to confirm changes were successful or show any conflicts you need to address before the changes are made.
NOTE: If Advanced Availability is enabled, you will get a warning message to let you know when a location change for specified dates conflicts with the staff member's availability. See Schedule Appointment with Advanced Availability for more information.

Bulk Edit Appointment Status to Canceled
- Click Schedule in the navigation bar.
- Select Bulk Edit Appointments.
- Select the Date Range, Location/Rooms, Staff, and/or Client Appointments you want to mark as canceled.
- Your filtered results will show in the grid below. Select the appointments you want to update to the status of Canceled.
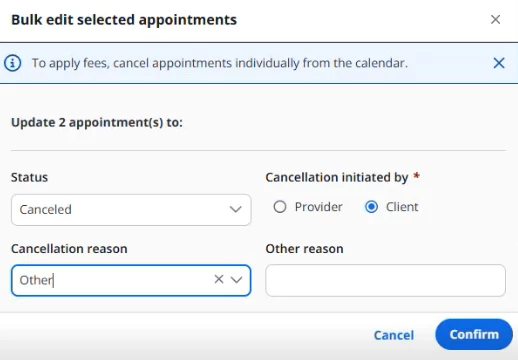
NOTE: If you would like to apply cancellation fees, individually cancel the appointments from the calendar.
- Click Edit.

- Update the Status drop down from Upcoming to Canceled.
- Select if the cancellation(s) were initiated by the Provider or the Client.
- Select a Reason from the pre-defined options or select Other and input Cancellation Reason.
NOTE: The cancellation reason will appear the same on all appointments that are bulk canceled.
- Click Confirm.
- A message displays to confirm changes were successful or show any conflicts you need to address before the changes are made.
NOTE: If you cancel any direct appointments that have a supervision appointment tied to them, the supervision appointment will also be marked as canceled.

Bulk Delete Appointments
- Click Schedule in the navigation bar.
- Select Bulk Edit Appointments.
- Select the Date Range, Location/Rooms, Staff, and/or Client appointments that you want to delete.
- Your filtered results will show in the grid below. Select the appointments that you want to delete.
- Click Delete.

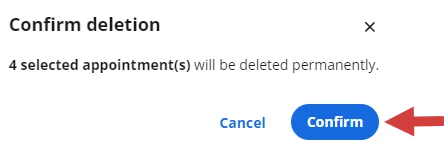
- Click Confirm on the confirmation window.
- You will receive a message if your bulk changes were successful or if any conflicts arise that should be addressed first before the changes will be made.
NOTE: If you attempt to delete a direct appointment that is tied to a supervision appointment that is not also being deleted you will either need to also delete the supervision appointment or reschedule the overlapping supervision appointment(s).
