

Jump to Section:
Overview
Learn how to use the integrated Electronic Client Payment tool and how to save client payment options for future client payments. This article is for agencies that are partnering with Stripe.
Assign Permission
A Champion needs to assign permissions by editing the applicable roles. If you are not familiar with editing staff roles, please review this support article: Change Permissions (Edit a Role).
Payment Options
Initiate Electronic Client Payments in the following modules:
- Clients module
- Appointments module
- Payments module
Options to process an electronic client payment:
- One-Time Payment
- Add a new card, process a payment on that card and save the card for future use
- Process a payment with a previously stored card
Process a One-time Payment
- Go to the Payments Module.
- Using the filters or search option, locate & select the client.
- Click Add.
- A New Payment window will open.

- A New Payment window will open.
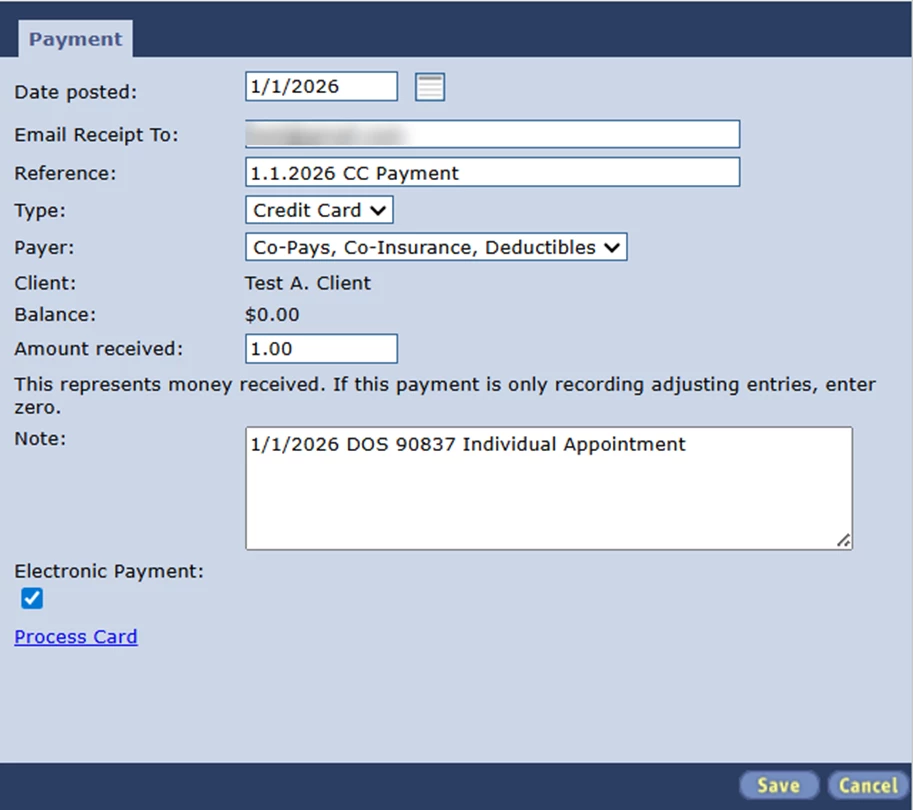
- Enter or select an option for the following fields:
| Date Posted | Today's date |
| Email Receipt To | Enter the email address the client would want the payment receipt emailed to |
| Reference | A unique reference helps differentiate payments in reporting - one option is to use the date, client # and type (i.e., 1.1.2026 1000 CC). |
| Type | How the client is paying - credit card, cash, or check. |
| Payer | Make sure Co-Pays, Co-Insurance, Deductibles is selected. |
| Amount Received | Enter the amount of the payment being processed. (Must be the full dollar amount i.e., $10.00 instead of $10) |
| Note | Optional - one option would be to type the service code or appointment that is associated to this payment (i.e., 1/1/2026 DOS 90837). |
| Electronic Payment | Make sure the box is checked. |
- Click Process Card.
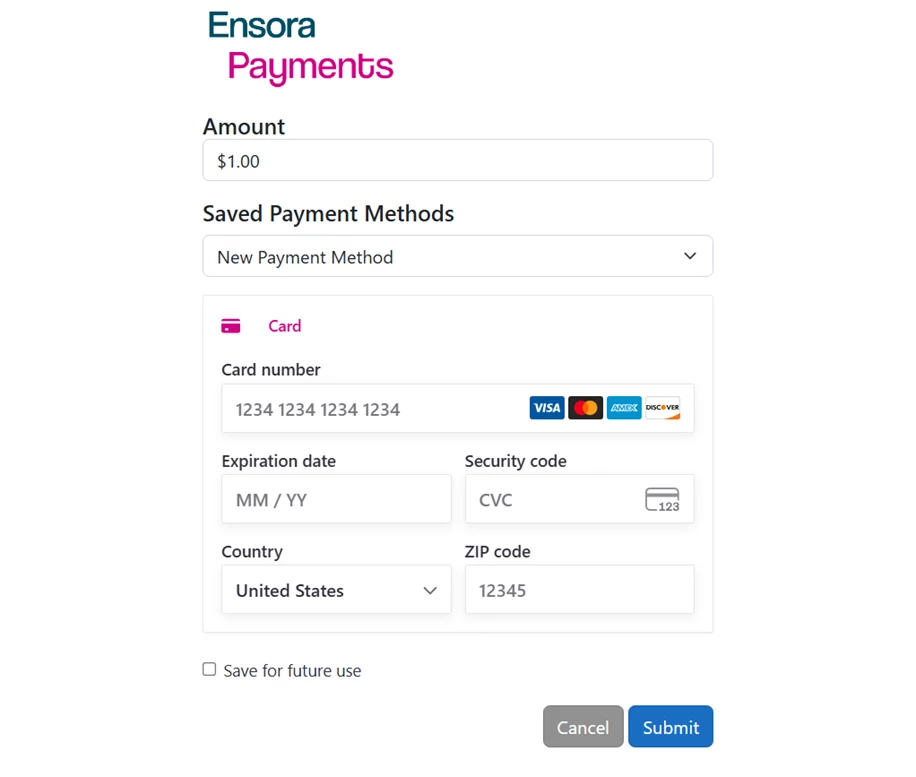
- The Payment Processing window will open.

- The Payment Processing window will open.
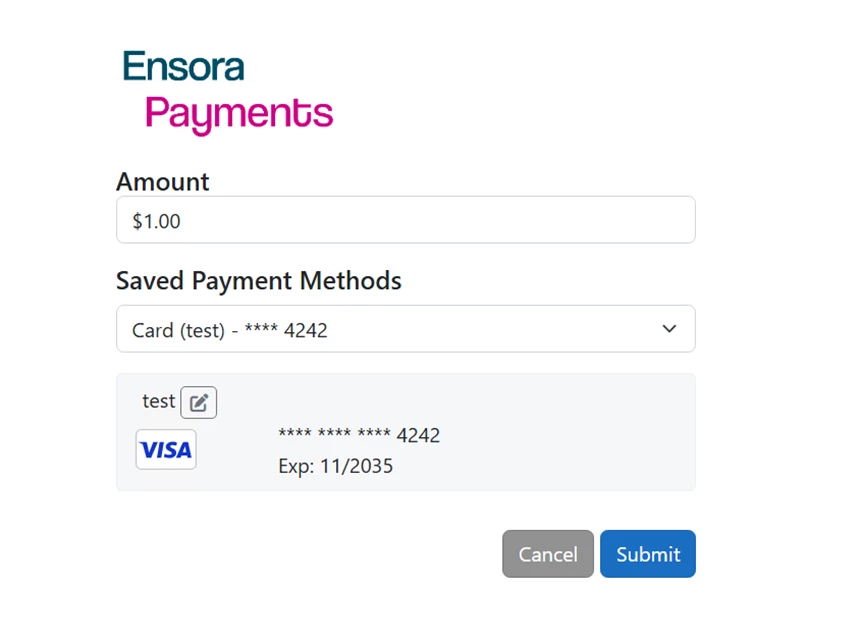
- Verify the Amount and enter all required fields (*).
- Click Submit and wait for the confirmation message that payment was successfully processed.
IMPORTANT: Please allow the system to complete the payment process before exiting the New Payment window. Generally, a success or failure response is promptly displayed but the processing could take up to a minute or two.
- If you experience a significant delay in receiving the Payment Successful or Payment Failed message, check that the window isn't open and hidden behind other open windows on your computer or device.
- A Payment Successful message should appear:
-
If a payment cannot be processed, a Payment Failed message displays with the reason and response text received from the payment processor:
- Click Close.
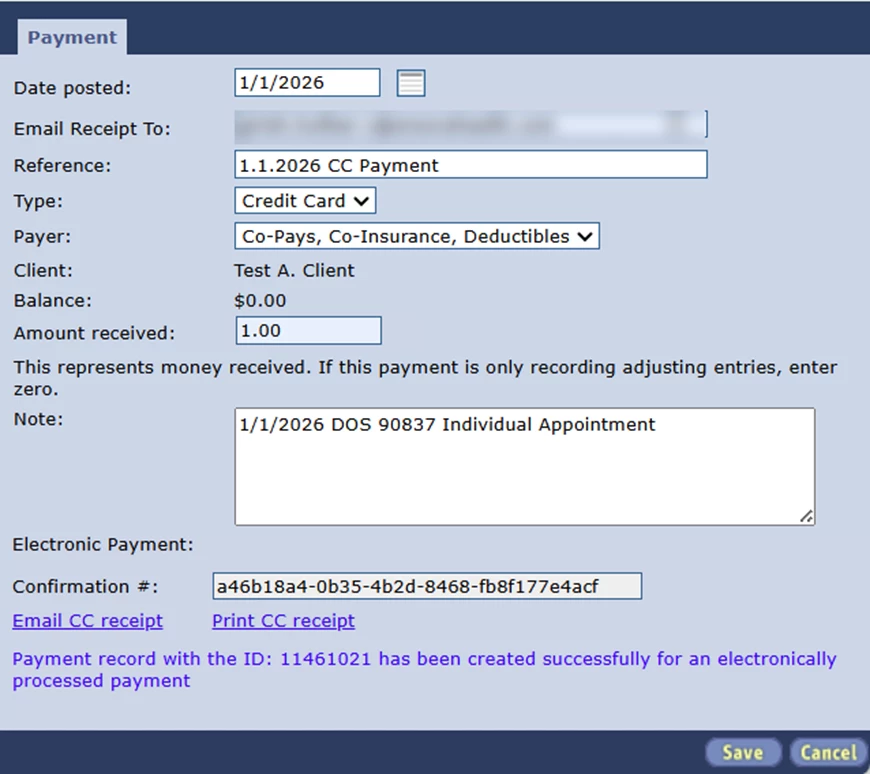
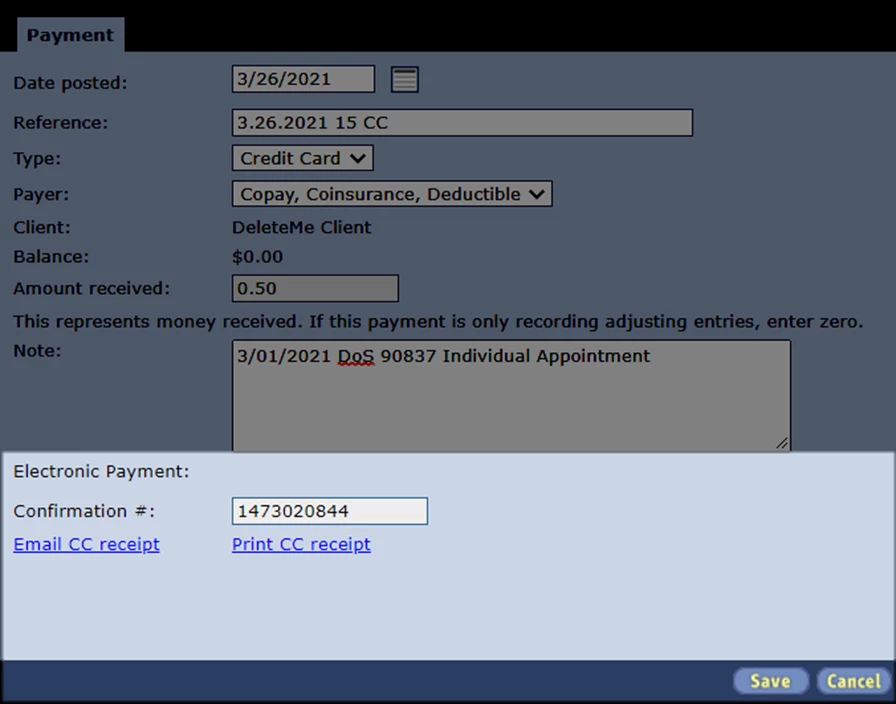
- The Payment Window should be open still, but now display a Confirmation #.
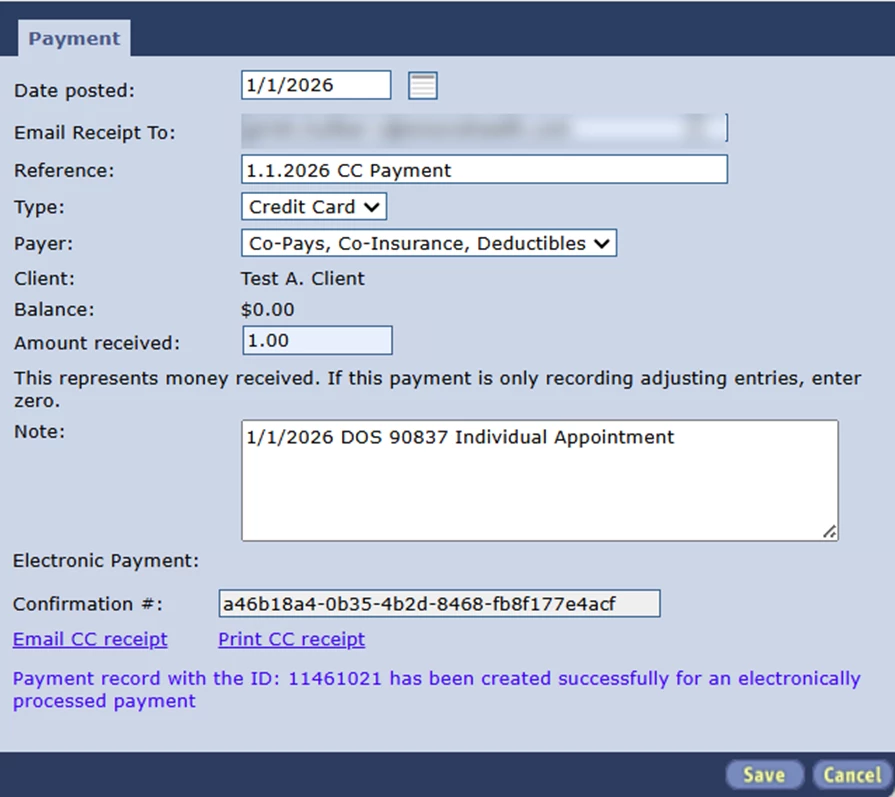
- The Payment Window should be open still, but now display a Confirmation #.
- Click Save.
- Click Email CC receipt or Print CC receipt to provide a receipt to the client.
- The Email CC receipt link will send a copy to the email in the client's file.
- Click Email CC receipt or Print CC receipt to provide a receipt to the client.
IMPORTANT: Clicking Save is required to store the record of the payment in the system.
Add a New Card, Process a Payment, and Save the Card for Future Use
IMPORTANT: When a payment card is saved for future use, it becomes accessible to all associated parties, including the client, client representative, and agency staff. This means any of these parties can:
- Charge the saved card for future transactions
- Manage or update the saved payment method
This applies whether the card is saved by the client, client representative through the portal, or by agency staff in the system. If you do not want a card to be accessible to one or more of these parties, do not select the option to save the card for future use.
- Go to the Payments module.
- Using the filters or search option, locate & select the client.
- Click Add.
- A New Payment window will open.

- A New Payment window will open.
- Enter or select an option for the following fields:
Date Posted Today's date Email Receipt To Enter the email address the client would want the payment receipt emailed to Reference A unique reference helps differentiate payments in reporting - one option is to use the date, client # and type (i.e., 1.1.2026 1000 CC). Type How the client is paying - credit card, cash, or check. Payer Make sure Co-Pays, Co-Insurance, Deductibles is selected. Amount Received Enter the amount of the payment being processed. (Must be the full dollar amount i.e., $10.00 instead of $10) Note Optional - one option would be to type the service code or appointment that is associated to this payment - i.e., 1/1/2026 DOS 90837. Electronic Payment Make sure the box is checked. Choose Card Select New Payment Method. New Card Name Enter the type of credit card (i.e., Visa) and client number. - Click Process Card.
- The Payment Processing window will open.
- The Payment Processing window will open.
- Verify the Amount and enter all required fields (*).
- Ensure the Saved Payment Methods dropdown field has “New Payment Method” selected.
- Check the Save for future checkbox.
- A field will appear below the checkbox.

- A field will appear below the checkbox.
- Enter the name of the card to save it for future use.
- Click Submit and wait for the confirmation message that payment was successfully processed.
IMPORTANT: Please allow the system to complete the payment process before exiting the New Payment window. Generally, a success or failure response is promptly displayed but the processing could take up to a minute or two.
- If you experience a significant delay in receiving the success confirmation or payment failed message, check that the message hasn't opened and is hidden behind other open windows on your computer or device.
- A Payment Successful message should appear:
- If a payment cannot be processed, a Payment Failed message displays with the reason and response text received from the payment processor.
- Click Close.
- The Payment Window should be open still, but now display a Confirmation #.
- The Payment Window should be open still, but now display a Confirmation #.
- Click Save.
- Click Email CC receipt or Print CC receipt to provide a receipt to the client.
- The Email CC receipt link will send a copy to the email in the client's file.
- Click Email CC receipt or Print CC receipt to provide a receipt to the client.
IMPORTANT: Clicking Save is required to store the record of the payment in the system.
Process a Payment with a Previously Stored Card
- Go to the Payments Module.
- Using the filters or search option, locate & select the client.
- Click Add.
- A New Payment window will open.
- A New Payment window will open.
- Enter or select an option for the following fields:
Date Posted Today's date Email Receipt To Enter the email address the client would want the payment receipt emailed to Reference A unique reference helps differentiate payments in reporting - one option is to use the date, client # and type (i.e., 1.1.2026 1000 CC). Type How the client is paying - credit card, cash, or check. Payer Make sure Co-Pays, Co-Insurance, Deductibles is selected. Amount Received Enter the amount of the payment being processed. (Must be the full dollar amount i.e., $10.00 instead of $10) Note Optional - one option would be to type the service code or appointment that is associated to this payment - i.e., 1/1/2026 DOS 90837. Electronic Payment Make sure the box is checked. Choose Card Select the name of the stored card. -
Click Process Card.
-
The Payment Processing window will open.
-
- Verify the Amount and enter all * required fields.
- In the Saved Payment Methods dropdown field, select the desired card to use.
- Click Submit and wait for the confirmation message that payment was successfully processed.
IMPORTANT: Please allow the system to complete the payment process before exiting the New Payment window. Generally, a success or failure response is promptly displayed but the processing could take up to a minute or two.
- If you experience a significant delay in receiving the success confirmation or payment failed message, check that the message hasn't opened and is hidden behind other open windows on your computer or device.
- A Payment Successful message should appear:
- If a payment cannot be processed, a Payment Failed message displays with the reason and response text received from the payment processor:
- Click Close.
- The Payment Window should be open still, but now display a Confirmation #.
- The Payment Window should be open still, but now display a Confirmation #.
- Click Save.
- Click Email CC receipt or Print CC receipt to provide a receipt to the client.
- The Email CC receipt link will send a copy to the email in the client's file.
- Click Email CC receipt or Print CC receipt to provide a receipt to the client.
IMPORTANT: Clicking Save is required to store the record of the payment in the system.
Access the Payments Window
Clients Module
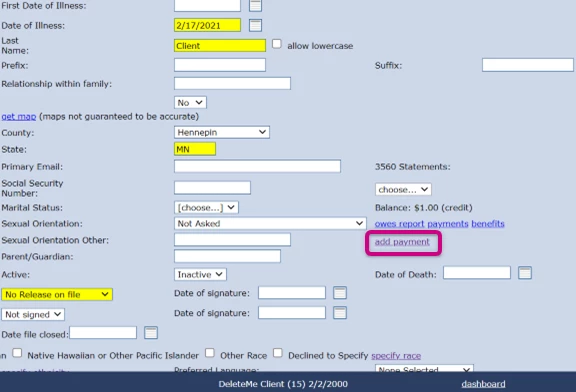
- Go to the Clients module.
- Double-click into a client.
- Click add payment.
Appointments Module
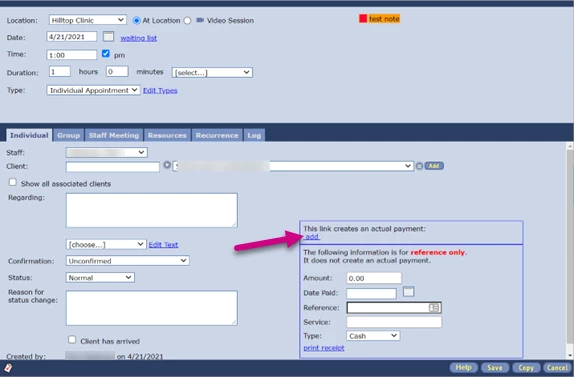
In the appointment:
- Go to the Appointments module.
- Double-click on an appointment.
- Click add.
In the Information Panel (on right-side):
- Go to the Appointments module.
- Click on an appointment.
- Click New Payment.
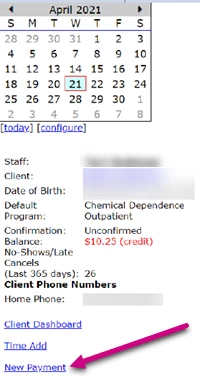
NOTE: See Configure Appointments Module Info Panel to learn how to configure your appointments side panel.