

PERMISSIONS REQUIRED: You must have Organization Administration Permissions.
When the Ensora Data Collection integration is enabled, Clients in the system are listed on the Client Setup tab page. Clients are automatically matched by the system or manually matched by the User. Client matches can then be edited and un-matched. See Ensora Data Collection Integration: Enable Integration for more information.
Jump to Section:
Automatic Match
The system automatically matches Clients based on the Client's first name, last name and date of birth.
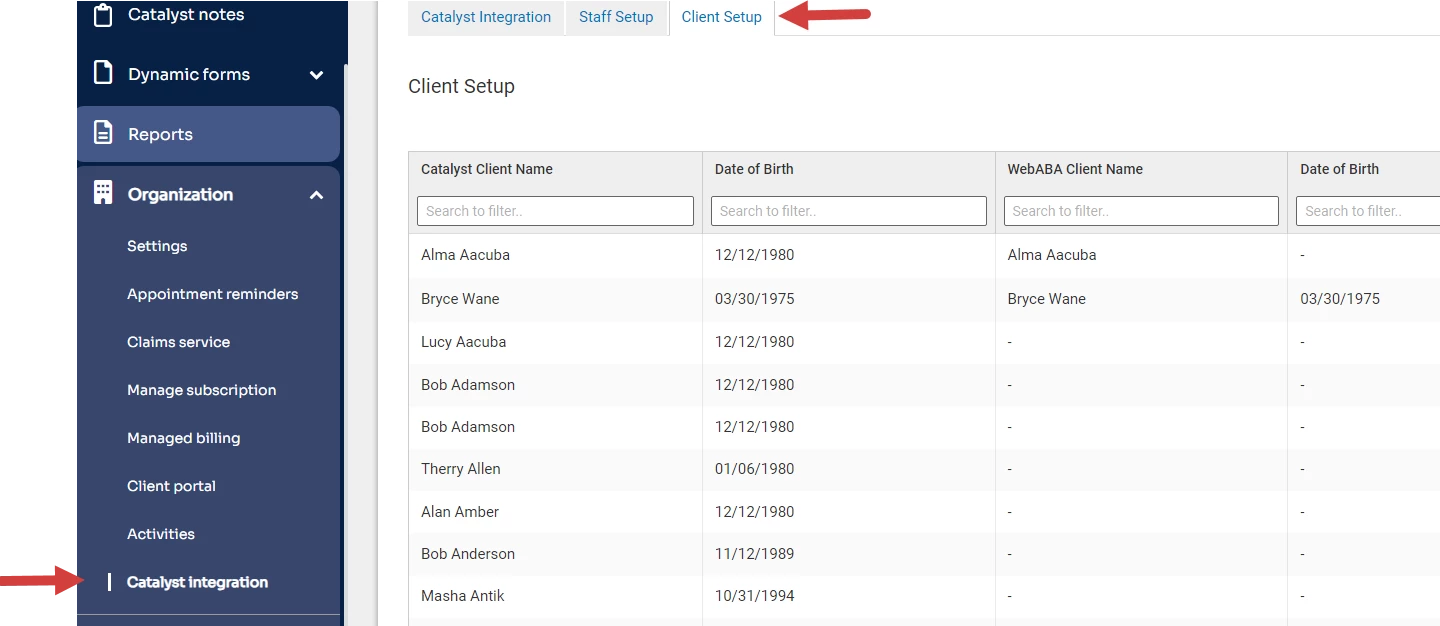
- Click Organization tab in primary navigation bar.
- Click Ensora Data Collection Integration in side menu.
- Click Client Setup tab.
- All Client's display to be matched.
Manual Match
The system does not automatically match Clients if the Clients' information is different in each system. If the system does not auto-match a Client, users can manually match Ensora Data Collection Clients to existing Clients.
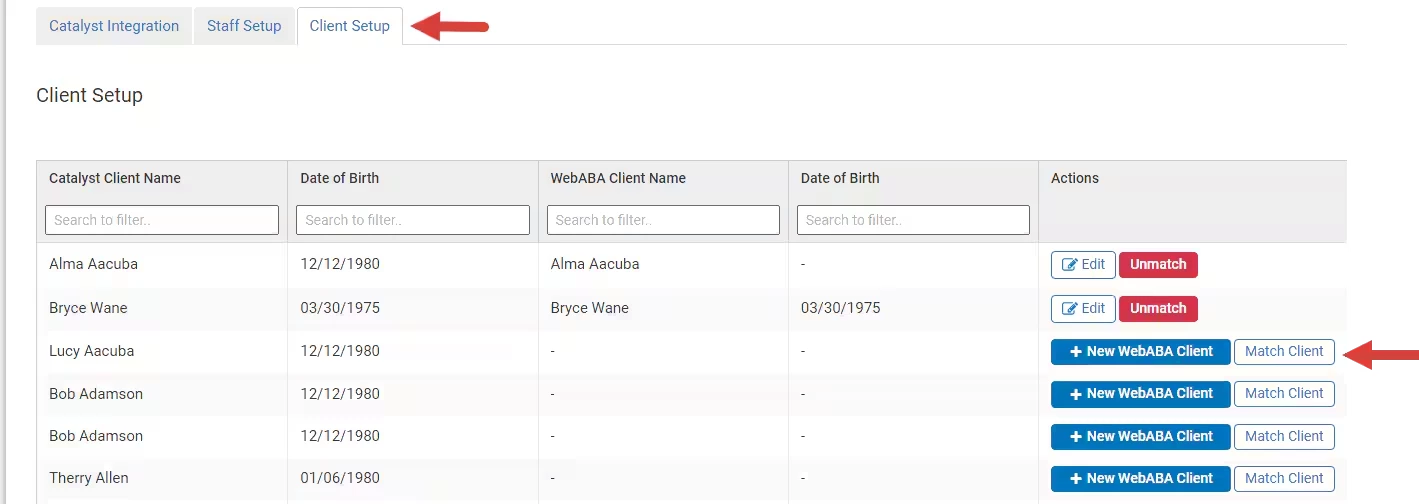
- Click Client Setup tab.
- Click Match Client button for appropriate Client.
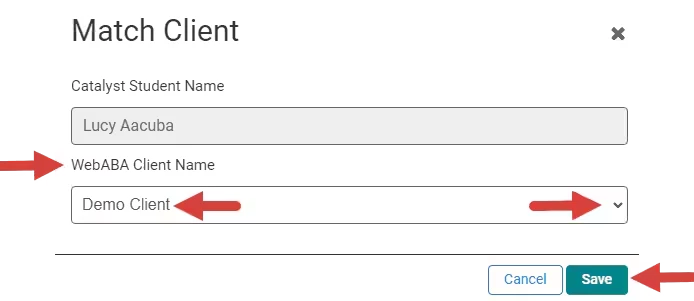
- Click Client Name dropdown and select appropriate Client.
- Click Save.
Create New Client to Match
If the Ensora Data Collection Client you are trying to match doesn't already exist in the system, you can create the Client and then match them.
- Click Client Setup tab.
- Click +New Client button for appropriate Client.
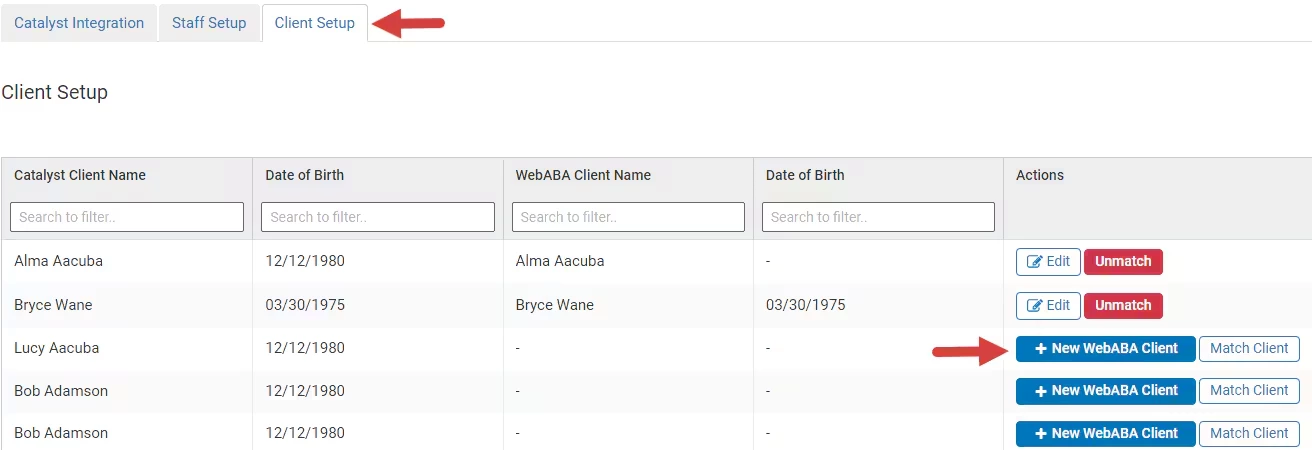
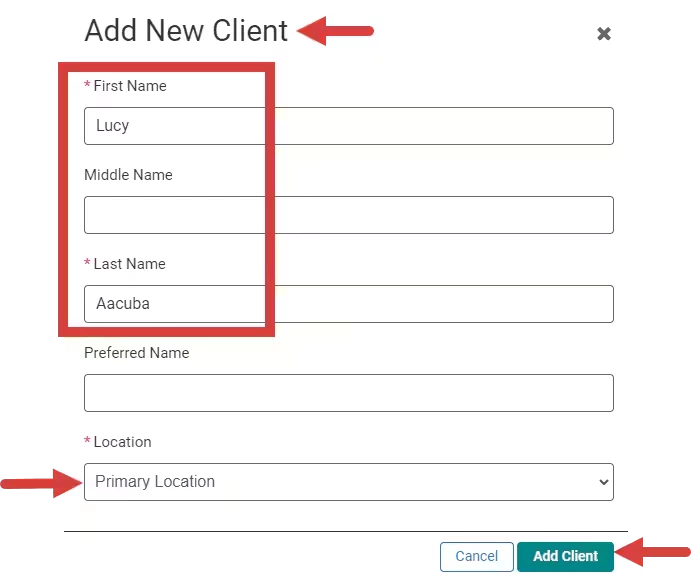
- The Client First and Last Name will auto-populate in the Add New Client window to match the Ensora Data Collection Client information. You can manually change these fields as needed.
- Select Client Location.
- Click Add Client button.
- The Client will move to the matched section of the list.
Edit Client
After a match is made, you can edit it or completely un-match the Client profiles if needed.
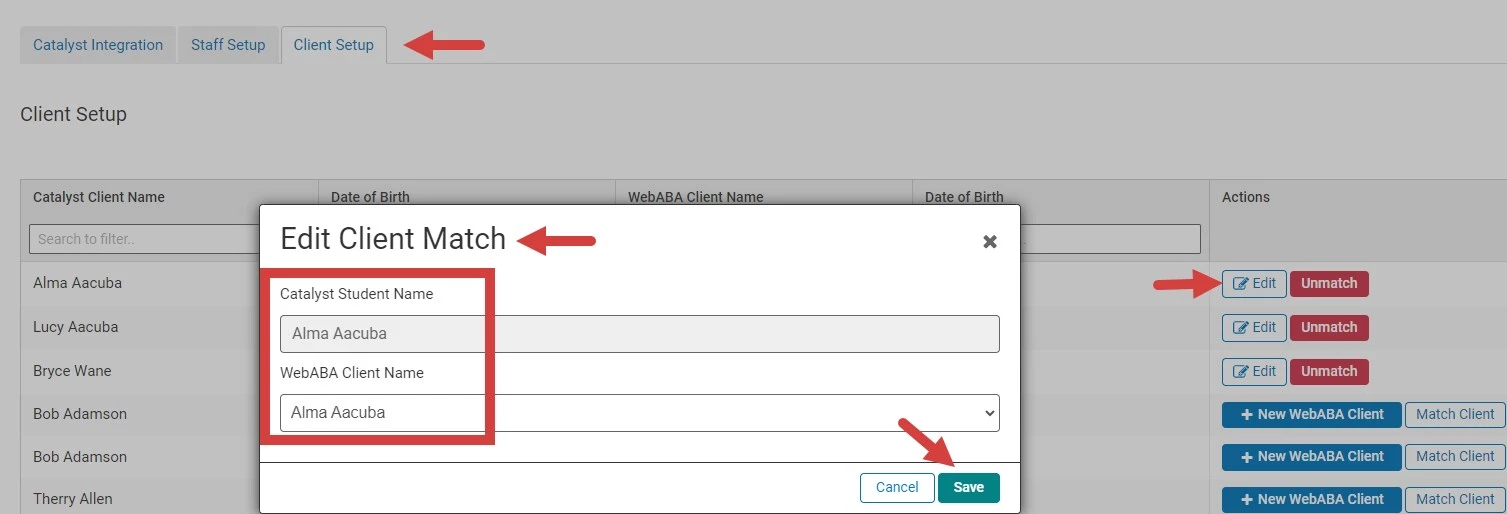
- Click Client Setup tab.
- Click Edit button and make necessary changes.
- Click Save.
Unmatch Client
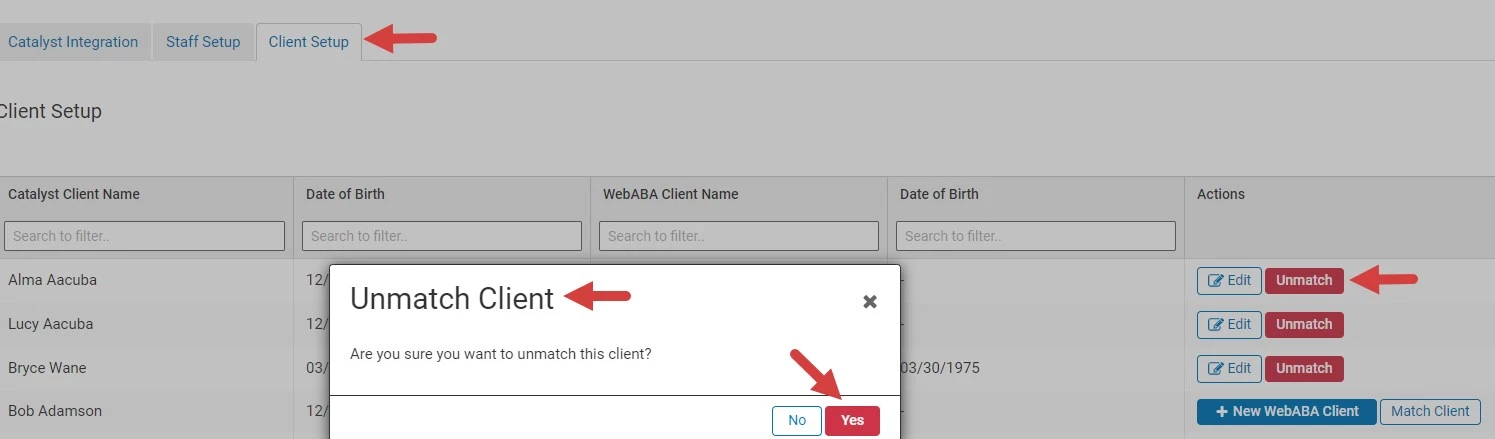
- Click Client Setup tab.
- Click Un-match.
- Confirm that you would like to un-match the Clients.