
PERMISSIONS REQUIRED: Organization Administration Permissions.
Move from thera-LINK to TheraNest to run your Telehealth sessions.
Jump to Section:
Start Your Trial
IMPORTANT: You will receive confirmation that your billing information has been received.
To start your trial and have your discounts applied:
- See Start Your Free Trial for more information.
- Complete the sign-up form.
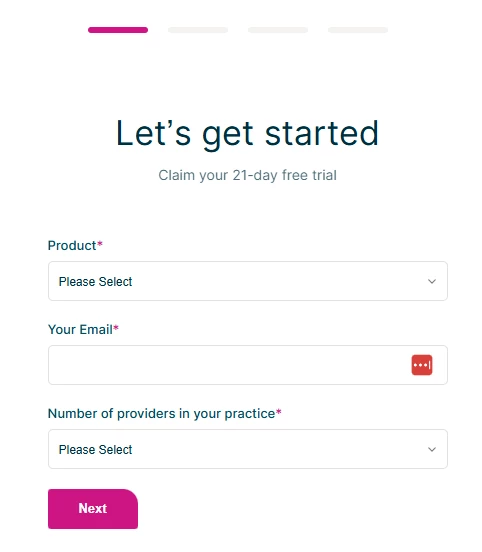
- Click Next.
- You are logged in and taken to the Schedule page.
- Close any pop-up windows displayed.
- Check your email and confirm your email address.
- Once confirmed, the red banner at the top of the page will no longer display.
Enter Payment Information
IMPORTANT: To receive discounts enter your payment information prior to subscribing.
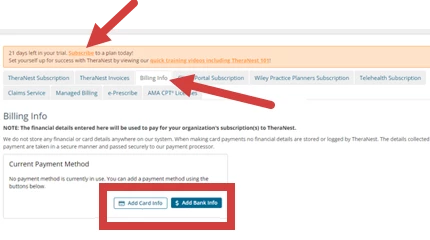
- Click Subscribe in the yellow banner at the top of the page.
- Select Billing Info Subscription page.
NOTE: Submit your billing information before you select a subscription and wait for confirmation to receive your discount.
- Select either Add Card Info (to pay via debit or credit card) or Add Bank Info (to pay via direct withdrawal from your bank).
- Complete the requested information and submit.
IMPORTANT: After completing billing setup, submit a help request to let us know you have completed this process. We will apply your discount and reply via the help ticket and email to let you know the discount has been applied.
Once the discount is applied to your account you will receive an email notification and your help request will be updated and closed. - Click Help button on the bottom right of your screen.
- In the Type your question here box, confirm the following:
-
- that you are moving from thera-LINK to TheraNest
- that you have entered your Billing Info
- your thera-LINK email address
- the email address used for your account
Organization Settings
See Set up your Organization Profile for more information.
- Login to the system.
NOTE: he URL will be the first part of your email address followed by .theranest.com by default. If your email is myemail@mail.com your default TheraNest login page would be at myemail.theranest.com. You can also login using this link.
-
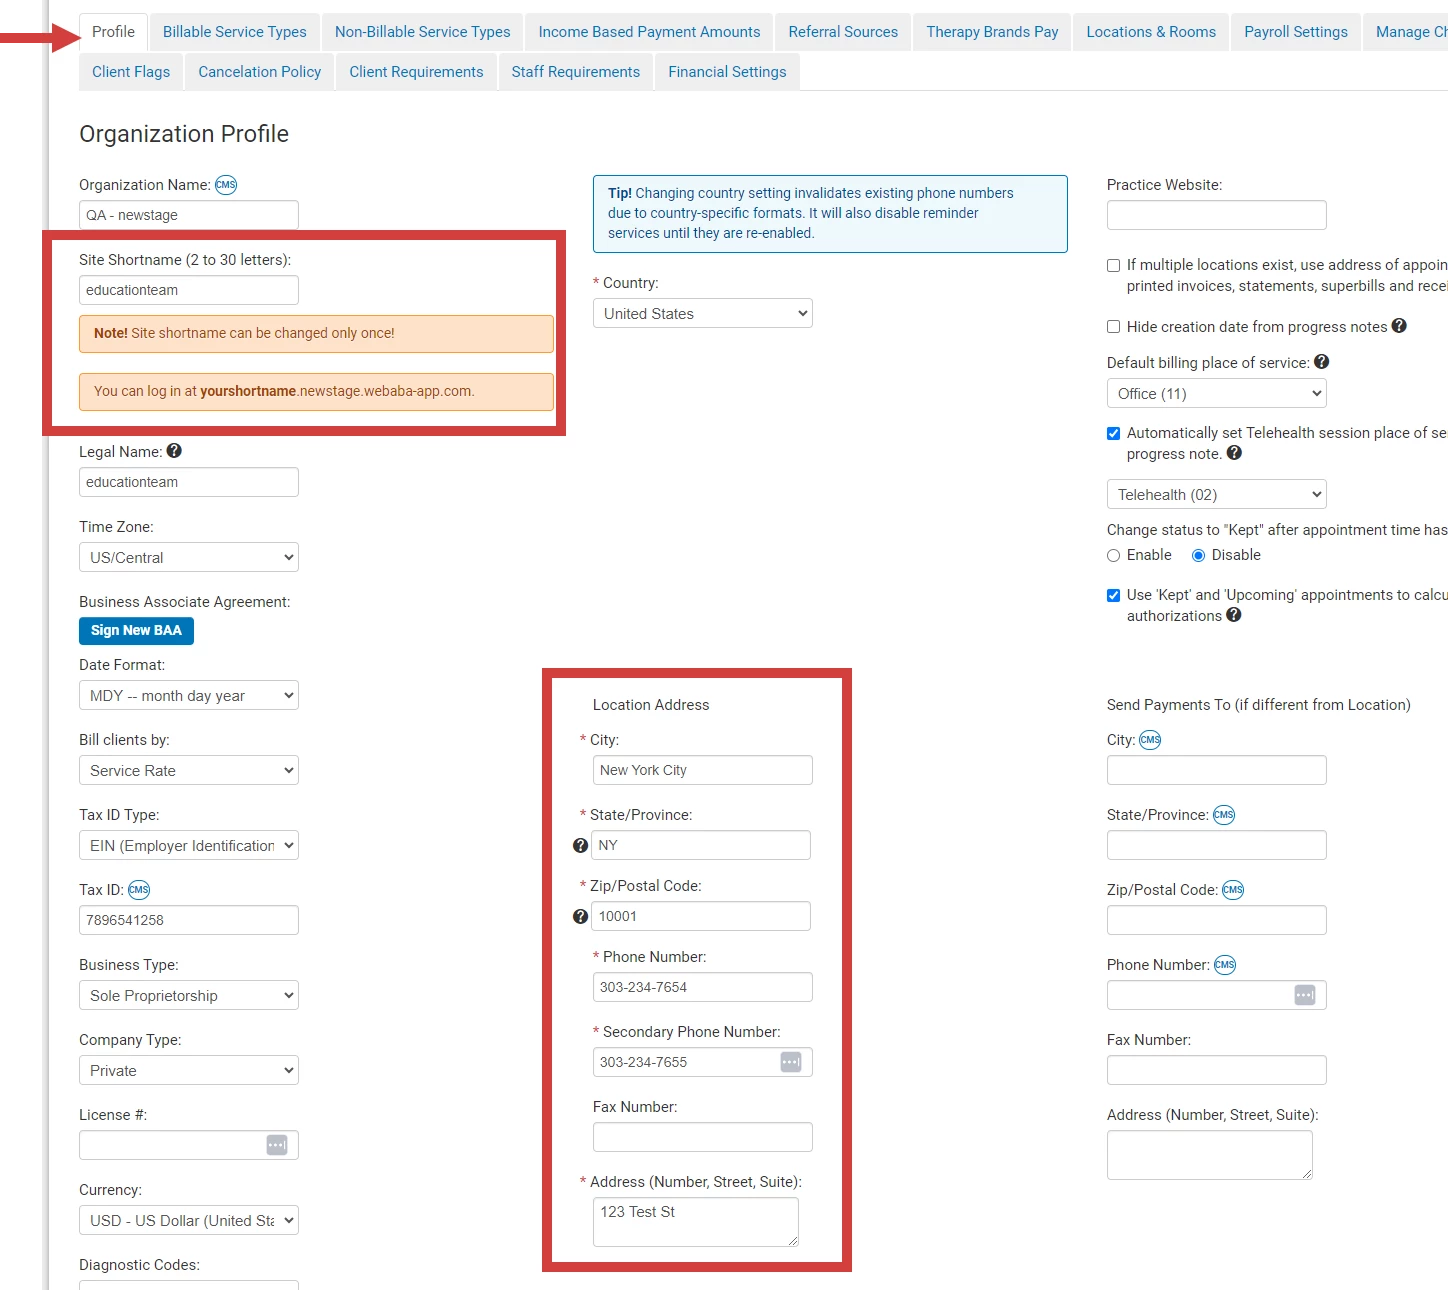
Enter Organization Name. It will be displayed at the top of the page.
- Enter Site Shortname.
IMPORTANT: This will become the start of the URL for your page. What is entered here is added to .theranest.com to create your URL.
You cannot change your shortname after saving changes and this box will not appear again.
- State/Province - two letter abbreviation
- Phone Number
- Secondary Phone Number
- Address (Number, Street, Suite)Enter your Location Address which includes the following required fields
Add Staff
Add staff to the system by sending an email invitation, adding them manually or importing them into the system. See these articles for more information on how to manage staff.
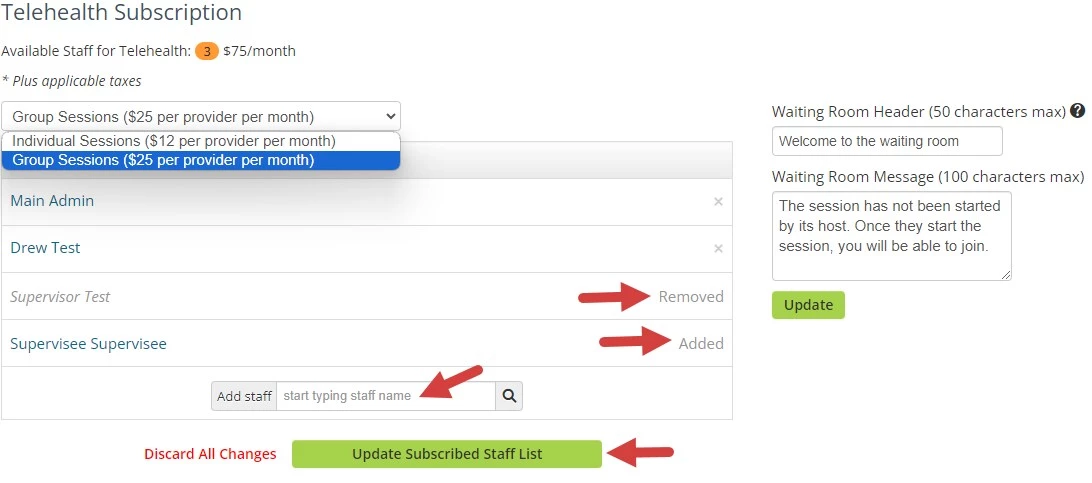
Add Telehealth Subscriptions
Add a Telehealth subscription for each staff member who uses telehealth. Choose an Individual or Group plan.
NOTE: When you choose a plan it will be for all providers. You cannot have some providers on Individual and some on Group.
- Individual Telehealth Plan: one client per session, unlimited sessions per month.
- Group Telehealth Plan: Up to 20 participants per session, unlimited sessions per month.
- Go to Organization and click Manage Subscription on the side menu.
- Click the Telehealth Subscription tab.
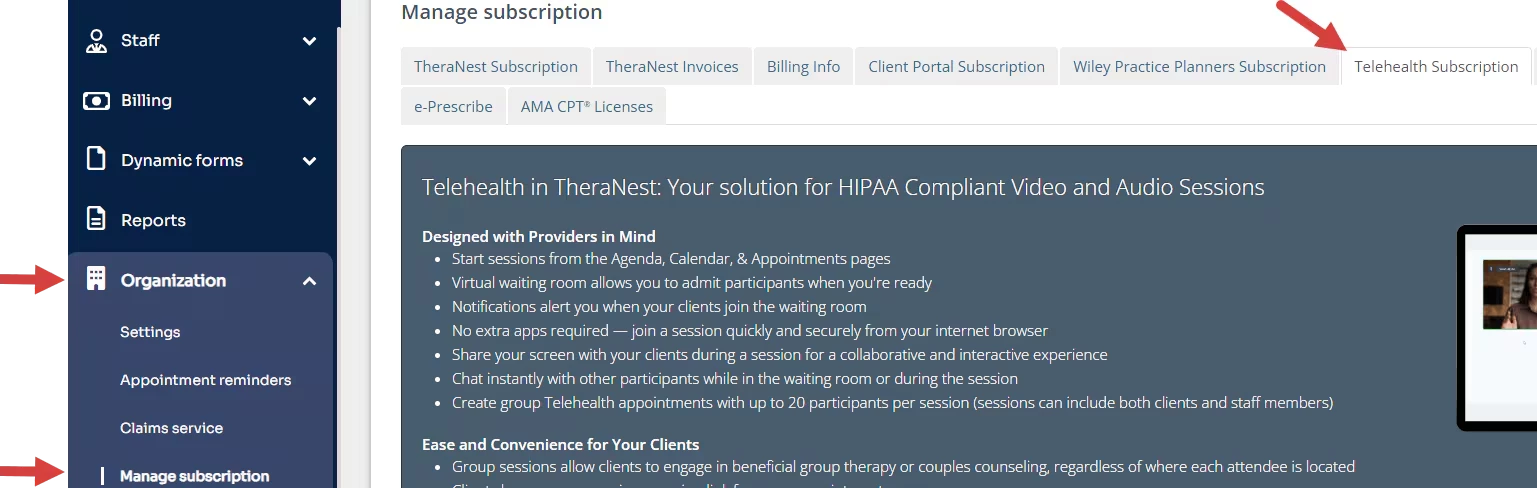
- Scroll down to Search for field and Add Staff in Active Telehealth Staff sections.
- The Staff Member will appear as Added.
- Click Update Subscribed Staff List button to complete process.
- A Confirmation screen will display.
- Click Update My Subscription.
Add Clients
Add Clients to the system by importing them into the system or adding them manually. See these articles for more information on how to manage clients.
Schedule & Start a Telehealth Session
Schedule Individual and Group telehealth appointments. See these articles for more information on how to manage telehealth appointments.