

Electronically send a prescription directly to a pharmacy. Electronically transmitted medications display with a Pill Bottle icon. See Medication Source Icons for more information.
- Enter the drug name in the Drug Name field from the Compose Rx tab, then click the Drug Search button. Enter the first four to five letters of the drug brand or ingredient name to return the best results.

NOTE: Filter checkboxes are available below the Drug Search. These allow you to include obsolete drugs or to limit the search to ophthalmic drugs.
- Search results display. If there are many results, each category of drug will be minimized by default.
Click on the Drug Name to expand the category and show the specific formulations. - Select the Preferred Formulation to open the Sig Builder.
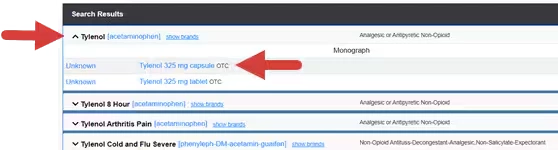
NOTE: You can modify your search results or view additional drug information from the Search Results window
- Click Show Brands to display search results for other brands sharing the same active ingredient.
- Click Monograph to link to Lexicomp.
- Click on the Formulary Coverage link in the column on the left to review therapeutic alternatives.
- Click the Ingredient link to display the search results based on the ingredient name.
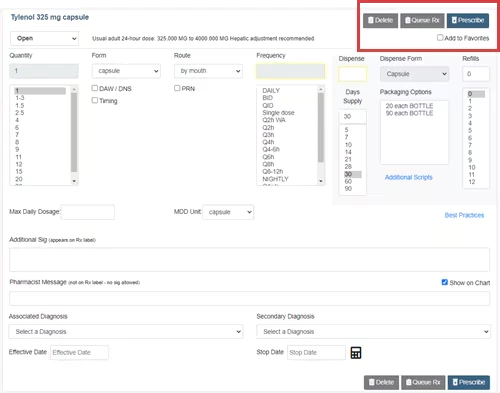
- Click the drop-down fields to populate the Sig Directions.
- Click the DAW/DNS checkbox to indicate the brand is medically necessary. (DAW/DNS is not an option for generic drugs.)
- Click the PRN checkbox to indicate the medication should be taken as needed. A drop-down list of commonly used reasons will appear below.
- Click the Timing checkbox to indicate administration timing. A drop-down list of commonly used timing options will appear below.
- Enter Maximum Daily Dosage and MDD Unit, if applicable. This will be displayed on RxDetails and Receipts and will be transmitted to the pharmacy.
NOTE: The Quantity and Frequency drop-downs may be customized in the Sig Builder Configuration section on the Admin tab. See Customize the Sig Builder for more information.
- Enter the Dispense Information.
- Packaging Options displays the different quantities and packages available.
- Changes to Days Supply will recalculate the Dispense Quantity.
- Refills may be limited or restricted if the drug is a Controlled Substance.
- Additional Scripts allows the Prescriber to quickly make multiple copies of the prescription for future dates. This is frequently used with a follow-up mail-order prescription or for scheduled drugs.
- The Best Practices link opens Electronic Prescribing Best Practices in the Knowledge Hub.
- Enter Additional Information as needed.
- Enter any Additional Sig directions or Pharmacist Messages.
- Select a Diagnosis from the drop-down list or click the Add Diagnosis link to add a new diagnosis.
- Enter an Effective Date and Stop Date.
- Click the Show in Chart checkbox to display the Pharmacist Message on the Compose Rx and Med Entry pages.
- After the Prescription is complete, click the Prescribe button. The Transmit page launches.
- Click the Add to Favorites checkbox under the Prescribe button to save a frequently used prescription to the Favorites List.
- Click the Queue Rx button to add the prescription to the Pending Rx list instead of transmitting it to the pharmacy.
- Click the Delete button to return to the Compose page and discard the prescription.
- Leaving without any selection will leave the script pending in its current state.
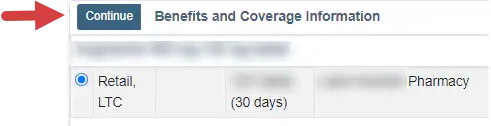
- Review Real Time Benefits, then click the Continue button.
- Review drug Interactions and Alerts if applicable. You can also Select a Drug Review Override Reason (optional). A long list of interactions may be minimized by clicking the expand/collapse toggle.

NOTE: Interactions and alerts can be managed by a doctor in the Clinical Options section of the Admin Tab.
- Review the Prescription Directions. This information will be sent to the pharmacy exactly as it is written here.
- The Effective Date of the prescription is shown on the left. This may be modified if you wish the prescription to not be filled until a later date.
- The Edit button opens the sig builder for the prescription.
- Review the selected Pharmacy, then click Transmit.
NOTE: To change the pharmacy for the prescription, click the pharmacy field in the pharmacy column, then select a new patient pharmacy.

NOTE: To transmit a scheduled drug, the prescriber must be registered for up for EPCS.