Okta is a third-party identity and access management system that controls access to different applications across the internet. Okta offers Single Sign On (SSO) and Multi-Factor Authentication (MFA) services which give an agency one place to enable or disable user access for all the apps used by the agency. The following sections detail the setup required for Okta to work with the EHR and can be performed once the Agency establishes an account with Okta directly.
Configure Okta
The instruction below must be performed by a user with admin privileges in the Okta account.
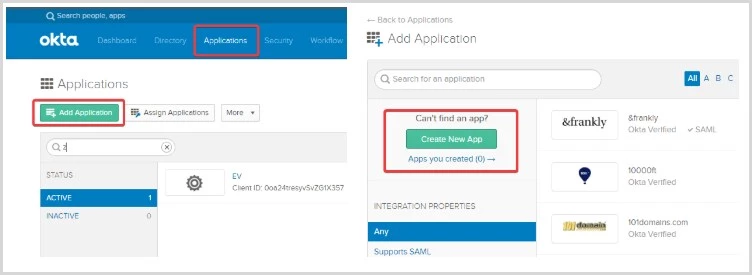
Step 1: Navigate to the Okta Admin page

Step 2: Navigate to Applications > Add Application > Create New App
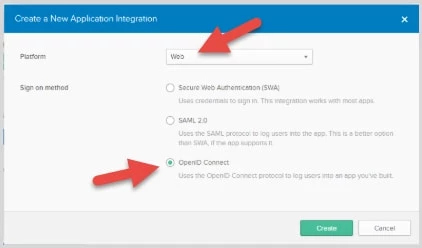
Step 3: Create a Web app using OpenID Connect
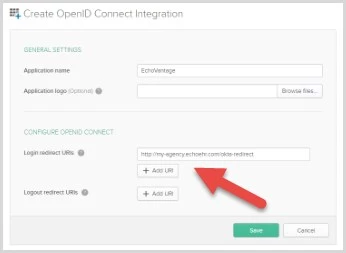
Step 4: Complete the app creation form and Save.
- Be sure to replace my-agency in the example below with the agency's EHR URL.
- Write this URL down. It will be needed in Step 11.
Step 5: Navigate to the General tab.

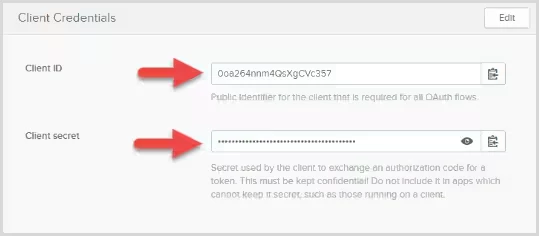
Step 6: Scroll to the bottom of the page and copy the Client ID and the Client Secret.
These will be needed in Step 11.
Step 7: Take note of the base Okta URL.
This is based on the URL that is currently in the Okta browser and should look similar to this:

- Only the first part of the URL (with -admin removed) is needed.
- For this example, the URL would be https://myagency.okta.com.
- This will be needed in Step 11.
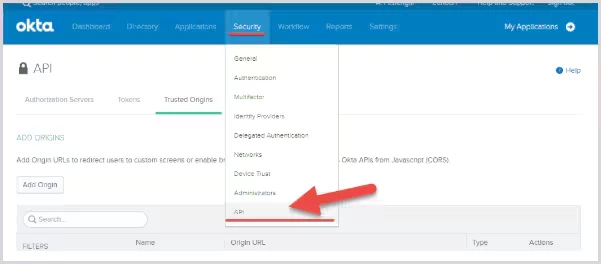
Step 8: Navigate to Security > API
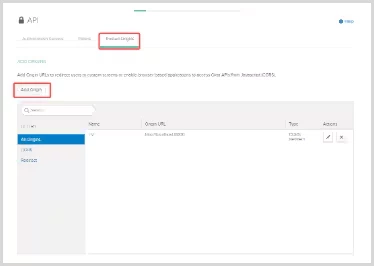
Step 9: Navigate to the Trusted Origins tab and click Add Origin
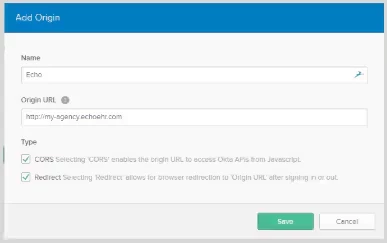
Step 10: Add the EHR URL as a trusted origin.
- Remember to change my agency to the agency's URL.
- Both the CORS and Redirect check boxes must be selected.
Step 11: The following information is needed to complete the Okta integration.
- Redirect URL (Step 4)
- Client ID (Step 6)
- Client Secret (Step 6)
- Base URL (Step 7)
Configure User Access
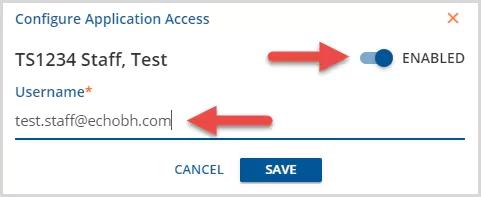
New and existing users must be configured so that their Application Access Username is the same as their Okta username to access EchoVantage via Okta. This can be done by:
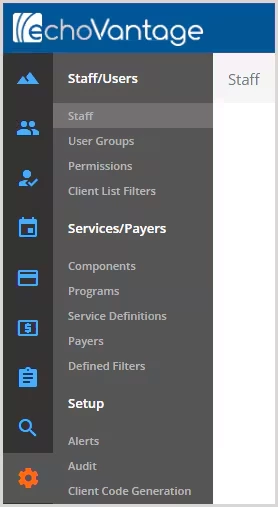
Step 1: Navigate to Configuration - Staff/Users > Staff
Step 2: Select the staff from the drop-down listing and click on the Application Access icon. For new staff proceed to Step 3 as this can be populated on the Add Staff screen.

Step 3: Slide the toggle to Enabled and set the Application Access Username to match that user's Okta Username.