
PERMISSIONS REQUIRED: Must have Organization Administrator Permissions or have Staff Permission - Can invite clients to the client portal and manage intake forms.
Organization Administrators can Invite Clients to the Client Portal from the Organization tab. After a Staff Member has been granted access in their Staff Permissions, they can invite the Client via Client Details. See Allow Staff to Invite Clients to the Client Portal for more information.
NOTE: You will not be able to use the same email address/Client Portal login for multiple Clients. This is to avoid HIPAA violations and to protect Patient Security.
Use the Allow client Signup on Client Portal setting to control how clients sign up for the client portal. If the setting is turned off, you will need to send and invite before the client can signup. See Client Portal Settings for Your Organization for more information.

Jump to Section:
Invite from Client Details
Only Staff who have been granted access can invite Clients from the Client Details page. See Allow Staff to Invite Clients to the Client Portal for more information.
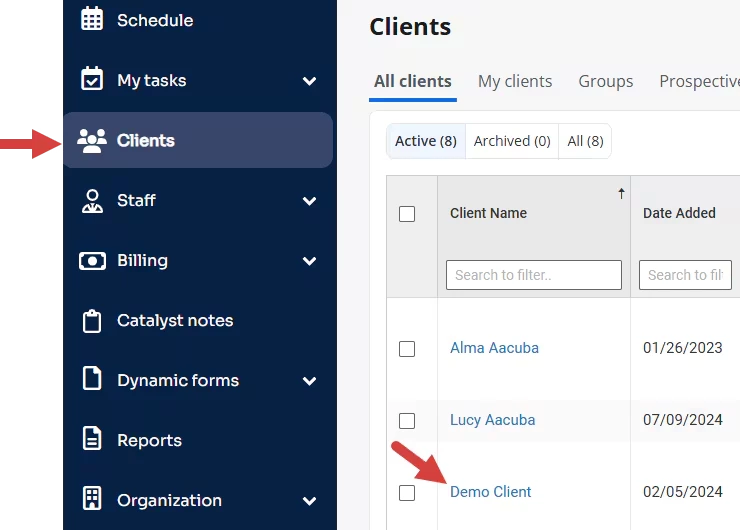
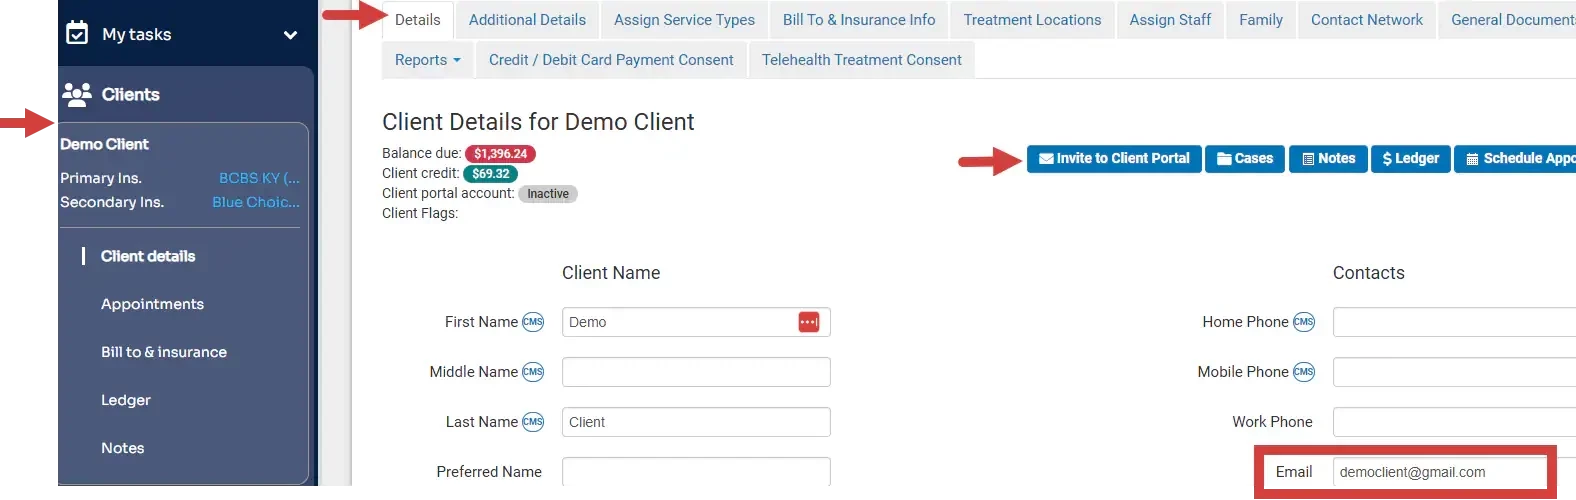
- Navigate to your desired Client.
- Be sure the Client does not have an active Client Portal account and has an Email Address entered. See Does my Client already have a Client Portal Account? for more information.
- Click the Invite to Client Portal button.
NOTE: Click Invite to Client Portal again to re-invite client to the portal.
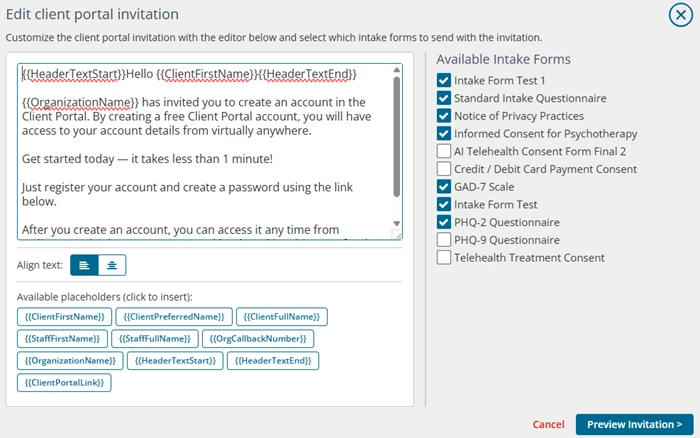
- Choose desired Intake Forms and customize the Invitation message.
- You can add and remove any text from the message as well as use the placeholders to populate information in your message.
- Scroll down and click Preview Message.
- Make desired changes. Click Send.
Invite or Re-Invite from the Organization Tab
Only Organization Administrators can invite Clients from the Organization tab. The process to send the Invite and Re-Invite emails is the same.
- Click Organization in the primary navigation bar.
- Click Client Portal in the side menu. Ensure you are on the Settings tab.
- Scroll down to the Manage Clients section and search for the appropriate Client(s). You can select/invite multiple Clients at a time.
- If the Client's row is white that means they do not have a Portal Account and you can invite them and send intake forms to them.
- If the Client's row is highlighted in green then you will need to resend forms to them. See Resend Intake Forms for more information.
- Mark the box next appropriate Clients.
NOTE: You cannot invite a client to the client portal without having their email address on file. The checkbox next to the client's name is disabled to prevent invitations from being sent.
- Click Invite to Client Portal button.
- Review the invite message that will be sent to Clients.
- You can add and remove any text from the message as well as use the placeholders to populate information in your message.
- Select the desired Intake Forms to send on the right.
- Select Save Default message and intake form selections to make this message the new default if desired.
- Scroll down and click Preview Invitation.
- Make any desired changes.
- Click the Invite to Client Portal button.
IMPORTANT: Placeholders such as {{ClientFirstName}}, {{OrganizationName}}, and {{ClientPortalLink}} are dynamic fields. These fields automatically pull the correct information from your account settings and client records when the client portal invitation is sent.
Because the system automatically completes these fields on your behalf, you do not need to edit or replace them. Typing over these fields can prevent the system from inserting the correct client details.
The text you see in the editor is an HTML template preview. When the email is delivered, all placeholders are replaced with the client’s actual information, ensuring the invitation is accurate and personalized.
Staff Member - Invite Client to Client Portal
- Click Clients in the side navigation menu and click on the client name to open Client Details.
- Click Invite to Client Portal.
- Select forms you would like to send on invites and make edits to the message if needed.
NOTE: Message text and intake form selections can be set by an Organization Administrator. Users without organization administrator permissions can make changes before sending the invitation, but these changes are not saved for future emails.
- Click Preview Invitation to see the invitation message and included forms.
- Click Invite to Client Portal to confirm the invitation settings.
NOTE: Confirm email is entered before sending the invite.
Staff Member - Manage Intake Forms
You will be able to send forms by inviting the client to the Client portal for the first time and will be able to resend forms once the Client Portal account shows Active under Client>Client Details.
- Click the General Documents tab from the Client Details page.

- Click Resend Selected Forms or Share New Forms.
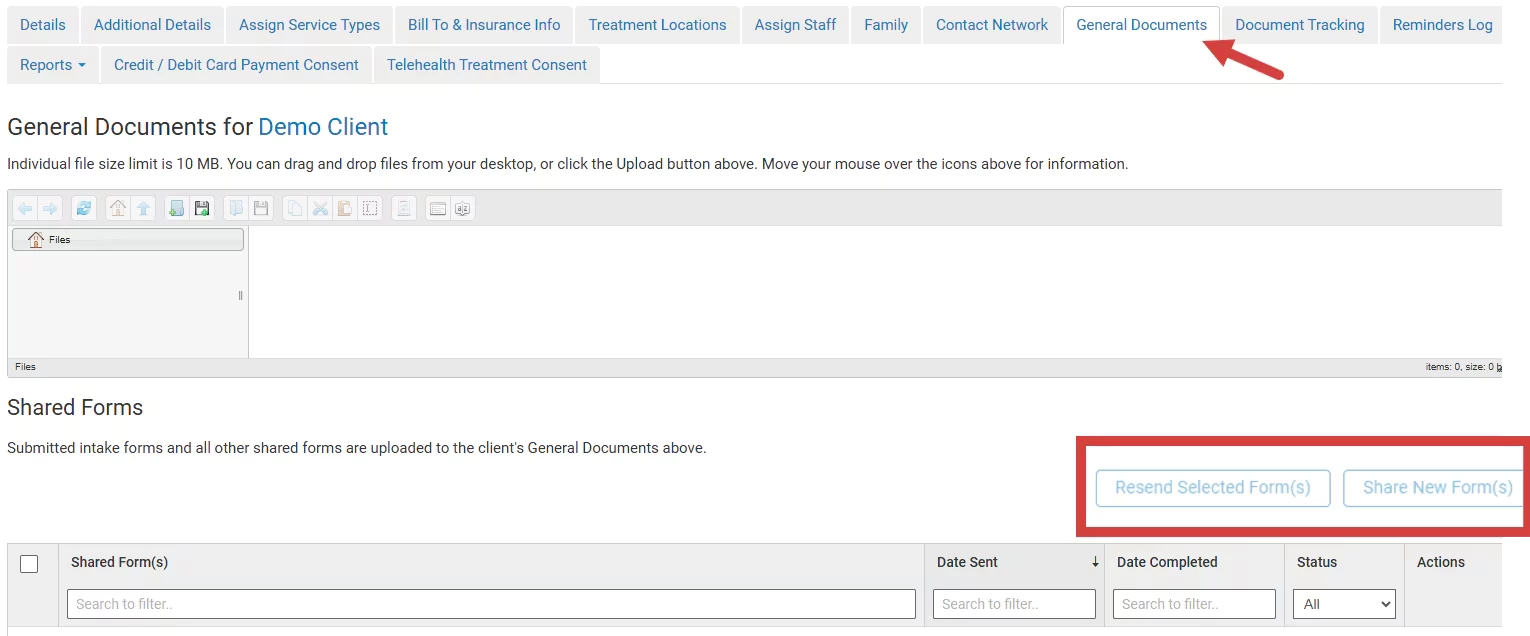
- Click Resend Selected Forms or Share New Forms.
[Back to Top]