Contacts are added as part of a Client Contact Network in the Client Profile. Contact information, as well as relationship to the Client is added into the Client Profile so you can easily view it. You can add multiple Contacts to a Client's Contact Network.
Ideally this would be used in Family situations where a spouse/parent/guardian add to the Client's Contact Network would be able to make Payments, send Secure Messages and schedule Appointments for them in the Client Portal.
IMPORTANT: We recommend you always try to search for the Contact before adding them.
Jump to Section:
Add Existing Contact/Client
If a Contact is already in the system (either as a Contact for another Client or as a Client themselves) you can use the information already in the system to add them as a Contact for this Client.
IMPORTANT: Adding a Client B to Client A's Contact Network is a one way action. It does NOT add Client A to Client B’s Contact Network. You would have to manually do this on Client B's Contact Network.
- Locate Client and open Client Profile.
- Click Contact Network tab.
- Click Dropdown Arrow on the New Contact button.
- Select Existing Contact or Client.

- Enter the client or contact name in the Find Contact field. Contact information displays, if it is correct, move to the next step. Otherwise search again.

- Select Allow access to Client Portal if you would like to to give this Contact access to the Client's Portal Account.
NOTE: Allowing access will prompt the Contact to visit their own Client Portal Account where they will be able to make Payments and schedule Appointments on behalf of the Client.
- Use the Settings toggles to allow access to secure messaging, payments, and appointment reminders. Learn more: Enable Appointment Reminders for Client Contacts
- Click the Save button.

Add New Contact
A new Contact is one that has never been added to the system for any Clients before.
- Locate Client and open Client Profile.
- Click Contact Network tab.
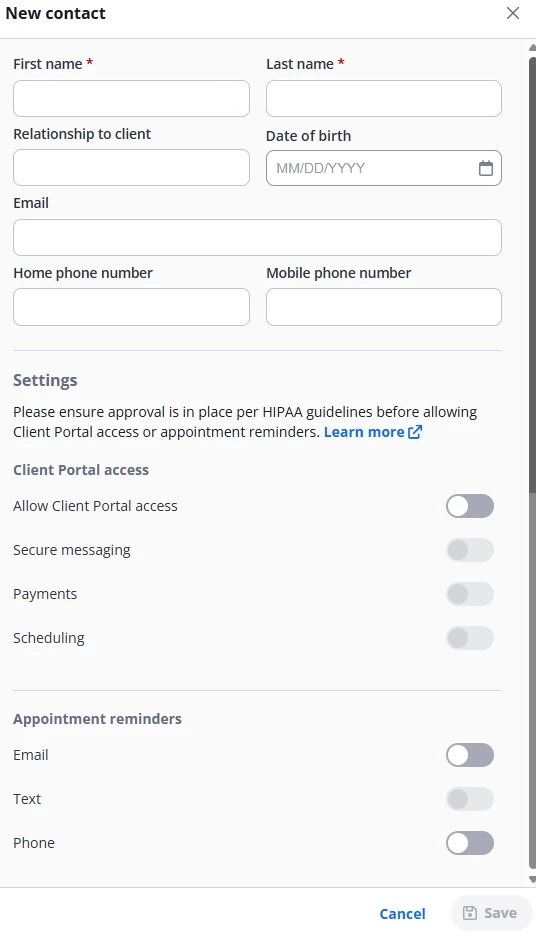
- Click + New Contact button.

- Select Allow access to Client Portal if you would like to to give this Contact access to the Client's Portal Account.
NOTE: Allowing access will prompt the Contact to visit their own Client Portal Account where they will be able to make Payments and schedule Appointments on behalf of the Client.
- Use the Settings toggles to allow access to secure messaging, payments, and appointment reminders. Learn more: Enable Appointment Reminders for Client Contacts
- Click the Save button.
If Contact already exists, you will receive an error message. If that is case, click Existing Contact/Client and search for the Contact you are trying to add.