

Typically, this would be done when you create the Client Profile. If it was not added initially, you can always go back into the Client Profile and add it. Additionally, you can add in a Secondary Insurance and/or edit any Insurance Information already listed.
- Select Client from drop down list and click green Client Setup icon.
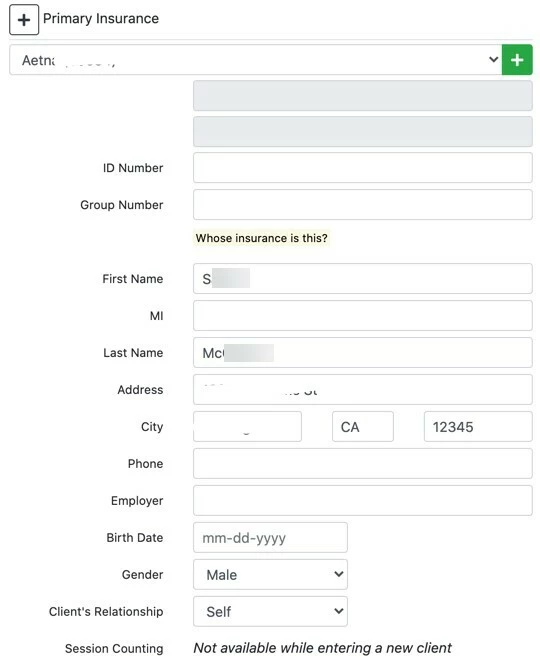
- Scroll to Primary Insurance section (click the plus to expand if not already expanded).
-
Enter a Primary Insurance first and then repeat the process for a Secondary Insurance if appropriate.
- Click Primary Insurance dropdown. By default, all Electronic Payers you entered previously display.
- Select SWITCH to ALL Paper Insurance Payers to filter and display on only Paper Insurance Companies you had previous setup in the Insurance Companies Setup Link.
- Select SWITCH to ALL Electronic Payers to filter and display all available electronic payers.
- Select SWITCH to MY Electronic Payers to filter back to electronic payers you previously entered.
-
Click the dropdown again and select appropriate payer.
- Enter the Insures ID in the ID Number box and Group ID (if applicable).
- Whose Insurance Is This? - This will auto-populate with Client information from above AFTER you click to enter the Insured's ID.
NOTE: If the Insured is different than the Client, then you will need to enter that information.
- Clients Relationship - Relationship between the Client and the insurance subscriber. Select the appropriate option as this can impact the name of the Client in an electronic claim submission.
- Client File Notes -These are used for administrative notes. They do not print anywhere, but you can see them when you enter or review the Client Session.
- Click Save.
- Click Primary Insurance dropdown. By default, all Electronic Payers you entered previously display.