PERMISSIONS REQUIRED: You must have Billing Permissions.
Client Balance Due is listed on the Agenda, as well as in the Client's Ledger.

Payments can be accepted at any time from a Client, even if Client does not have any outstanding Invoices. In such cases, any payments accepted will show as a credit/open payment on the Client's Ledger. Same goes for any overpayments.
If your Client has Insurance entered on their Bill To & Insurance Info tab, then Insurance will be the default responsibility when accepting a payment, unless your Client has a set payment amount entered OR a co-pay.
Related Articles:
- Clinics enrolled in payment processing can process credit cards within the system. For information, see Process Invoice Payments.
- If a client prepays for an appointment, the payment is automatically applied to the invoice when the invoice is generated for the appointment. For more information, see Record or Process a Prepay for an Appointment.
Jump to Section:
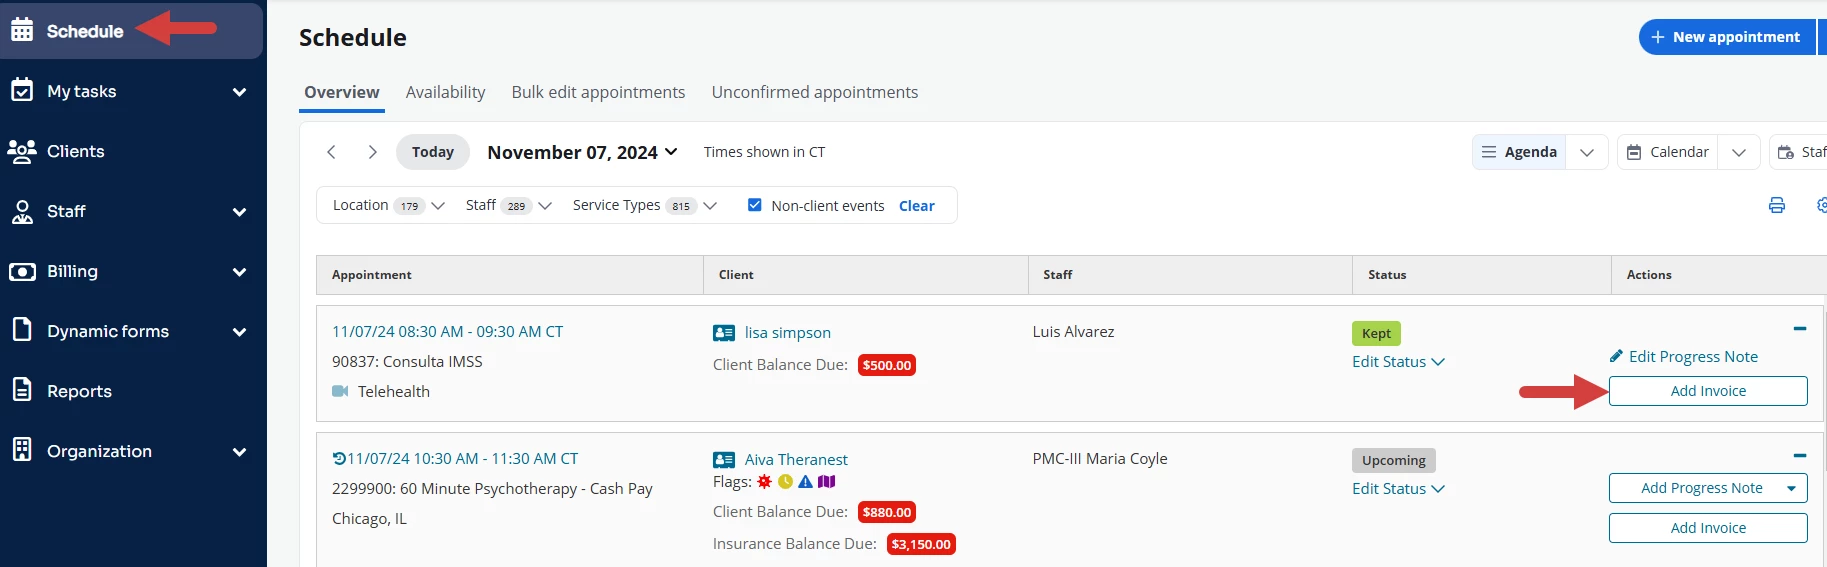
Accept Payment from Schedule
- Click Add Invoice for appropriate Client Appointment on the Agenda.
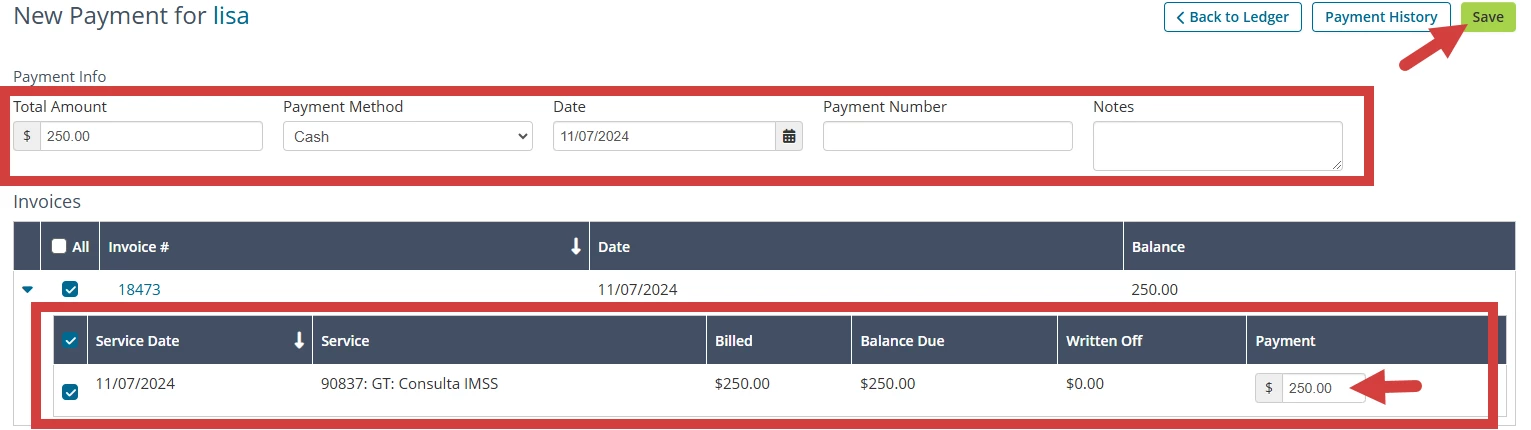
- Click Apply Payment button.

- In the Invoice line, full payment amount defaults.
- IF payment amount is different than full amount, enter that in.
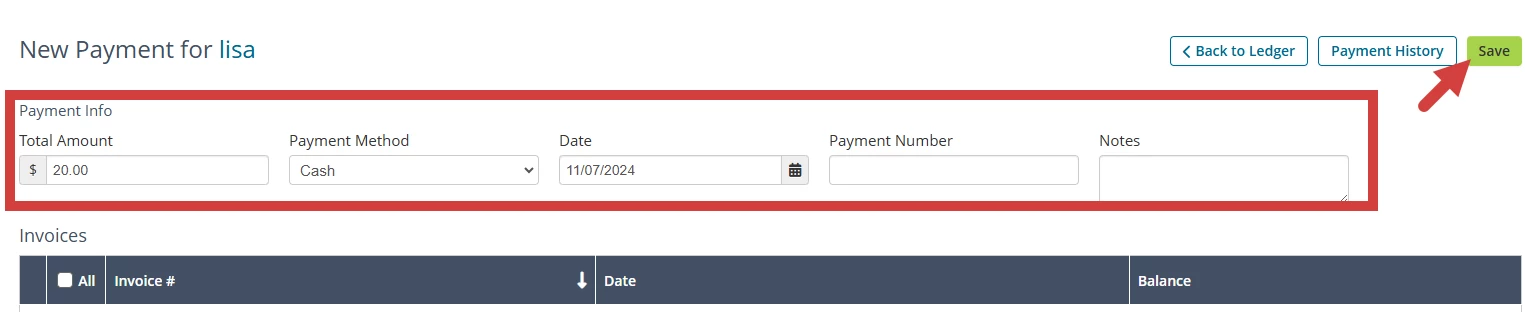
- In Payment Info, enter Payment Details:
- Total Payment Amount defaults what you entered below.
- Payment Method
- Payment Date
- Payment Notes (optional)
- Click Save button.
Accept Payment from Ledger
- Locate Client and open Client Profile.
- Click Ledger in side navigation.
- Click Accept Payment button.

- Ensure that Client Payment is selected.
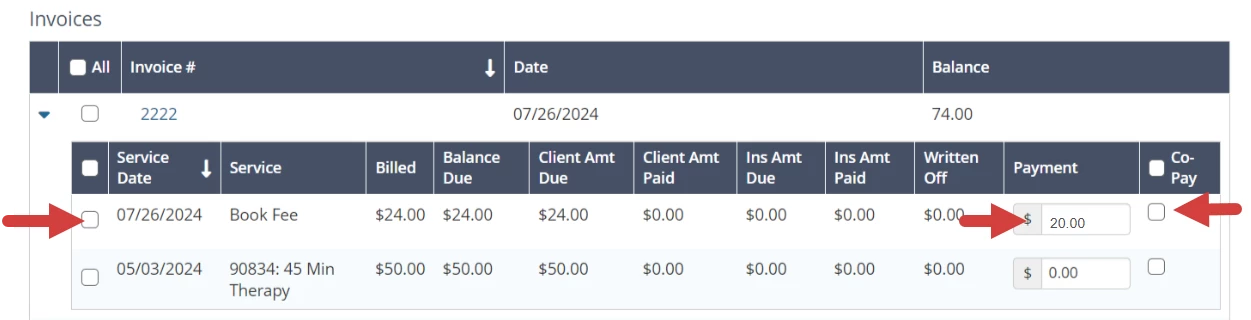
- Scroll to appropriate Invoice and enter payment amount inline.
- Select if this is a Co-Pay.
- Scroll to top and enter additional Payment Details: Payment Method, Date, and Notes if needed.
- Click Save button.