PERMISSIONS REQUIRED: Therapist can create Notes for their assigned Cases, Administrators or higher can create Notes for all Cases.
There are several ways to access and add a Progress Note for a Client. This is the recommended workflow as it will link your Progress Note to a Client Appointment.
Jump to Section:
Add a Progress Note
- Be sure an appointment has been created for this Client. Learn More: Schedule Individual Client Appointment
- On the Schedule, navigate to appropriate Client Appointment.
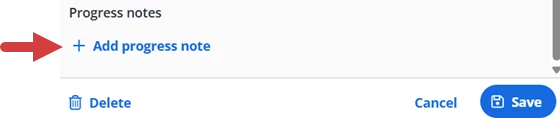
- Click the Add Progress Note button for the appointment on the agenda or open the appointment on the calendar and click the +Add Progress Note link at the bottom of the Edit Appointment Window.
- If there are no cases for this Client, a new Case will be created.
- If a Case has been created for this Client that you are not assigned to, a new one will be created.
- If there are multiple Cases you are assigned to, you will need to select appropriate Case.
Agenda: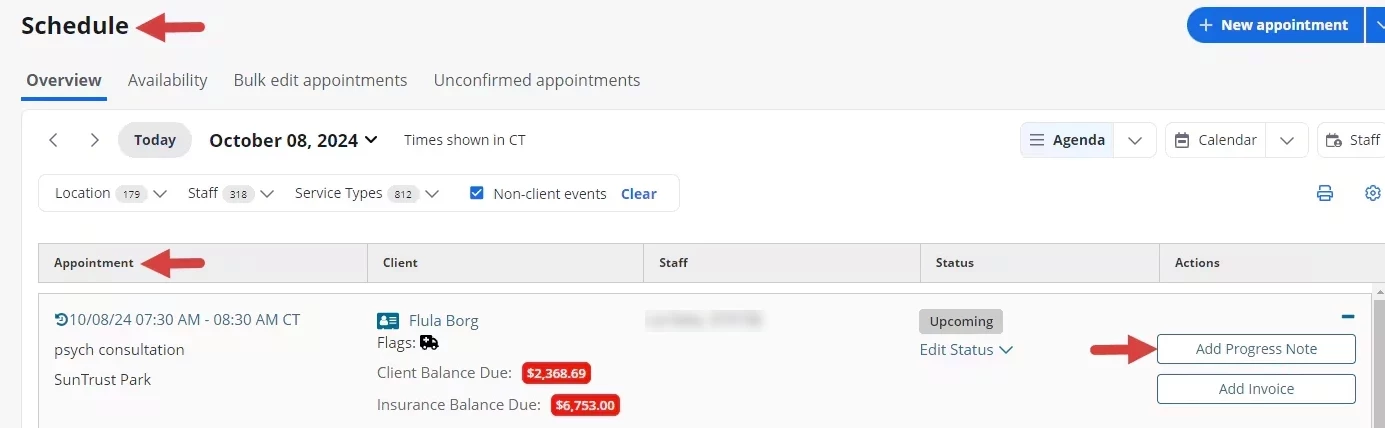
Edit Appointment Window:
Complete a Progress Note
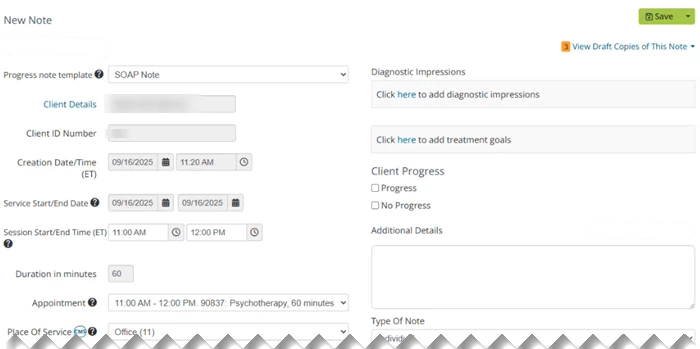
Add the appropriate information to complete and Save the Note. Form element inputs are saved to the draft.
NOTE: Progress Notes & Upcoming Appointment Status - Progress notes linked to appointments with an Upcoming status cannot be signed, submitted or approved. Learn More:Change Appointment Status
- The Appointment and Place of Service will auto-populate upon creation.
NOTE: If you have proper permissions, you can change the Place of Service on the Note.
- Service Start/End Date - populates based on the appointment date & can be adjusted as needed to update the duration
- Session Start/End Time - populates according to the appointment & can be adjusted as needed to update the duration
- The Duration In Minutes field auto-fills with the Appointment length. If it was shorter or longer, edit that here.
- The Provider(s) on the Appointment auto-fill. You can add/remove any Staff Member who is assigned to the Case or already on the Appointment.
- Enter Mental Status and Risk Assessment. Type in the field and select from list or enter in a new phrase.
- The Diagnostic Impressions from the Initial Assessment & Diagnostic Code tab and a History of Treatment Goals display. Click the Treatment Plan tab or the Initial Assessment & Diagnostic Codes tab to edit.
NOTE: You can prevent your staff from submitting and signing progress notes that do not have a diagnosis code entered. See Prevent Staff from Submitting/Signing Progress Note without a Diagnosis for more information.
- As you fill in the Note, your draft auto-saves and will display a message in the top right corner.
NOTE: If you leave the page without pressing the green Save button, you can still retrieve the Note by clicking View Draft Copies of This Note. Loaded drafts disappear after the Note is saved. Learn More: Access Document Drafts
- When you have completed the note click the green Save icon.