
Once you receive the ERA, the system has the ability to auto-process ERAs that match certain criteria. If an ERA is not auto-processed, you will then be able to make adjustments, write off a balance, shift the balance to the client, or leave it as is from within the ERA Received tab.
Jump to Section:
Enable Automated ERA Processing
- Click Claims Service under Organization.
- Click the Automation Settings tab.
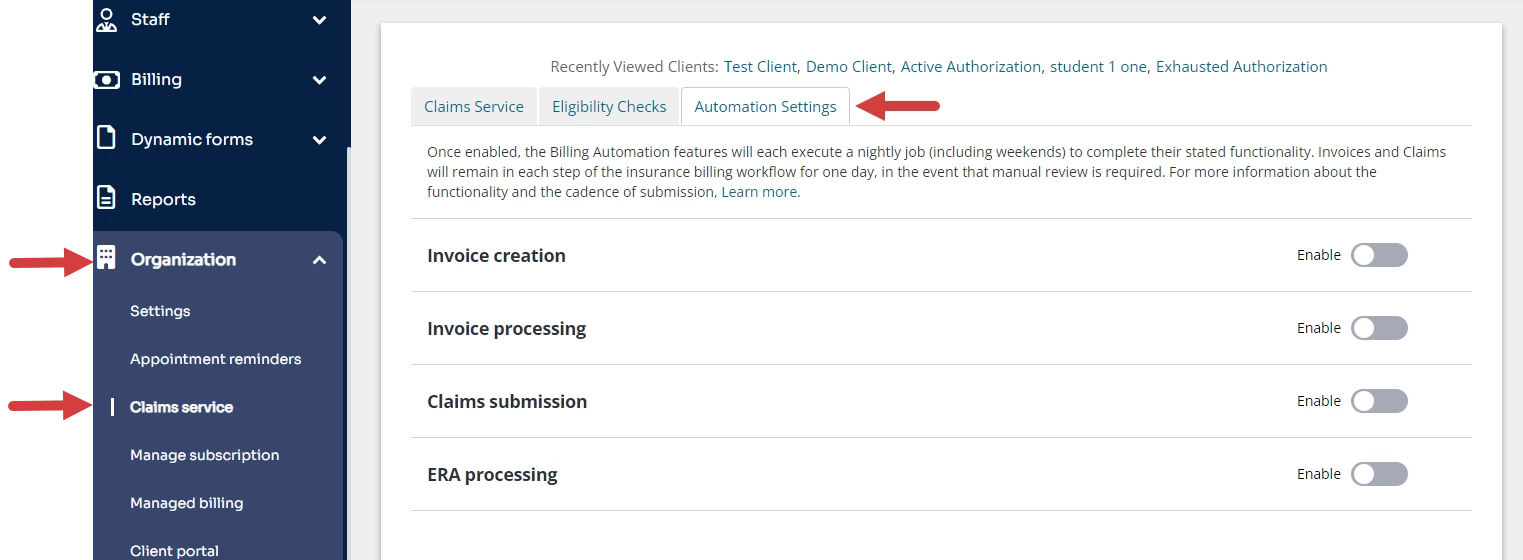
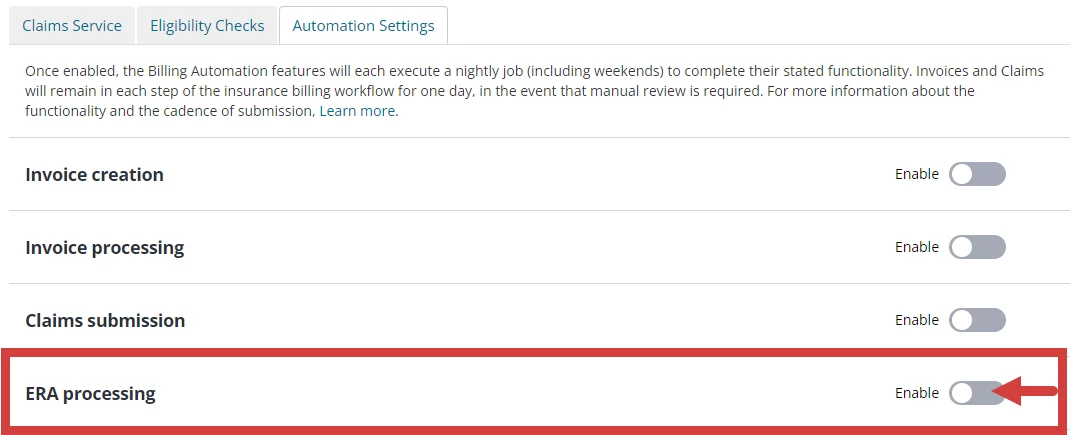
- Click the toggle to Enable Automated ERA Processing. A confirmation window opens.
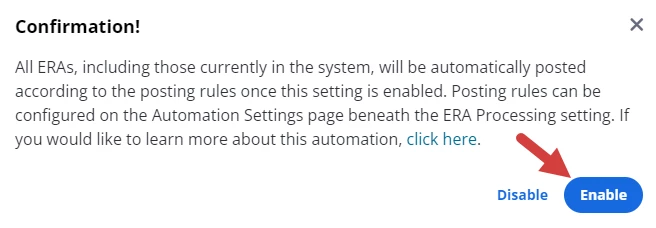
- Click Enable in the confirmation window. The toggle moves to the right and turns blue.
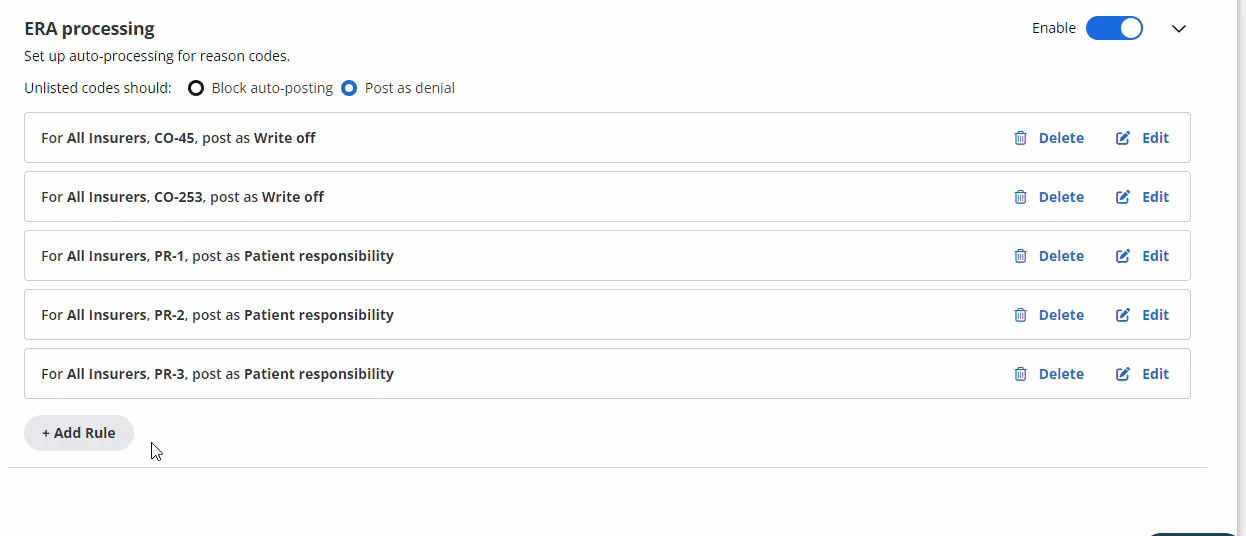
- The Posting rules window opens where you can configure conditions to exclude claims from automatic processing.
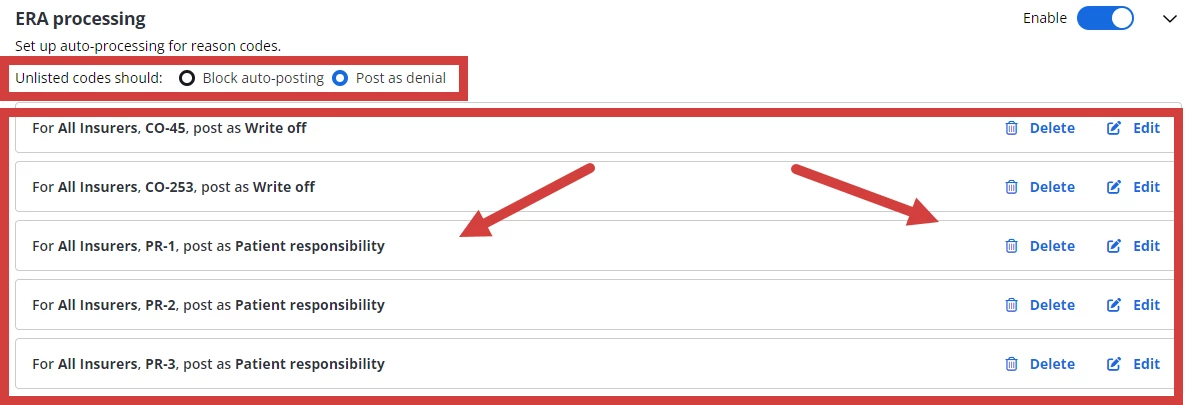
NOTE: The following ERA Posting Rules will be populated by default after enabling ERA Processing Automation:
- For All Insurers, CO-45, post as Write off
- For All Insurers, CO-253, post as Write off
- For All Insurers, PR-1, post as Patient Responsibility
- For All Insurers, PR-2, post as Patient Responsibility
- For All Insurers, PR-3, post as Patient Responsibility
Set Posting Rules
You can exclude Claims from automatic ERA processing by configuring posting rules.
- The Posting Rules window opens when you enable the setting.
- Configure Unlisted Codes to Block auto-posting or Post as denial.
- Existing posting rules will auto-populate in the window. You can delete & edit these rules based on the needs of your organization.
- Click +Add Rule and select Insurer(s), Group Code, Reason Code, Post as (action).
- Click Save for each rule.
Disable Automated ERA Processing
- Click the toggle setting.

- A message displays to confirm the setting is disabled.
NOTE: A Disable button also displays in the confirmation window when you enable a setting but it is only used to cancel the Enable action.