
KASA allows you to set your availability, sync your calendar, and customize your notifications.
Related Video: Get Started With KASA Video
Jump to Section:
Schedule and Availability Settings
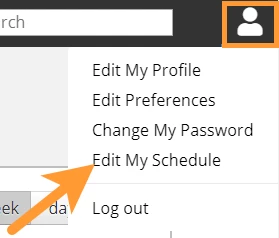
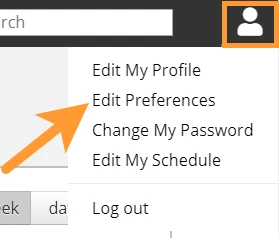
- Hover over the My Details icon in the top right corner, then click Edit My Schedule from the drop-down.
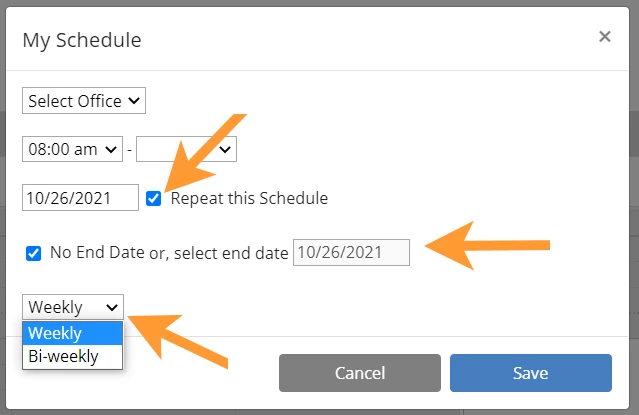
- To add availability to your schedule, click on the desired day and/or time on your calendar.
- Select the location if you work at multiple sites, then set the time you will be available.
- If you would like to repeat this schedule, check the Repeat this Schedule box. You can then set it to end on a certain date or continue until you end the occurrence. You can also indicate if you would like this to be a Weekly or Bi-weekly occurrence.
- Click Save to add that availability to your schedule.
Calendar Settings
Follow the steps below to sync your KASA Appointment calendar to a third-party calendar application.
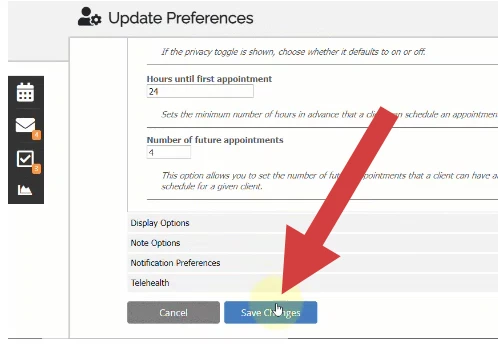
- Hover over the My Details icon in the top right corner, then click Edit Preferences from the drop-down.

- Click Calendar Options to expand the section.
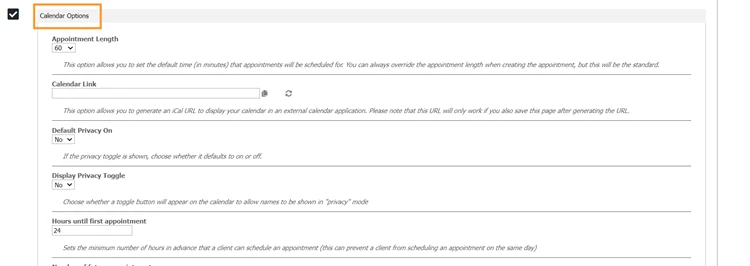
- In the Calendar Link section, click the Generate New Calendar Link icon.
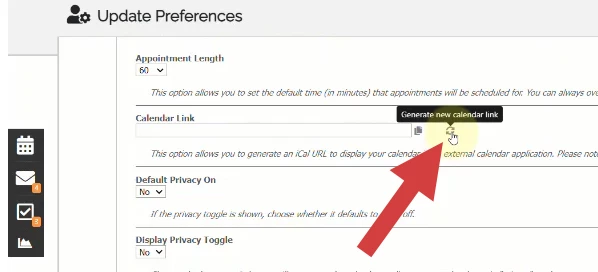
- Copy the URL, then scroll to the bottom and click Save Changes.
- Paste the URL into your preferred application. If you need to copy the link again, return to the calendar link section to copy it.
NOTE: You cannot make changes to your calendar from the third-party app. Any changes to your calendar must be made from your KASA calendar.
Notification Preferences
- Hover over the My Details icon in the top right corner, then click Edit Preferences from the drop-down.
- Click Notification Preferences to expand the section.
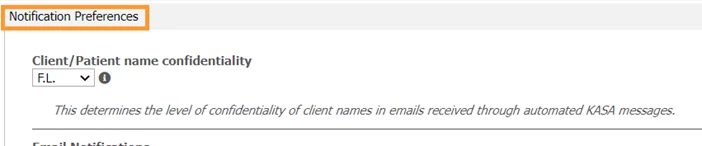
- Here you can set your notification preferences for your Client/Patient name confidentiality, Email Notifications, Message Center Notifications, and Receive daily schedule email. Use the drop-downs to customize your notifications, then click Save Changes.