
After adding a new Payer, the application defaults to the Profile tab as indicated by the orange horizontal bar. This tab stores basic Payer information much like the Client Profile tab stores basic client information. A sample view of this page and a description of each field is below.
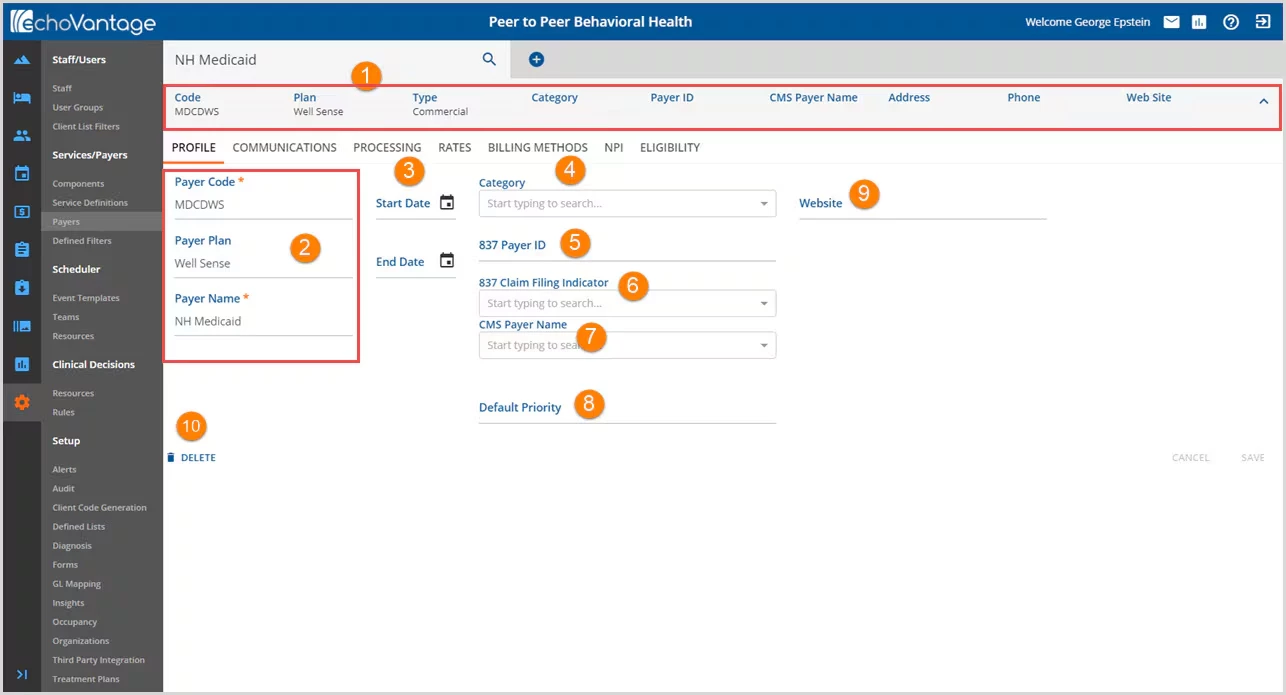
1. Beneath the Search Bar is a grey header area that displays summary information about the Payer. The Code, Plan, and Type are populated from the initial add screen and the remaining fields will be updated as information on the tabs is completed. This header defaults to an expanded view and can be collapsed by clicking on the "^" to the far right.
2. Information in this section is populated from the Add Payer screen. Edits may be made to this field to correct any errors in the initial entry.
3. Use the Start Date and End Date to define the period that the payer is valid in the system for billing and processing functions. The End Date may be left to keep the date open-ended.
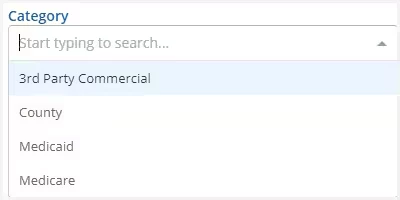
4.Category - Select an option from the list that describes the classification the Payer Plan falls under.
5. 837 Payer ID - Requires a unique number among all the numbers available NATIONALLY for payers.
6. 837 Claim Indicator - Use the drop-down box to select a claim-filing description.
7.CMS Payer Name - The application used this name to report client payers in labs and other Meaningful User reporting but NOT in billing.
8.Default Priority - This is a numeric text field with a maximum of 3 characters. Use to set the default priority of this payer.
- This may be reprioritized at the client-payer level.
- This field is used by the Eligibility Bulk Action to update Accepted: Missing Payer Action Required records with the New Payer.
- If this Priority is already being used for the client, an error will be given to adjust the priority.
9. Website - Enter up to a 100 character URL address for this payer. (The user defines this purpose or use.)
10. Select the trash can icon to delete the Payer. Once a claim has been processed for the payer, the option to delete will no longer be available.
Remember to click SAVE to record changes or select CANCEL to exit without saving.