You can manually add Clients to the system or you can import Clients using the import tool.
When adding a New Client you will enter basic Client Details. You can immediately enter additional Client Details, or come back at a later time to do so.
NOTE: You have the ability to control who creates and imports clients in your organization. Use the Can create and import clients permission in the Default Permissions section. Learn more about permissions.
Jump to Section:
Add a New Client
- Click Clients tab in primary navigation bar.
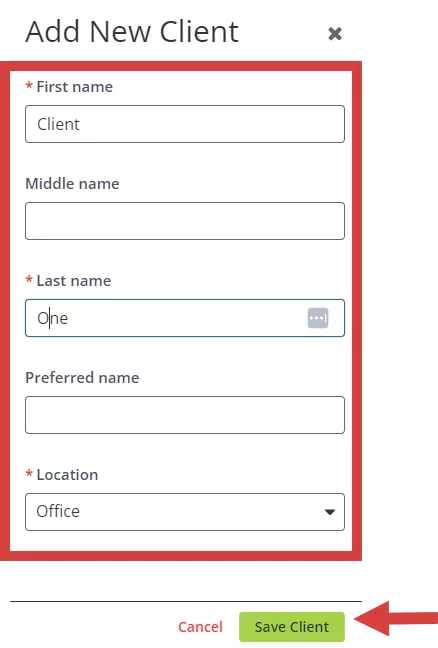
- Click + Add New Client button.

NOTE: You can also add a new client to the system when scheduling appointments. See Schedule Client Appointment for more information.
- Click the
icon.

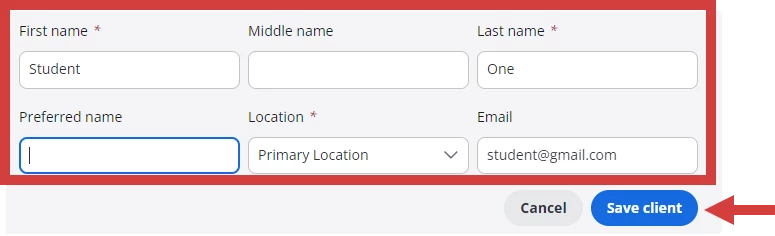
- Enter client details & click Save Client.
- Click the
- Enter Add New Client Details:
- First and Last Name
- Preferred Name
- Location
- Click Save Client button. Client Details will open. You can add in additional Client Details now or do so later.
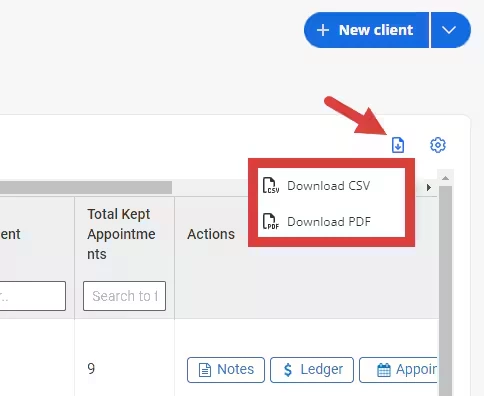
Export Client List Data
- Click the download icon above the client list and select CSV or PDF.