
Manage Group Participants
A group’s name or associated form may be changed at any time, as described above. The real power of Groups is in Participant management. Start by selecting the blue + ADD PARTICIPANT button at the bottom, left-hand corner of the Edit Details screen to display the Add a Participant screen.
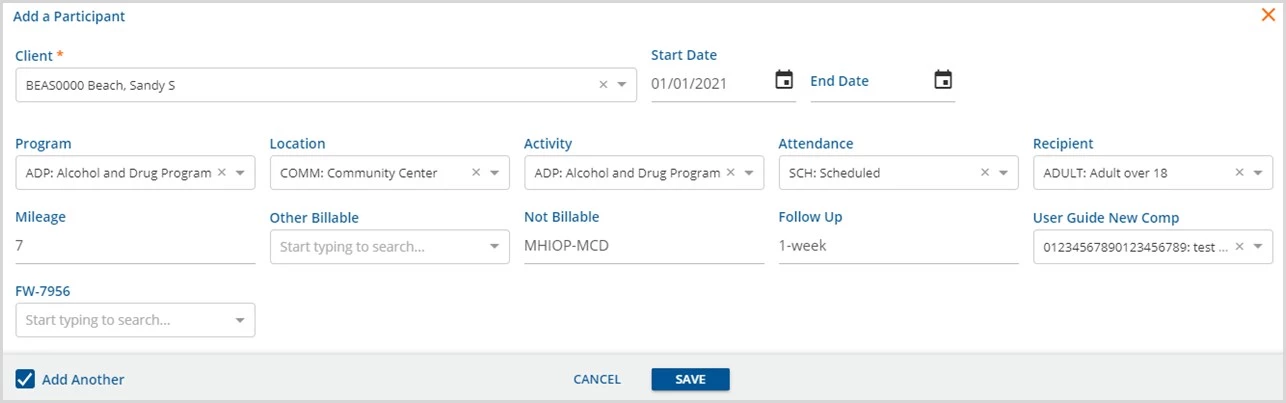
- The Client field is required; all other fields are optional.
- The 5 core Service Components and 10 additional Service Components are available for use.
- The SAVE button is enabled once a Client selection is made.
- Select the Add Another checkbox to preserve the existing component selections if adding additional participants with similar component settings.
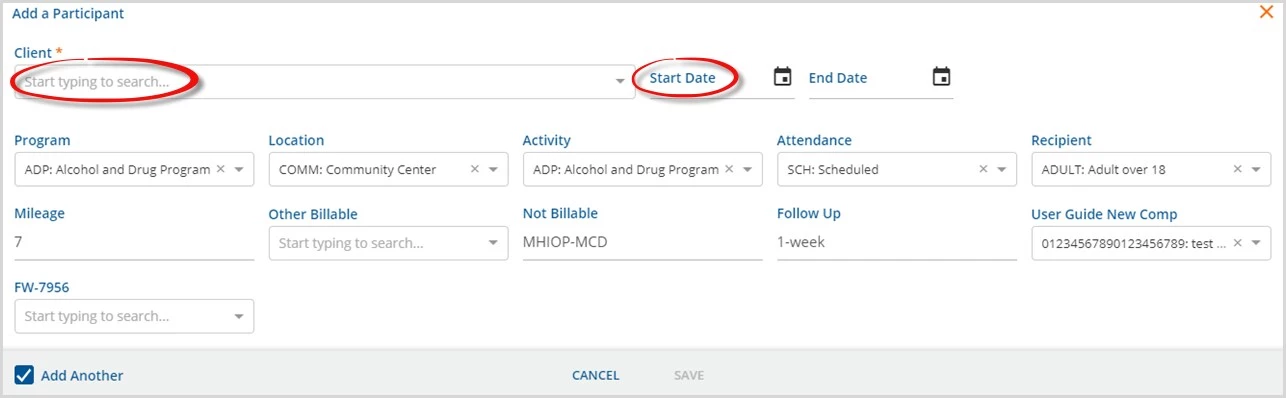
- If this box is selected, the Add a Participant screen displays again after SAVE is selected.
- The Service Component selections are copied forward from the previous Participant.
- Only the Client and Date range are cleared; an example is below.
- The Start and End Dates determine the date range the associated Client is an active member of the group.
- Adding a participant to a group with the Start Date populated adds the Client to any currently scheduled future Events without affecting the prior Group Event history.
- Entering an End Date removes a Client from any scheduled future Events and leaves the historical Group Event participation intact and accurate.
- If a participant is added to a group without Start and End Dates, then the Client is added to all historical and future Events; this is the same previous behavior of Event Templates.
- A participant may be added to the Group multiple times as long as the date ranges do not overlap.
- When all desired participants are added, select the + in the upper right-hand corner to close the Add a Participant screen. The Edit Details screen now displays the group’s participants.
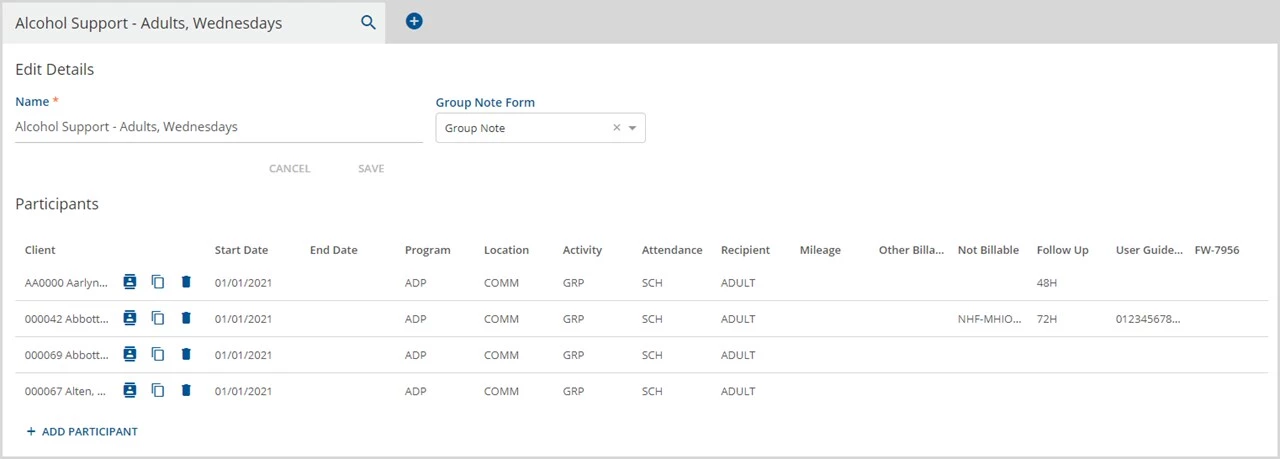
- Group participants are not required to have the same component code values.
- Edit the Start and End Dates or any component codes by clicking on a participant’s name.
- The icons to the right of the participant names fulfill the following functions:
| Icon | Description |

| The Client Contact Info icon is a quick link directly to that Client’s Contact Info tab. This link allows easy access to verify and update client contact information, especially useful when working with telemedicine groups. |

| The Copy Client icon opens a new Add a Participant screen with the same Service components as the Client in that row. Copy makes it quick and easy to add another participant with the same configuration and works like the Add Another checkbox on the Add a Participant screen. |

| The garbage can icon removes a participant from the group. Users must select confirm in the delete confirmation box to continue. This action removes the participant from the group and from scheduled Events that have not become Services. IMPORTANT: End-dating, instead of deleting, a participant leaves historical Event participation intact and only removes the Client from Events scheduled in the future that have not become Services. |