PERMISSIONS REQUIRED: You must have Billing Permissions.
NOTE: This feature is only for organizations that use our partnered clearinghouse service.
When you need to manually remit a claim you can search by payer and service date and then add payment type, check number, check dates, and notes to the claim remitted manually.
Jump to Section:
Manual Payments
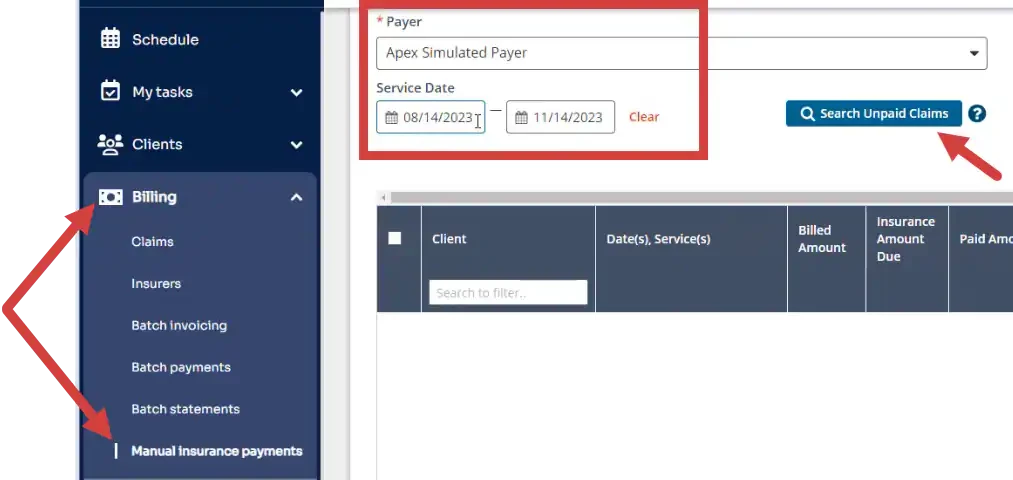
- Click Billing on the navigation bar and Manual Insurance Payments.
- Select the Payer.
- Enter the date or date range of service.
- Click Search Unpaid Claims.
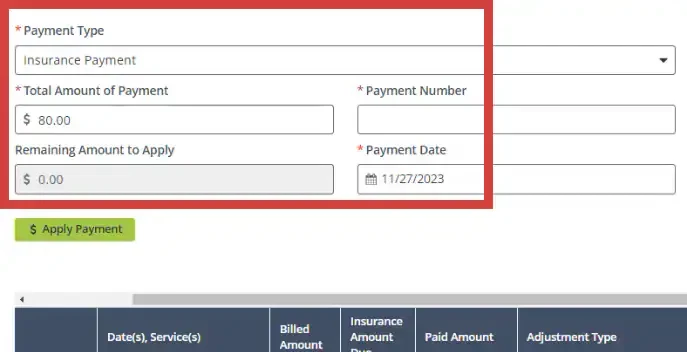
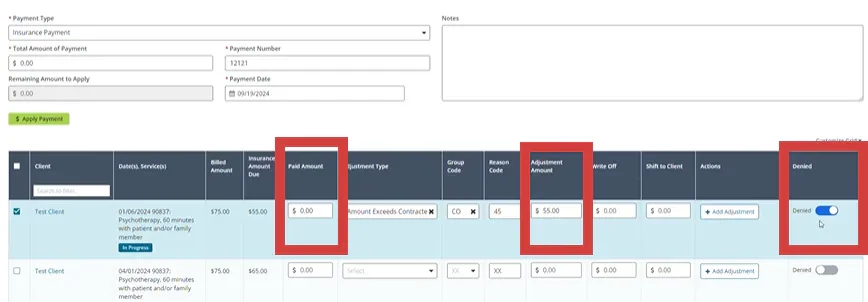
- Enter payment information: Payment Type, Total Amount of Payment, Payment Number and Payment Date.
- Select the service line(s).
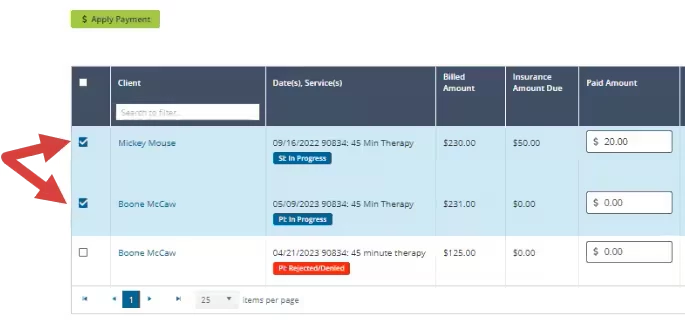
- Use the column headings to view breakdown of results:
Client, Date(s) Services, Billed Amount, Insurance Amount Due, Paid Amount, Adjustment Type, Group Code, Reason Code, Adjustment Amount, Write Off, Shift to Client, Actions.
- Enter Paid Amount.
- Enter Adjustment Type, Group Code & Reason Code as needed.
NOTE: Amounts for eligible adjustment types (for example, deductible) will move to the Shift to Client column.
CO-45s & CO-253s will shift to the Write-Off column. PR-1s, PR-2s & PR-3s will shift to the Shift to Client column.

- You will get validation warnings or errors if there are discrepancies between expected and actual Paid Amount, Shift to Client & Write-Off amounts.
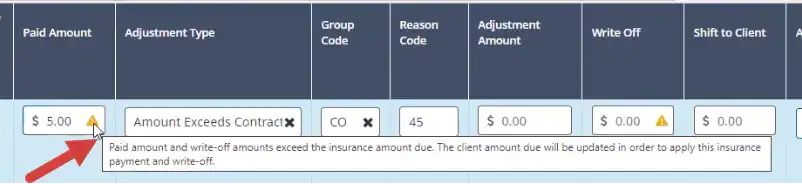
- Hover over red icon to see the warning message:
Paid amount and write-off amounts exceed the total amount due for the line and cannot be applied. Please modify these amounts before continuing.

- Hover over yellow icon to see the warning message:
Paid amount and write-off amounts exceed the insurance amount due. The client amount due will be updated in order to apply this insurance payment and write-off.
- Hover over red icon to see the warning message:
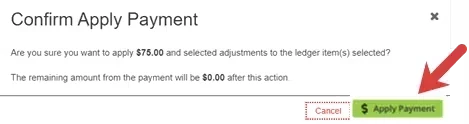
- Click Apply Payment for the claim(s).
- Confirm or cancel Apply Payment.
- Upon posting, the following actions will occur:
- Paid Amounts will be created as payments
- Adjustment Amounts will be created as adjustments with the appropriate code
- Write-Off Amounts will be created as write-offs
- Shift to Client Amounts will be shifted from Insurance Due to Client Due, as long as the money is available to shift
Denied Payments
- Apply a zero-dollar payment.
- Enter Adjustment Amount.
- Use the Denied toggle to mark the payment as denied.
NOTE: This amount will not shift to the client.
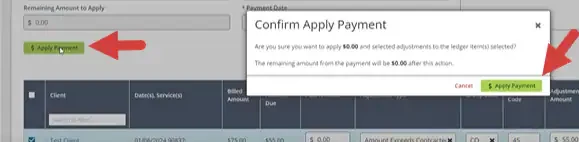
- Click Apply Payment.
- Confirm Apply Payment.
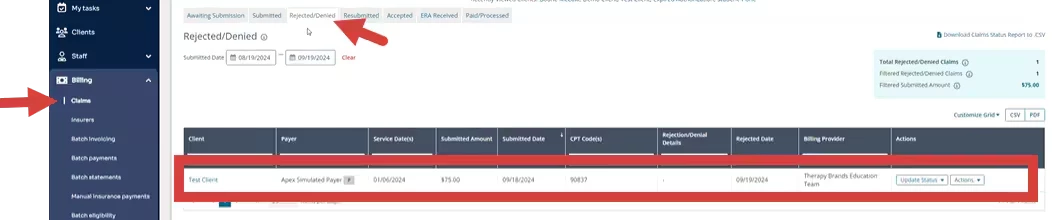
- Click Claims in the side navigation panel.
- The claim will show as Rejected/Denied.