
The Remittances tab screen has multiple functions that users can utilize to process payer payments, credits, contractual adjustments and credit and loss transaction, mark payments as "Ready" and process "Ready" batches. A system of checks and validations is in place to allow users to identify and fix many processing issues as they occur. All entered Remittances populate the Remittance table list regardless of Status.
NOTE: Remittances imported or entered via the Batches tab cannot be changed and do not have a checkbox. Users must return to the Batches tab to perform actions. The exception to this is for a PLB Segment - Provider Adjustment.
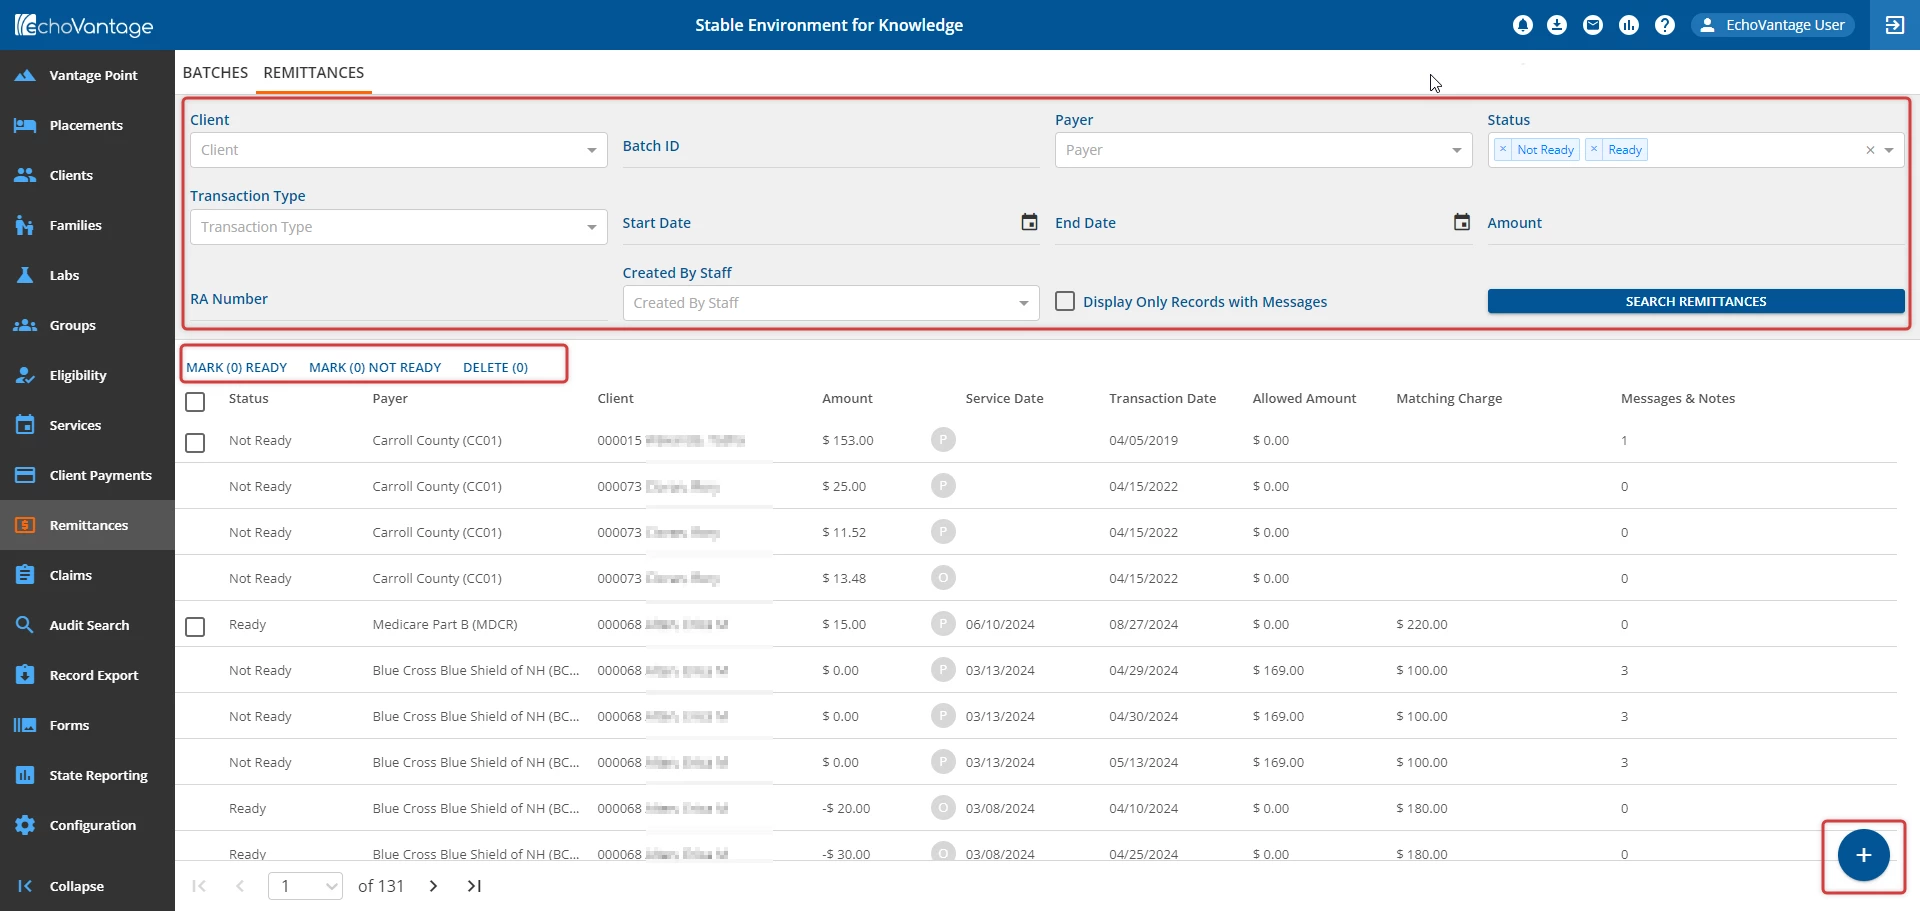
Remittance search filtering criteria are entered in the upper section of the screen. There are several filter options: Client, Batch ID, Payer, Status, Transaction Type, Start Date, End Date, Amount, RA Number, Created By Staff, and Display Only Records with Messages.
Once criteria are selected, click the blue Search Remittances button. All available remittances will populate the list view. The icons to the left of the row Service Date indicate what type of remittance it is. The grey circle icon with a white P is a Payer Payment. Other types include but are not limited to: Credits, Adjustments, Denials, and Losses.
Status - The Status indicates where in the process the remittance entry is.
- Ready - Row was processed successfully. This row can move to the next billing step within Fiscal Overview > Unprocessed Remittances, however the "Ready" remittances will remain on screen.
- Not Ready - Row does not have a check box and there is an issue that prevented the remittance from moving forward and requires correction to keep moving through the billing cycle.
- Done - Row has been batched and finalized within Fiscal Overview > Unprocessed Remittances.
- Preview - Row has been batched but not yet finalized within Fiscal Overview > Unprocessed Remittances.
To mark a remittance as "Ready":
- Click the blank check box next to the corresponding row, or click the blank check box to the left of the Status column to select all Not Ready remittances.
- Click the blue Mark (x) Ready button, and then the blue Confirm button to perform the bulk action.
Add a Remittance
To add a new remittance:
- Click the blue + New Remittance button at the bottom right of the screen.
- The New Remittance form will open automatically.
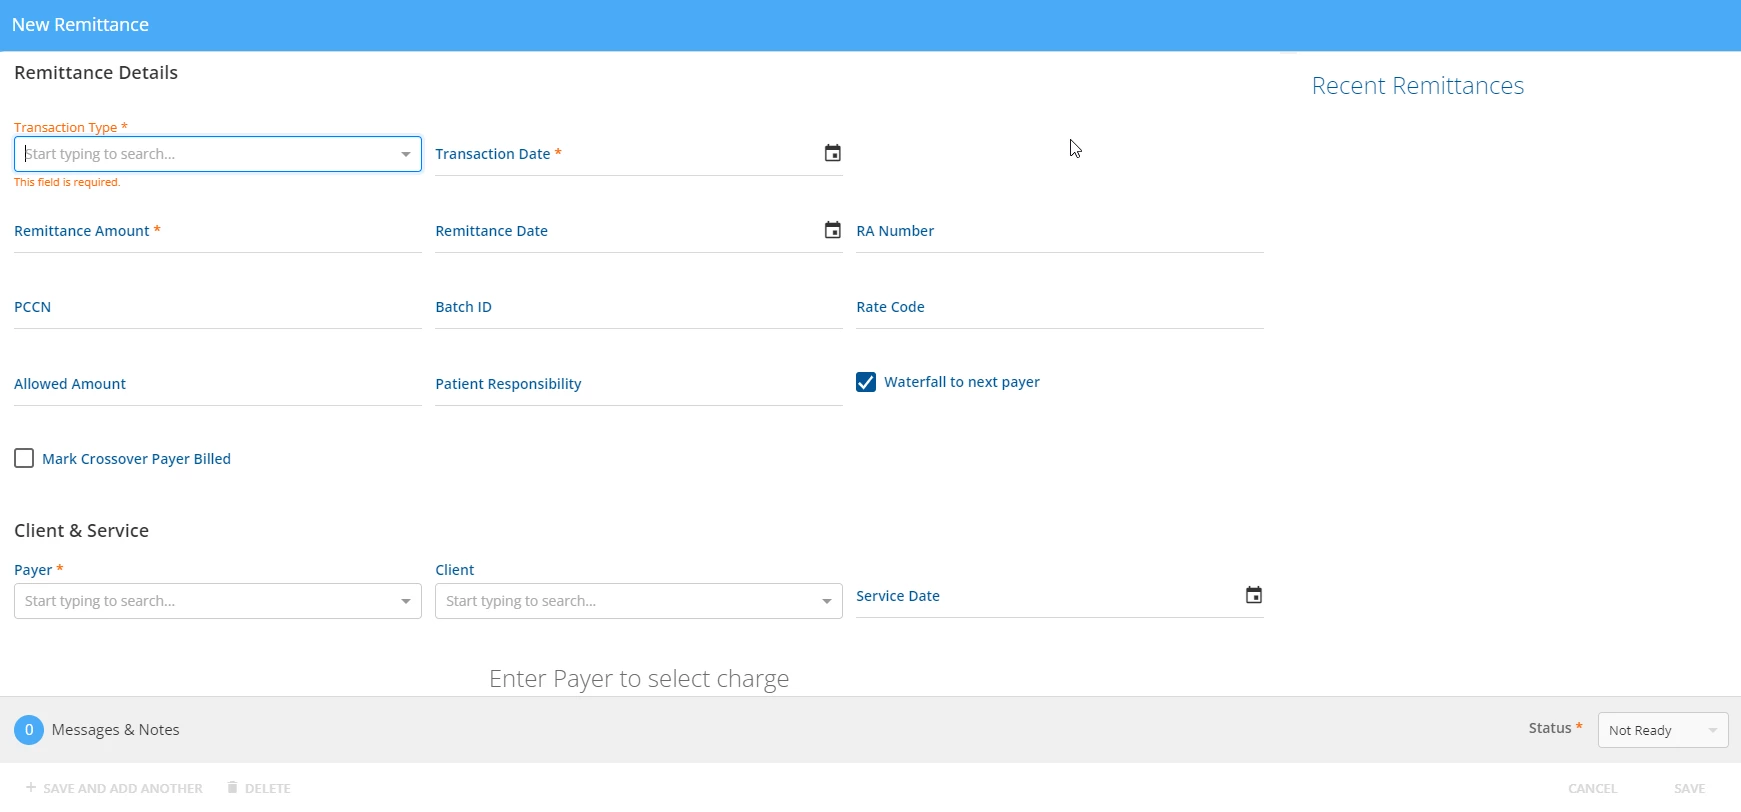
- Enter data into the required fields and any additional optional fields within the Remittance Details section.
- Within the Client & Service section, the user must select a charge to apply to the remittance. Use the Payer, Client, and Service Date fields to select an existing charge.
- Click the blue Save button.
- The default status for the new remittance will be "Not Ready" unless another status is selected.